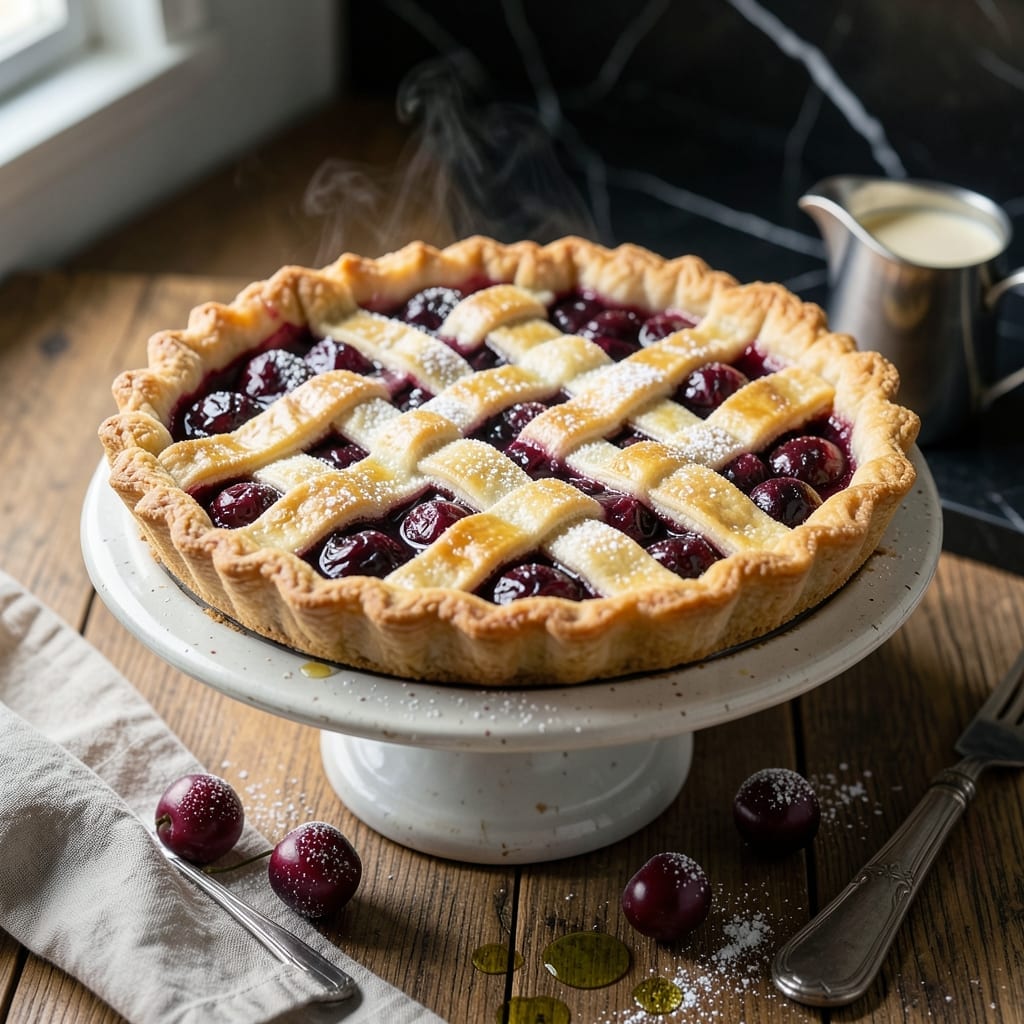
Frozen cherries work beautifully for a homemade pie, delivering that classic burst of sweet-tart flavor in every bite. This method ensures a thick, glossy filling without the hassle of pitting fresh fruit.
The lattice crust adds an elegant touch while allowing the vibrant filling to peek through. With a few simple techniques, you’ll achieve a flaky, golden pastry that complements the juicy cherries perfectly.
Ingredients for Cherry Pie Recipe Using Frozen Cherries
Frozen cherries and a few pantry staples create this showstopping dessert with ease.
| Ingredient | Amount | Notes |
|---|---|---|
| Frozen Dark Sweet Cherries 🍒 | 5 cups | Do not thaw before using |
| Granulated Sugar 🍚 | 1 ¼ cups | Divided for filling and crust |
| Cornstarch 🌾 | ¼ cup | For thickening the filling |
| Lemon Juice 🍋 | 1 tbsp | Freshly squeezed preferred |
| Vanilla Extract 💧 | 1 tsp | Pure extract for best flavor |
| Almond Extract 🌰 | ¼ tsp | Optional for depth |
| All-Purpose Flour 🌾 | 2 ½ cups | Plus extra for dusting |
| Unsalted Butter 🧈 | 1 cup | Cold and cubed |
| Salt 🧂 | ½ tsp | Fine sea salt preferred |
| Ice Water 💧 | ½ cup | Plus more as needed |
| Large Egg 🥚 | 1 whole | For egg wash |
[recipe_ingredient_scaler]
The cherries are the star—look for dark, sweet frozen varieties at Trader Joe’s or Whole Foods. Avoid tart cherries unless you love that extra pucker. The cornstarch is non-negotiable for that thick, glossy filling. Clabber Girl is my go-to brand. For the crust, King Arthur Flour gives the flakiest results, and always keep your butter ice-cold for that perfect texture.
No dark cherries? Sweet cherries work too (just add an extra tablespoon of sugar). Out of cornstarch? Arrowroot powder at the same amount does the trick. Don’t have almond extract? Skip it—the vanilla carries enough flavor. For a vegan version, coconut oil instead of butter works, but the texture will differ slightly.
The pie dough can rest in the fridge for up to 2 days, or freeze it for 3 months. Baked pie keeps at room temperature for 2 days (covered) or refrigerated for 5 days. Always let it cool completely before slicing for clean cuts.
Why You’ll Love This Recipe
- No-Thaw Needed: Honestly, frozen cherries go straight into the filling—no waiting, no mess.
- Sweet-Tart Magic: The vanilla and lemon juice turn those dark cherries into something bright and crave-worthy.
- Holiday or Tuesday: I’ve served this at Thanksgiving and devoured it solo on a random night—no judgment here.
- Leftovers? Doubt It: Between us, the second slice always disappears before the first one cools.
Step-by-Step Instructions for Cherry Pie with Lattice Crust
Here’s the method. Straightforward, tested, works every time.
Step 1: Prepare the Filling with Frozen Cherries
In a large saucepan, combine the 5 cups Frozen Dark Sweet Cherries, 1 cup Granulated Sugar, 0.25 cup Cornstarch, 1 tbsp Lemon Juice, 1 tsp Vanilla Extract, and 0.25 tsp Almond Extract. Do not thaw the cherries first—this prevents them from becoming mushy.
Cook over medium heat for 8-10 minutes, stirring constantly, until the mixture thickens and bubbles. The filling should be glossy and thick enough to coat the back of a spoon. Watch for the cherries to soften and release their juices, which will combine with the cornstarch to create a luscious, burst berry consistency.
Remove from heat and let it cool completely before assembling the pie. This ensures the filling sets properly and doesn’t make the crust soggy.
Step 2: Make the Pie Crust Dough
In a food processor, pulse the 2.5 cups All-Purpose Flour and 0.5 tsp Salt to combine. Add the 1 cup Unsalted Butter, cold and cubed, and pulse until the mixture resembles coarse crumbs with a few pea-sized butter pieces remaining. This creates flaky layers in the crust.
With the processor running, slowly pour in the 0.5 cup Ice Water, 1 tablespoon at a time, until the dough just comes together. It should hold when pressed but not be sticky. If it feels too dry, add more ice water, 1 teaspoon at a time, until it reaches the right consistency.
Divide the dough into two equal portions, flatten into discs, and wrap in plastic wrap. Refrigerate for at least 1 hour to let the gluten relax and the butter firm up. Chilled dough is easier to roll and less likely to shrink during baking.
Step 3: Roll Out and Assemble the Pie
On a lightly floured surface, roll out one disc of dough to a 12-inch circle and transfer it to a 9-inch pie dish. Trim the edges, leaving a ½-inch overhang. Roll out the second disc to the same size for the lattice top.
Spoon the cooled filling into the crust-lined pie dish, mounding it slightly in the center. Cut the second dough round into 1-inch strips and arrange them in a lattice pattern over the filling. Trim and crimp the edges to seal, then brush the lattice with a light coating of 1 whole Large Egg beaten with 1 tablespoon water for a golden finish.
Place the pie on a baking sheet to catch any drips and refrigerate for 20 minutes while the oven preheats. This prevents the crust from shrinking or slumping during baking.
Step 4: Bake to Golden Perfection
Preheat the oven to 375°F. Bake the pie for 20 minutes, then reduce the temperature to 350°F and continue baking for 35-40 minutes, or until the crust is deep golden brown and the filling is bubbling.
If the edges begin to brown too quickly, cover them with a pie shield or strips of aluminum foil. The filling should bubble through the lattice, indicating it’s fully set and thickened.
Remove from the oven and let the pie cool on a wire rack for at least 2 hours before slicing. This allows the filling to set completely, ensuring clean slices with every burst of cherry flavor.
Pro Tips For Making Cherry Pie Recipe Using Frozen Cherries
- Thaw and Drain: Let the frozen cherries thaw completely, then drain them well—I learned this the hard way after my first pie turned into a soupy mess because the excess liquid made the filling runny.
- Toss Cherries First: Mix the cherries with sugar, cornstarch, and lemon juice while they’re still slightly frozen; it helps the cornstarch distribute evenly and thicken properly without clumping.
- Skip the Overmixing: Stir the filling just until the cherries are coated—overmixing breaks them down and turns your pie into jam instead of keeping those nice, whole cherry chunks.
- Add Vanilla Last: Fold in the vanilla extract after the filling has thickened on the stove; adding it too early can mute its flavor, and you want that warm, aromatic kick to shine through.
Health Benefits of cherry pie recipe using frozen cherries
Rich in Antioxidants
Cherries are packed with anthocyanins, the pigments that give them their deep red color. These compounds combat oxidative stress and inflammation. One serving of this dessert provides a substantial dose, supporting overall cellular health. I notice my skin feels more vibrant when I enjoy cherries regularly. 💪
Heart Health Support
This fruit is linked to improved heart health due to its potassium content and polyphenol antioxidants. A 1-cup serving of cherries contains about 300mg of potassium, which helps regulate blood pressure. The fiber in cherries also supports healthy cholesterol levels.
Natural Pain Relief
Cherries contain natural anti-inflammatory compounds that may help reduce muscle soreness and arthritis pain. Studies suggest consuming cherries can be as effective as some over-the-counter pain medications for exercise-induced muscle damage. I always reach for cherries after intense workouts.
Sleep Regulation
This fruit is one of the few natural food sources of melatonin, the hormone that regulates sleep cycles. Eating cherries may help improve sleep quality and duration. A warm slice of this pie before bed might just become your new nighttime ritual.
Vitamin Boost
Cherries provide a good dose of vitamin C and vitamin A. One serving offers about 10% of your daily vitamin C needs, supporting immune function. The vitamin A in cherries contributes to healthy vision and skin maintenance. 🥗
Fiber-Rich Dessert
Each serving of this pie contains a significant amount of dietary fiber from the cherries and crust. Fiber aids digestion, promotes gut health, and helps maintain steady blood sugar levels. It’s a dessert that satisfies your sweet tooth while contributing to your daily fiber intake.
Nutrition Facts
Frequently Asked Questions
Do I need to thaw the cherries first?
No, keep them frozen! Cooking from frozen prevents mushiness. They’ll release juices as they heat, creating that perfect thick filling.
How do I prevent a soggy bottom crust?
Blind-bake the bottom crust for 10 minutes before adding filling. Also, cool the filling completely to avoid steaming the crust.
Can I use a different thickener instead of cornstarch?
Yes, swap in arrowroot powder or tapioca starch at the same ratio. Avoid flour—it can create a pasty texture.
Why did my lattice crust turn pale?
Brush it with egg wash before baking and ensure your oven is fully preheated to 375°F. For extra shine, add 1 tablespoon of sugar to the wash.

Trained in classic French technique but raised on slow-cooked ribs and spicy rubs, she blends culinary skill with smoke and soul.
- Recipe for Boneless Pork Chops in Cast Iron Skillet: Sear and Baste to Juicy Perfection - October 3, 2026
- Recipe for Boneless Cross Rib Roast: Slow-Roasted Beef with Herb Crust - October 3, 2026
- Hamburgers in Sauce Recipe Crock Pot: Slow-Cooked Savory Delight - October 3, 2026