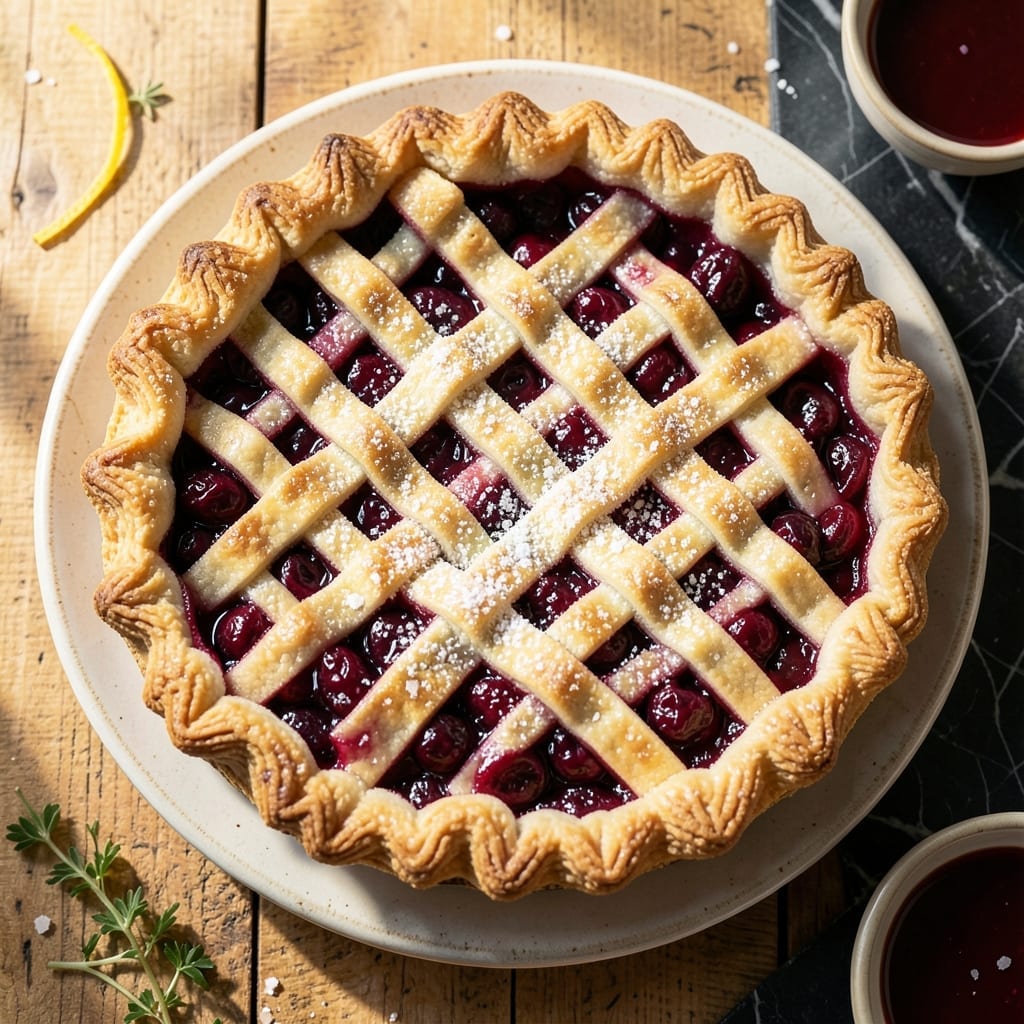
This recipe delivers homemade pie flavor with the convenience of canned cherry filling. A flaky crust and simple assembly create a dessert that tastes like it came from a bakery.
With just a few steps, you’ll have a golden, bubbling pie that’s perfect for any occasion. The canned filling ensures consistent quality while keeping the process effortless.
Ingredients for Cherry Pie Recipe with Canned Filling
Short list. Bakery-worthy results. Canned filling keeps it effortless yet delicious.
| Ingredient | Amount | Notes |
|---|---|---|
| Canned Cherry Pie Filling 🍒 | 2 cans | 21 oz each, not reduced sugar |
| All-Purpose Flour 🌾 | 2 ½ cups | Plus extra for dusting surface |
| Granulated Sugar 🍚 | ¼ cup | Fine white sugar preferred |
| Salt 🧂 | 1 tsp | Fine table salt |
| Unsalted Butter 🧈 | 1 cup | Cold, cubed for flaky crust |
| Ice Water 💧 | ½ cup | Plus 1 tbsp as needed |
| Large Egg 🥚 | 1 whole | For egg wash finish |
| Vanilla Extract 🌿 | 1 tsp | Pure extract recommended |
| Almond Extract 🌰 | ½ tsp | Optional for depth of flavor |
| Lemon Juice 🍋 | 1 tbsp | Freshly squeezed for brightness |
| Cornstarch 🌽 | 1 tbsp | For thickening if needed |
[recipe_ingredient_scaler]
The crust is everything here. King Arthur Flour gives the best rise and flakiness, but any all-purpose works. Use European-style butter (like Plugrá) for extra flakiness—it has less water content. The filling should be Comstock or Lucky Leaf for consistent quality. Avoid low-sugar versions—they can make the pie dry. Keep everything cold (butter, water, dough) for the flakiest results.
Out of cherry filling? Blueberry or apple pie filling works in a pinch (adjust spices if needed). No almond extract? Skip it or use vanilla only. The egg wash can be replaced with melted butter or cream for a different finish. If your crust cracks, patch it with a little water and flour—no one will notice. The cornstarch is optional but helps thicken juicy fillings.
The pie keeps well at room temperature for 2 days (cover loosely with foil). Refrigerate for up to 1 week for longer storage. Freeze baked pie for 2-3 months—thaw overnight before serving. Best enjoyed warm with a scoop of ice cream.
Why You’ll Love This Recipe
- One Bowl Wonder: I just dump the canned filling, mix the flour, sugar, and butter, and it’s ready for the oven—no peeling or pitting cherries here.
- Buttery Crust Magic: That flaky, golden crust from the butter and flour combo with the sweet-tart canned cherries? Pure comfort in every bite.
- Potluck Hero: I bring this to gatherings and it’s always the first to disappear—great for holidays, picnics, or just because it’s Tuesday.
- Budget Friendly: Honestly, canned filling keeps costs low, and I can make two pies for the price of fresh cherries. Leftovers? Even better the next day.
Step-by-Step Instructions for Cherry Pie With Canned Filling
Here’s the method. Straightforward, tested, works every time.
Step 1: Prepare the Pie Crust Dough
In a large bowl, combine the 2.5 cups all-purpose flour, 0.25 cup granulated sugar, and 1 tsp salt. Cut in the 1 cup unsalted butter (cold and cubed) using a pastry cutter or your fingers until the mixture resembles coarse crumbs with pea-sized butter pieces visible.
Gradually add the 0.5 cup ice water, 1 tablespoon at a time, mixing gently with a fork until the dough just comes together. Don’t overwork it—you should see streaks of flour still. The dough will look shaggy, but it will come together when pressed.
Divide the dough into two equal portions, flatten into discs, wrap in plastic, and refrigerate for at least 1 hour. This chilling step is crucial for a flaky crust.
Step 2: Roll Out the Crust and Prepare the Filling
On a lightly floured surface, roll out one dough disc into a 12-inch circle. Transfer it to a 9-inch pie dish, pressing gently into the bottom and up the sides. Trim the edges, leaving a ½-inch overhang.
In a bowl, mix the 2 cans canned cherry pie filling with the 1 tablespoon lemon juice, 1 teaspoon vanilla extract, and 0.5 teaspoon almond extract. If the filling seems too thin, stir in the 1 tablespoon cornstarch to thicken it slightly.
Pour the filling into the crust-lined pie dish, spreading it evenly. Dot the top with small pieces of any leftover butter from the dough preparation if desired.
Step 3: Add the Top Crust and Seal
Roll out the second dough disc into another 12-inch circle. Place it over the filling, then trim and fold the edges under the bottom crust, crimping with your fingers or a fork to seal. Cut 4-5 slits in the top crust to allow steam to escape.
In a small bowl, beat the 1 whole large egg with 1 tablespoon water to make an egg wash. Brush this mixture evenly over the top crust and edges. This will give your pie a beautiful golden brown finish.
Step 4: Bake to Perfection
Preheat your oven to 375°F. Place the pie on a baking sheet to catch any drips, then bake for 45-50 minutes. The crust should be deep golden brown and the filling should be bubbling through the vents.
If the edges brown too quickly, cover them with aluminum foil. The pie is done when the crust is uniformly golden brown and the filling is thick and bubbly. Let it cool for at least 2 hours before slicing to allow the filling to set.
Pro Tips For Making Cherry Pie Recipe With Canned Filling
- Chill the Dough: After mixing your flour, sugar, and butter for the crust, let it rest in the fridge for at least 30 minutes—I learned this the hard way after my first few pies turned into soggy messes.
- Drain the Filling: Pour the canned cherry filling into a strainer for 5 minutes to remove excess syrup, or your pie will turn into a runny disaster.
- Vent the Top: Cut 4-5 small slits in the top crust before baking, or steam will build up and split your crust open like a sad balloon.
- Use Cold Butter: Keep your unsalted butter ice-cold when cutting it into the flour—this is the thing that actually gives you a flaky crust instead of a dense one.
Make-Ahead Tips for This Recipe
Prep Ahead
You can prepare the pie dough up to 3 days in advance. Wrap the discs tightly in plastic wrap and refrigerate. This actually improves the flavor and texture as the dough rests. I often make a double batch to have extra dough ready for future pies. 💡
Assemble Early
Assemble the entire pie (unbaked) and refrigerate for up to 24 hours before baking. This is perfect for holiday mornings when oven space is limited. Just add 5-10 minutes to the baking time since you’ll be starting with a cold pie.
Freeze Unbaked
For longer storage, assemble the pie completely, wrap tightly in plastic wrap and aluminum foil, then freeze for up to 3 months. Bake from frozen, adding 15-20 minutes to the baking time. There’s no need to thaw first.
Pre-Bake Crust
If you’re worried about a soggy bottom crust, blind bake the bottom crust for 10 minutes at 375°F before adding the filling. Use pie weights or dried beans to keep the crust from puffing up. This creates a crispier base that holds up better to the juicy filling.
Make Filling Special
Enhance canned filling the day before by simmering it with a cinnamon stick and 1 star anise for 15 minutes, then cool and refrigerate. This infuses extra depth of flavor without any additional effort on baking day.
Store Baked Pie
Baked pies keep well at room temperature for 2 days. For longer storage, refrigerate for up to 1 week or freeze for 2-3 months. Wrap tightly to prevent drying out. 🍒
Nutrition Facts
Frequently Asked Questions
Can I use a store-bought crust instead?
Use 2 refrigerated pie crusts to save time. Just let them sit at room temperature for 15 minutes before rolling. The flavor will still be delicious with the canned filling.
How do I prevent a soggy bottom crust?
Sprinkle 1 tablespoon flour or crushed cornflakes in the bottom crust before adding filling. Blind baking the crust for 10 minutes at 375°F also helps.
Can I add fresh cherries to the canned filling?
Yes, but cook them first. Simmer 1 cup pitted fresh cherries with 2 tablespoons sugar for 5 minutes to soften before mixing with canned filling.
Why did my filling bubble over?
This happens when the pie isn’t vented enough. Cut 5-6 slits (not just 4) in the top crust next time. Also, place a baking sheet under the pie to catch spills.

Trained in classic French technique but raised on slow-cooked ribs and spicy rubs, she blends culinary skill with smoke and soul.
- Recipe for Boneless Pork Chops in Cast Iron Skillet: Sear and Baste to Juicy Perfection - October 3, 2026
- Recipe for Boneless Cross Rib Roast: Slow-Roasted Beef with Herb Crust - October 3, 2026
- Hamburgers in Sauce Recipe Crock Pot: Slow-Cooked Savory Delight - October 3, 2026