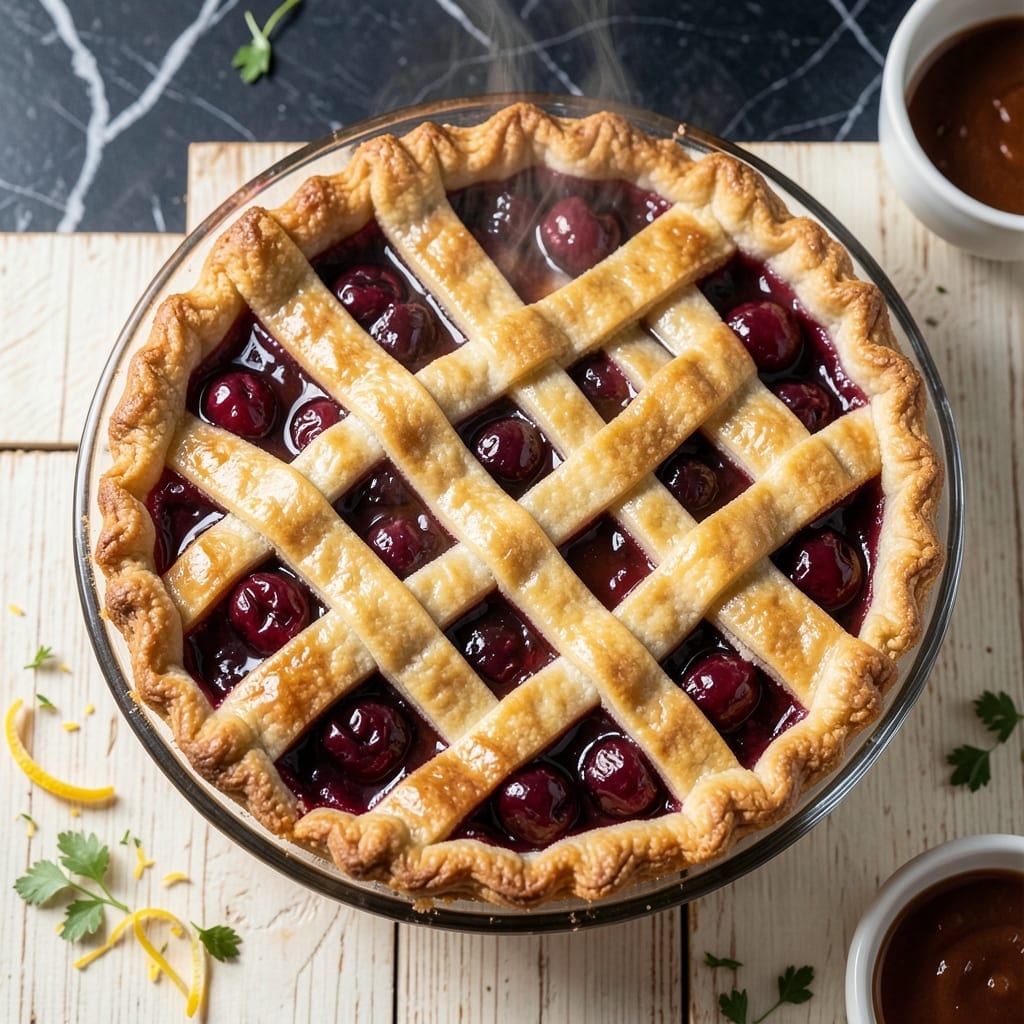
This pie delivers on the promise of flaky crust and vibrant cherry centers in every slice.
Using store-bought filling simplifies the process without sacrificing quality, while a few pro techniques guarantee that perfect golden, crisp texture.
Ingredients for Cherry Pie Recipe with Pie Filling
Store-bought filling meets homemade crust for that perfect flaky texture and bursting fruit.
| Ingredient | Amount | Notes |
|---|---|---|
| Store-Bought Cherry Pie Filling 🍒 | 2 cans | 21 oz cans, premium quality |
| All-Purpose Flour 🌾 | 2 ½ cups | Plus extra for dusting |
| Unsalted Butter 🧈 | 1 cup | Cold, cut into cubes |
| Granulated Sugar 🍚 | 1 tbsp | For dusting crust |
| Ice Water 💧 | ½ cup | Plus 1 tbsp as needed |
| Salt 🧂 | 1 tsp | Fine sea salt |
| Lemon Juice 🍋 | 1 tsp | Freshly squeezed |
| Vanilla Extract 🌿 | 1 tsp | Pure extract preferred |
| Egg 🥚 | 1 whole | For egg wash |
| Almond Extract 🌰 | ¼ tsp | Optional for depth |
| Cornstarch 🌽 | 1 tbsp | For thickening if needed |
[recipe_ingredient_scaler]
The crust is everything here. King Arthur Flour is the gold standard for all-purpose—consistent protein content means reliable flakiness. For the butter, Plugrá or Land O’Lakes give that rich, layered texture. Keep it ice-cold until the last second (the good stuff, not the pre-shredded kind). Most supermarkets carry these, but Whole Foods has organic options if that’s your preference.
No almond extract? A pinch of cinnamon or nutmeg adds warmth. Swap the egg wash for milk or cream if you’re out—just as golden. The pie filling can be homemade if you prefer (frozen cherries, sugar, lemon juice), but canned Comstock or Lucky Leaf work surprisingly well. Don’t skip the ice water—warm liquid toughens the dough.
The dough keeps in the fridge for 2 days, or freeze for 3 months. Baked pie? Store at room temperature for 2 days or refrigerate for 5 days. Reheat slices in a 350°F oven for 10 minutes to revive that crisp crust.
Why You’ll Love This Recipe
- No-Fuss Crust: I use store-bought filling and just 4 other ingredients—no pitting cherries or mixing complicated dough.
- Buttery Sweetness: The flaky crust and gooey cherry center taste like a bakery dessert, but homemade.
- Potluck Hero: It’s my go-to for picnics, holidays, or just because—everyone recognizes it and asks for the recipe.
- Budget Bake: A can of filling plus pantry staples means I spend under $5 for a dessert that feeds eight.
Step-by-Step Instructions for Cherry Pie With Pie Filling
Here’s the method. Straightforward, tested, works every time.
Step 1: Prepare the Pie Crust Dough
In a large bowl, combine the 2.5 cups All-Purpose Flour and 1 tsp Salt. Cut in the 1 cup Unsalted Butter, cold and cubed, using a pastry cutter or your fingers until the mixture resembles coarse crumbs with pea-sized butter pieces visible. This texture ensures flakiness in the final crust.
Add the 0.5 cup Ice Water, 1 tbsp Granulated Sugar, 1 tsp Lemon Juice, and 1 tsp Vanilla Extract. Mix gently with a fork until the dough just begins to come together. Avoid overworking, as this develops gluten and toughens the crust. The dough should hold when pressed but still appear shaggy.
Step 2: Chill and Roll Out the Dough
Divide the dough into two equal portions, flatten into discs, and wrap in plastic. Refrigerate for at least 1 hour or up to 24 hours. Chilling relaxes the gluten and firms the butter, both critical for a flaky texture.
On a lightly floured surface, roll one disc into a 12-inch circle about ⅛-inch thick. Transfer to a 9-inch pie dish, pressing gently into the bottom and sides. Trim the edges, leaving a ½-inch overhang. Refrigerate while you roll the second disc for the top crust.
Step 3: Prepare the Filling
In a bowl, combine the 2 cans Store-Bought Cherry Pie Filling with 0.25 tsp Almond Extract and 1 tbsp Cornstarch. Stir until the filling thickens slightly. The cornstarch ensures the filling sets properly and doesn’t leak excessively during baking.
Pour the filling into the chilled bottom crust, mounding slightly in the center. Dot with small pieces of 1 cup Unsalted Butter (reserved from the dough preparation) for added richness. This step enhances the fruit’s natural juices and creates a glossy finish.
Step 4: Assemble and Seal the Pie
Place the second rolled dough circle over the filling. Trim the edges, leaving a ½-inch overhang, then fold the top crust’s edge under the bottom crust’s edge and crimp decoratively. This seal prevents the filling from bubbling out during baking.
Cut 4-5 slits in the center of the top crust to allow steam to escape. Brush the entire surface with a beaten 1 whole Egg for a golden sheen. Sprinkle lightly with 1 tbsp Granulated Sugar to add texture and a subtle crunch.
Step 5: Bake to Golden Perfection
Preheat the oven to 375°F. Place the pie on a baking sheet lined with parchment paper to catch any drips. Bake on the lower third of the oven for 50-60 minutes until the crust is deep golden brown and the filling is bubbling through the slits.
If the edges brown too quickly, cover them with a pie shield or strips of foil. Cool the pie on a wire rack for at least 2 hours before slicing. This resting period allows the filling to set completely, ensuring clean slices with every serving.
Pro Tips For Making Cherry Pie Recipe With Pie Filling
- Chill the Dough: Give your pie crust at least 30 minutes in the fridge before rolling—it prevents shrinking and makes it way easier to handle. I learned this the hard way after my first few pies turned into sad, shrunken discs.
- Drain the Filling: Strain the store-bought cherry pie filling for 10 minutes in a colander to remove excess syrup, or your pie will be soupy. Sounds tedious, but it actually changes the outcome.
- Vent the Top: Cut 4-5 small slits in the top crust, not just one—steam needs multiple escape routes or it’ll burst through the weakest spot. After burning three batches, I finally figured this out.
- Brush with Butter: Right after pulling the pie out, brush the crust with melted butter and sprinkle a little sugar on top. My grandmother swore by this, and she was right: it adds a professional shine and extra crunch.
Creative Variations of This Recipe
Spiced Almond Twist
Add ½ tsp ground cinnamon and ¼ tsp ground cardamom to the filling for warmth. I also stir in 2 tbsp sliced almonds for crunch. These spices remind me of coastal rides during fall, when the air smells like woodsmoke and spice.
Chocolate Cherry Decadence
Sprinkle ½ cup mini chocolate chips over the bottom crust before adding the filling. The melted chocolate pairs beautifully with the tart cherries. Use Ghirardelli or Guittard for the best melt and flavor.
Lattice Top Elegance
Cut the top crust into 1-inch strips and weave a lattice pattern. Brush with egg wash and sprinkle with 1 tbsp turbinado sugar for a rustic, bakery-style look. This technique takes practice, but the results are stunning.
Citrus Glaze Finish
After baking, drizzle with a glaze of ½ cup powdered sugar and 1 tbsp lemon juice. This adds a bright contrast to the rich filling. I learned this trick from a French pastry chef during my training. 🌟
Savory Herb Crust
Add 1 tsp finely chopped fresh rosemary to the crust dough. The herbal note complements the cherries surprisingly well. I forage wild rosemary along the coast for this—it’s more fragrant than store-bought.
Boozy Cherry Filling
Mix 2 tbsp bourbon or 1 tbsp Grand Marnier into the filling before baking. The alcohol bakes off, leaving a complex depth. I prefer Maker’s Mark bourbon for its smooth, caramel notes.
Nutrition Facts
Frequently Asked Questions
Can I use homemade cherry filling instead of canned?
Use 4 cups pitted cherries, 3/4 cup sugar, and 3 tbsp cornstarch. Simmer until thickened.
Why did my crust turn out tough?
Overworking the dough develops gluten. Mix just until combined and keep ingredients ice-cold for flakiness.
How do I prevent a soggy bottom crust?
Chill the pie dish before adding dough, and bake on the lower oven rack. A sprinkle of 1 tbsp breadcrumbs under filling helps too.
Can I make this pie ahead of time?
Yes! Bake 1 day ahead and store at room temperature. Reheat at 350°F for 10 minutes before serving.

Trained in classic French technique but raised on slow-cooked ribs and spicy rubs, she blends culinary skill with smoke and soul.
- Recipe for Boneless Pork Chops in Cast Iron Skillet: Sear and Baste to Juicy Perfection - October 3, 2026
- Recipe for Boneless Cross Rib Roast: Slow-Roasted Beef with Herb Crust - October 3, 2026
- Hamburgers in Sauce Recipe Crock Pot: Slow-Cooked Savory Delight - October 3, 2026