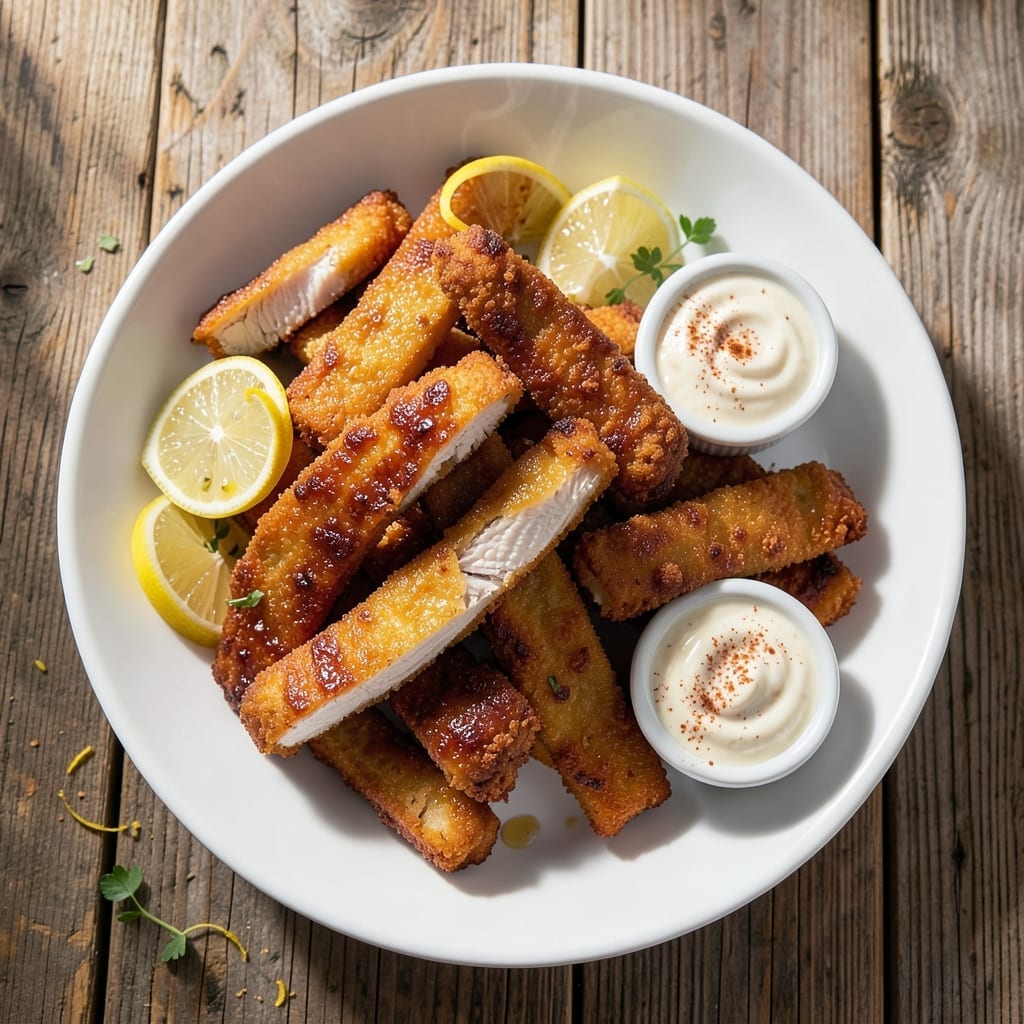
This recipe delivers crispy chicken strips with a juicy center every time. The secret is a two-step breading process and precise frying temperature.
I perfected this method to achieve restaurant-quality texture at home. The coating stays shatteringly crisp while the chicken remains tender. Serve with your favorite dipping sauce.
Ingredients for Chick Fil a Strips
Pantry staples plus a quick brine. Nothing exotic, just good stuff for crispy perfection.
| Ingredient | Amount | Notes |
|---|---|---|
| Chicken Breasts 🍗 | 1 ½ lb | Boneless, skinless, cut into strips |
| Buttermilk 🥛 | 1 cup | Full-fat for creaminess |
| All-Purpose Flour 🌾 | 1 ½ cups | Divided for breading |
| Powdered Sugar 🍚 | 2 tbsp | For signature sweetness |
| Paprika 🌶️ | 2 tsp | For color and mild heat |
| Garlic Powder 🧄 | 2 tsp | Enhances savory depth |
| Onion Powder 🧅 | 2 tsp | Balances flavor profile |
| Salt 🧂 | 2 tsp | Diamond Crystal kosher preferred |
| Black Pepper 🌶️ | 1 tsp | Freshly ground for best flavor |
| Large Eggs 🥚 | 2 whole | Beaten for binding |
| Peanut Oil 🫒 | 4 cups | For frying, high smoke point |
| Dill Pickle Juice 🥒 | ¼ cup | For brining chicken |
[recipe_ingredient_scaler]
The chicken needs to be uniform—cut breasts into 1-inch-thick strips so they cook evenly. Buttermilk is non-negotiable here; it tenderizes while adding richness. Whole Foods or local dairies have the best full-fat options. The flour gets split between the initial dredge and the final coating, so measure carefully. Pickle juice might seem odd, but it’s the secret to that signature tang.
No buttermilk? Whole milk plus 1 tbsp vinegar works in a pinch. Out of peanut oil? Vegetable or canola oil are fine, but avoid olive oil—it smokes too easily. The powdered sugar is key (don’t skip it), but granulated sugar in a blender gets you close. For extra crunch, add 1/2 cup crushed cornflakes to the breading.
Fry in batches to avoid crowding—keeps the oil temp steady for that shatteringly crisp crust. Leftovers hold up 2-3 days in the fridge, but reheat in the oven to revive the crunch. Freeze uncooked breaded strips for up to 3 months if you want to prep ahead.
Why You’ll Love This Recipe
- One Bowl Wonder: I mix everything in a single bowl—no fancy gadgets, just chicken, buttermilk, and that smoky paprika doing all the work.
- That Secret Crunch: The powdered sugar in the flour mix gives it that signature Chick-fil-A sweetness and a crispy bite you just can’t stop snacking on.
- Feeds the Pickies: Even my nephew who “only eats nuggets” devours these strips, and I can bake a double batch for lunches all week.
- Dollar Stretcher: A pound of chicken breasts and pantry staples make a meal that costs less than takeout but tastes just as good, if not better.
Step-by-Step Instructions for Chick Fil A Style Chicken Strips
Here’s the method I use to get that signature crispy exterior with tender, juicy meat inside.
Step 1: Brine the Chicken in Pickle Juice
Place the 1.5 lb Chicken Breasts in a bowl and pour in the 0.25 cup Dill Pickle Juice. This brine is the secret to that tangy, moist flavor that makes these strips stand out. Let them soak for 30 minutes at room temperature.
Don’t skip this step—it’s what gives the chicken that signature zing. The acidity in the pickle juice also helps tenderize the meat, ensuring it stays juicy through frying. After brining, pat the chicken strips dry with paper towels to help the coating adhere.
Step 2: Create the Wet and Dry Breading Stations
In a shallow dish, whisk together the 2 whole Large Eggs and 1 cup Buttermilk until fully combined. This creates your wet dip. In another shallow dish, combine 1.5 cups All-Purpose Flour, 2 tbsp Powdered Sugar, 2 tsp Paprika, 2 tsp Garlic Powder, 2 tsp Onion Powder, 2 tsp Salt, and 1 tsp Black Pepper.
The powdered sugar is key—it caramelizes during frying, adding that subtle sweetness that balances the savory spices. Mix the dry ingredients thoroughly so every bite has even seasoning. The flour should look uniformly speckled with the spices.
Step 3: Bread the Chicken Strips for Maximum Crunch
Dip each brined chicken strip into the buttermilk mixture, letting any excess drip off. Then dredge it in the flour mixture, pressing gently to ensure full coverage. For extra crispiness, I repeat this process once more—dip, dredge, dip, dredge.
Place the breaded strips on a wire rack set over a baking sheet. This allows air circulation so the coating doesn’t get soggy while you finish breading the rest. Let them rest for 10 minutes—this helps the coating set and adhere better during frying.
Step 4: Fry to Golden Perfection
Heat the 4 cups Peanut Oil in a deep, heavy pot to 350°F. Use a thermometer for accuracy—oil temperature is critical for even cooking. When the oil reaches temperature, carefully add the breaded strips in batches, being careful not to crowd the pot.
Fry for 6-8 minutes, turning occasionally, until the strips are golden brown and the internal temperature reaches 165°F. The coating should be crisp and the chicken juicy. Drain on a wire rack or paper towels to maintain crispiness.
Real talk: if your oil isn’t hot enough, the strips will absorb too much and become greasy. If it’s too hot, the outside will burn before the inside cooks. Maintain that 350°F temperature throughout for the best results.
Pro Tips For Making Chick Fil A Strips
- Brine First Always: Soak the chicken breasts in buttermilk for at least 4 hours—overnight if you can swing it. I learned this the hard way when my first batch came out dry as cardboard.
- Double Dredge: Dip the chicken in flour, then buttermilk, then flour again for that extra-crispy coating. Sounds tedious, but it’s the only way to get that signature crunch.
- Hot Oil Only: Make sure your oil hits 350°F before frying, or the strips will absorb grease like a sponge. A thermometer is non-negotiable here—I burned two batches guessing.
- Add Paprika Twice: Mix paprika into the flour dredge and dust a little extra on the strips right before frying. It deepens the color and flavor—my grandmother swore by this, and she was right.
Essential Equipment for Perfect Results
Deep Fryer
A heavy-duty 5-quart Dutch oven or deep fryer is essential—I use my Lodge enameled cast iron for even heat distribution. The high sides prevent oil splatter while frying in 350°F oil. Look for one with a heavy bottom to maintain steady temperature.
Candy Thermometer
Precise oil temperature is non-negotiable for crispy results. I swear by my ThermoWorks candy thermometer—it clips to the pot and gives instant readings. Without accurate temp control, your coating will either be greasy or burn. 🌡️
Wire Rack Setup
Place a wire cooling rack over a baking sheet to rest breaded strips before frying. This allows air circulation so the coating stays crisp. After frying, drain on the same rack to prevent soggy bottoms. I use OXO’s stainless steel rack—it’s sturdy and easy to clean.
Tongs
Long 12-inch locking tongs keep your hands safe from hot oil. I prefer OXO Good Grips for their comfortable handle and precise control when turning strips. Avoid short tongs—they put your hands too close to the oil.
Paper Towels
Keep a stack of heavy-duty paper towels nearby for patting chicken dry after brining and draining excess oil post-fry. I use Brawny for its strength and absorbency. The final blot removes any greasiness while preserving crunch.
Mixing Bowls
Use shallow, wide bowls for breading stations—Pyrex glass works great. The broad surface makes dipping and dredging easier. I keep one for wet mix and another for dry, with a third bowl for resting breaded strips before frying. 💡
Nutrition Facts
Frequently Asked Questions
Can I use chicken tenders instead of breasts?
Yes! Chicken tenders work perfectly and often stay juicier. Just reduce frying time to 5-6 minutes since they’re thinner. They’ll still get that crispy coating we all love.
What’s the best oil for frying?
Peanut oil is ideal for its high smoke point and neutral flavor. Vegetable or canola oil work too, but avoid olive oil—it smokes at 350°F. Always use enough oil for full submersion.
Why did my coating fall off?
This usually happens if the chicken isn’t dry before breading or if the oil isn’t hot enough. Pat strips thoroughly after brining and maintain 350°F oil temperature. Let breaded strips rest 10 minutes before frying too.
Can I bake instead of fry?
You can, but the texture won’t be identical. Bake at 400°F for 15-18 minutes on a wire rack for air circulation. Spray with oil first for extra crispiness.

Trained in classic French technique but raised on slow-cooked ribs and spicy rubs, she blends culinary skill with smoke and soul.
- Recipe for Boneless Pork Chops in Cast Iron Skillet: Sear and Baste to Juicy Perfection - October 3, 2026
- Recipe for Boneless Cross Rib Roast: Slow-Roasted Beef with Herb Crust - October 3, 2026
- Hamburgers in Sauce Recipe Crock Pot: Slow-Cooked Savory Delight - October 3, 2026