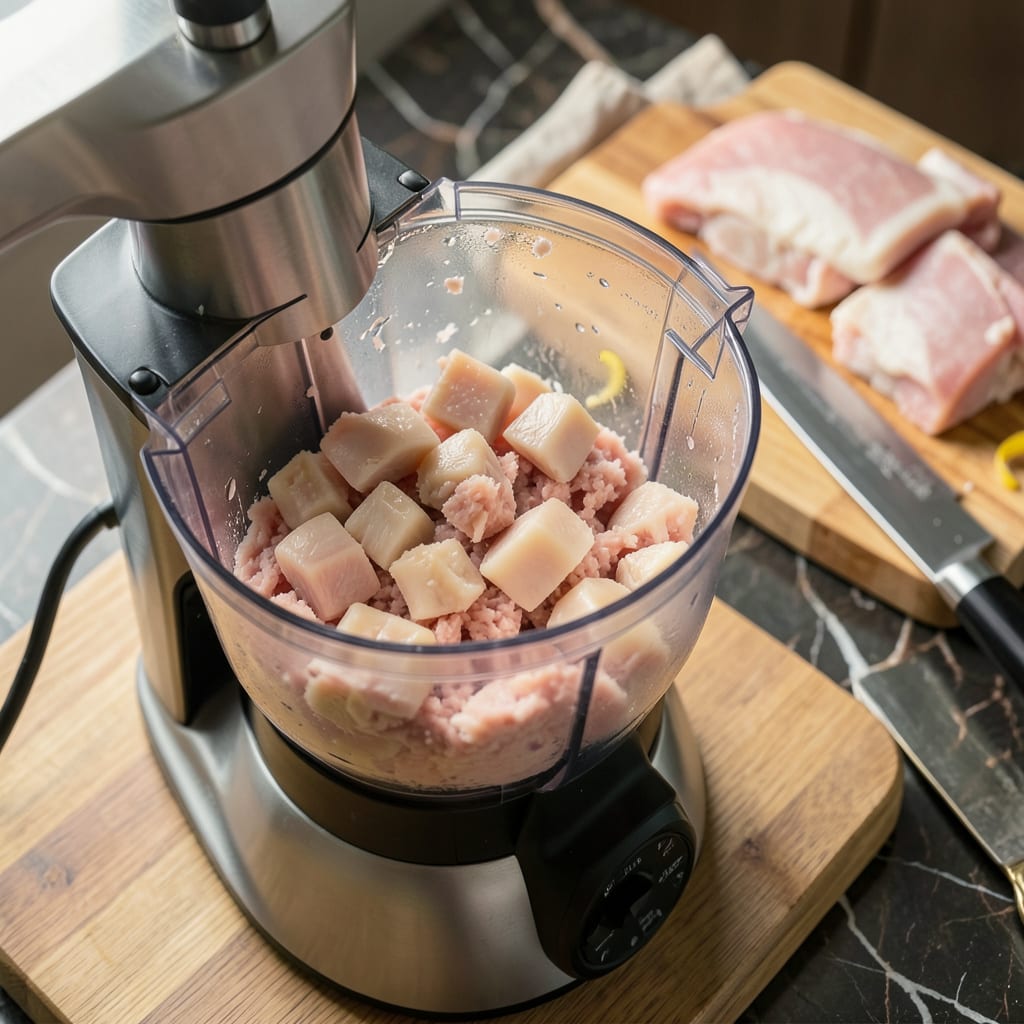
I’ll be real with you: using a food processor for chicken changed my meal prep game completely. That whirring blade transforms tough cuts into ultra-tender meat in seconds—no knife skills required. I first tried this during a rushed weeknight when I needed shredded chicken for tacos, and now it’s my go-to for everything from burgers to stir-fries.
The beauty here is the control you get. Pulse too long and you’ve got paste; do it just right and you unlock restaurant-quality texture without the work. I use the standard S-blade for most cuts, but here’s the thing—frozen chicken works better than fresh for shredding. The processor’s power breaks down those icy fibers into perfect, fluffy strands every time.
What you end up with is chicken that cooks faster and absorbs flavors deeper than hand-cut pieces. Whether you’re making meatballs, filling for lettuce wraps, or just prepping protein for the week, this method cuts active prep time to about 5 minutes. The food processor does all the heavy lifting while you focus on seasoning and cooking.
Fair warning: this works best with boneless cuts. But once you try it, you’ll never go back to chopping chicken by hand again. Let me show you exactly how to nail the texture and what to make with it.
📚 In This Guide
- What You’ll Need
- Instructions
- Tips and Common Mistakes
What Youll Need
- ● Food processor – A minimum 8-cup capacity (11-cup or larger for bigger batches). Look for a sharp S-blade for best results.
- ● Boneless, skinless chicken – 1–2 lbs (450–900g) (breasts or thighs). Chilled or partially frozen for easier processing.
- ● Cutting board & chef’s knife – To trim fat or cut chicken into 1–2-inch chunks before processing.
- ● Measuring spoons/cups – For adding marinades, spices, or liquids (if using).
- ● Bowl or container – To hold processed chicken (preferably with a lid for storage).
- ● Cooking oil or nonstick spray – 1–2 tbsp to prevent sticking if cooking immediately.
- ● Kitchen scale – For precise measurements (great for meal prep!).
- ● Marinade or seasoning – 2–3 tbsp of your favorite (soy sauce, lemon juice, garlic powder, etc.).
- ● Plastic wrap or parchment paper – To cover and pound chicken before processing for extra tenderness.
- ● Food processor pulse button – If yours has one, it’ll give you better control!
Instructions for Processing Chicken to Ultra-Tender Perfection
Here’s how to transform chicken into tender, versatile meat in minutes—no fancy skills required.
Prepare Your Chicken and Equipment
Start with boneless, skinless chicken breasts or thighs that are cold but not frozen solid. I like to cut them into 1-inch chunks before processing—this makes them easier to handle and ensures even texture. Make sure your food processor is clean and dry, with the standard metal blade attached.
Don’t overfill the processor bowl. For most standard 11-14 cup processors, I recommend processing 1-2 chicken breasts at a time (about 1 pound total). Overfilling prevents even processing and can create an inconsistent texture. Keep any extra chicken refrigerated until you’re ready to process it.
Pulse for Perfect Texture
Add your chicken pieces to the processor bowl, securing the lid tightly. Here’s the key: pulse in 1-second bursts rather than running the processor continuously. I pulse 8-10 times, then stop to check the texture. You’re aiming for evenly ground chicken that holds together when pressed but isn’t pasty.
Watch the chicken closely—it should look like coarse ground meat, not a smooth puree. If you see any large pieces remaining, give it 2-3 more pulses. Be careful not to over-process, or you’ll end up with a dense, rubbery texture. The whole process should take less than 30 seconds for perfectly tender results.
Check for Doneness and Adjust
Stop the processor and remove the lid. Press a small amount of the processed chicken between your fingers—it should hold together lightly but still have visible texture. If it feels too sticky or pasty, you’ve gone too far. If it’s not cohesive enough, give it 2-3 more pulses.
For the most tender results, I like to transfer the processed chicken to a bowl and mix in 1 tablespoon of cold water per pound by hand. This small amount of moisture helps prevent the meat from becoming too dense during cooking. The mixture should feel slightly tacky but not wet.
Use Immediately or Store Properly
Processed chicken is best used immediately for burgers, meatballs, or stir-fries. If you need to store it, transfer to an airtight container and refrigerate for up to 24 hours. For longer storage, portion into freezer bags (about 1 pound per bag) and freeze for up to 3 months.
When ready to use frozen processed chicken, thaw it overnight in the refrigerator. Avoid microwaving, as this can start cooking the meat unevenly. The texture will be slightly softer after freezing, but the tenderness will remain. Cook within 2 days of thawing for best quality and safety.
Cook for Maximum Tenderness
Whether you’re making patties, meatballs, or adding to sauces, cook the processed chicken gently. I recommend medium heat for pan-frying—this prevents the exterior from drying out before the interior cooks through. The chicken is done when it reaches an internal temperature of 165°F and the juices run clear.
Because the meat is so finely processed, it cooks about 25% faster than whole pieces. Keep this in mind and check for doneness early. The result should be incredibly tender with a uniform texture throughout—perfect for quick weeknight meals that still feel special.
Tips and Common Mistakes for Ultra-Tender Processed Chicken
Mastering this technique comes down to a few simple but crucial details. Here’s what I’ve learned from processing hundreds of pounds of chicken.
The Pulse Technique: Those 1-second bursts in Step 2 aren’t arbitrary—they create the perfect texture. I count each pulse out loud (“one-Mississippi, two-Mississippi”) to maintain consistency. The 8-10 pulses should transform your chicken into coarse ground meat, not paste. If you hear the processor motor straining, you’ve likely overfilled it or pulsed too long. Remember, the entire processing should take less than 30 seconds for ideal tenderness.
Texture Check: After pulsing, always do the finger test from Step 3. Press the mixture between your thumb and forefinger—it should hold together but still have visible texture. If it feels gummy or looks shiny, you’ve over-processed. The 1 tablespoon of cold water per pound isn’t just for moisture; it actually prevents the proteins from binding too tightly during cooking, which is what keeps the meat tender rather than rubbery.
Heat Control: When cooking in Step 5, that medium heat recommendation is critical. Processed chicken cooks 25% faster than whole pieces, so high heat will dry it out before the center reaches 165°F. I use a two-zone approach: sear briefly over medium-high to develop color, then finish over medium. This gives you that perfect balance of slight crust and juicy interior without overcooking.
Batch Processing: For larger quantities, process in batches as mentioned in Step 1—no more than 1-2 chicken breasts (about 1 pound) at a time. I learned this the hard way after ruining a 3-pound batch that turned into an uneven, pasty mess. Keep extra chicken refrigerated while processing, and clean the processor blade between batches if you’re making multiple pounds. The cold temperature of the chicken helps maintain the right texture during processing.
Pro Tips for Chicken In Food Processor
- Mastering this technique comes down to a few simple but crucial details. Here’s what I’ve learned from processing hun…
- The Pulse Technique: Those 1-second bursts in Step 2 aren’t arbitrary—they create the perfect texture. I count each p…
- Texture Check: After pulsing, always do the finger test from Step 3. Press the mixture between your thumb and forefin…
Frequently Asked Questions
Can I put raw chicken in a food processor?
Yes, but always use the pulse function for short bursts (1-2 seconds) to avoid over-processing into paste. Clean the processor immediately with hot, soapy water to prevent bacterial growth. For safety, chill the chicken 30 minutes first to firm it up.
How long should I process chicken for ground chicken?
Pulse raw boneless chicken (cut into 1-inch cubes) for 5-8 one-second bursts, scraping sides between pulses. Over-processing creates a mushy texture—stop when it resembles store-bought ground chicken. For cooked chicken, pulse just 2-3 times for chunky results. Use a sharp chef’s knife (for mincing) or a meat grinder attachment on a stand mixer. For shredded chicken, two forks or a hand mixer on low speed work well! Pro tip: Partially freeze chicken for 20 minutes to make knife-mincing easier. Three common culprits: Yes! Store raw processed chicken in airtight containers for 1-2 days in the fridge or 3 months frozen. Cooked shredded/ground chicken lasts 3-4 days refrigerated. Always reheat to 165°F for safety.What’s the best alternative if I don’t have a food processor?
Why does my processed chicken turn into paste?
Fix it by mixing in breadcrumbs or egg to bind for meatballs/patties.
Is processed chicken safe for meal prep?
Using a food processor for chicken is a game-changer for quick, tender meals! 🍗✨ Whether you’re prepping ground chicken, shredding for tacos, or making ultra-smooth pâté, this method saves time while boosting flavor and texture. With the right techniques and safety tips, you’ll unlock effortless versatility in your cooking.
Ready to try it? Grab your food processor and a fresh batch of chicken—your next meal just got a whole lot easier (and tastier)! For inspiration, check out our favorite quick recipes using processed chicken. Happy cooking! 👨🍳

Trained in classic French technique but raised on slow-cooked ribs and spicy rubs, she blends culinary skill with smoke and soul.
- Recipe for Boneless Pork Chops in Cast Iron Skillet: Sear and Baste to Juicy Perfection - October 3, 2026
- Recipe for Boneless Cross Rib Roast: Slow-Roasted Beef with Herb Crust - October 3, 2026
- Hamburgers in Sauce Recipe Crock Pot: Slow-Cooked Savory Delight - October 3, 2026