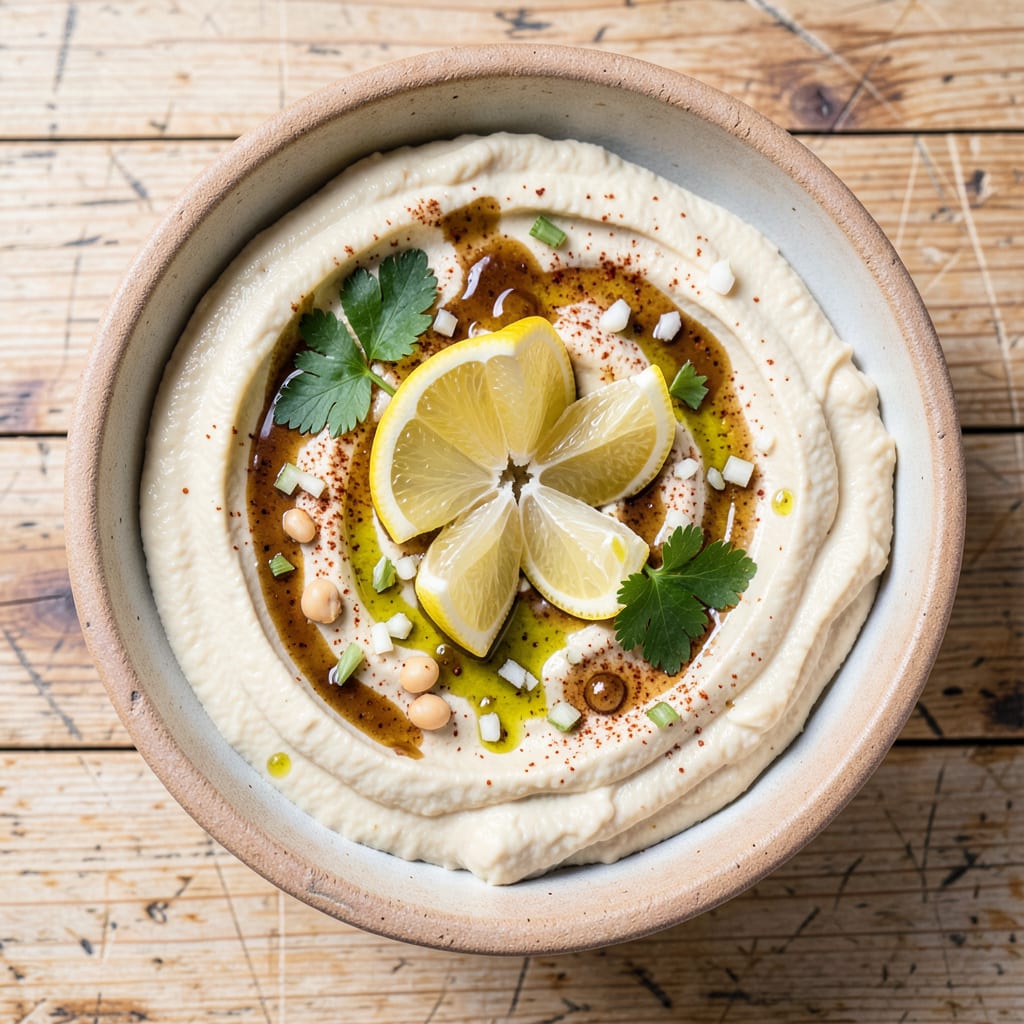
I’ll be real with you—making hummus without a food processor sounded impossible until I figured out the right technique. This isn’t your typical blended dip; it’s a hands-on approach that delivers surprisingly smooth results with just a bowl and some elbow grease. No fancy equipment needed, just simple ingredients and a little patience.
The secret is in the order of operations. Start with softened chickpeas (canned works fine) and mash them thoroughly before adding tahini, lemon juice, and garlic. This prevents that grainy texture you get when ingredients fight against each other. A sturdy fork or potato masher becomes your best friend here—work in small circles until you hit that creamy sweet spot.
What you end up with is hummus that’s rich, velvety, and packed with that classic garlicky-lemon tang. It might not be perfectly smooth like store-bought, but the texture has character—almost like a rustic, artisanal version. Plus, you control the consistency: add more olive oil for silkiness or leave it chunkier for dipping.
Perfect for spreading on sandwiches, scooping with pita, or dolloping on grain bowls. The best part? It keeps for a week in the fridge, so you can make a big batch and enjoy it whenever the craving hits. Here’s how to nail it every time.
📚 In This Guide
- What You’ll Need
- Instructions
- Tips and Common Mistakes
What Youll Need
- ● 1 can (15 oz) chickpeas – Drained and rinsed (or 1.5 cups cooked for homemade). 🌱
- ● ¼ cup tahini – Well-stirred (sesame paste is key for creaminess!).
- ● 2–3 tbsp fresh lemon juice – Adjust to taste for that zesty kick! 🍋
- ● 1–2 garlic cloves – Minced finely (or ½ tsp garlic powder for convenience).
- ● 2–3 tbsp extra-virgin olive oil – Plus extra for drizzling. 🫒
- ○ ½ tsp ground cumin – Optional but adds warmth.
- ● ½ tsp salt – Adjust to taste (start small!).
- ● 2–4 tbsp ice-cold water – Secret for ultra-smooth texture! ❄️
- ○ 1 tbsp chopped fresh parsley – Optional garnish for freshness.
- ○ Paprika or sumac – Optional topping for color and flavor.
- ● Large mixing bowl – Deep enough for mashing (stainless steel or ceramic works best).
- ● Fork, potato masher, or mortar & pestle – For smashing chickpeas by hand. 🥄
- ● Whisk or spoon – To blend ingredients smoothly.
- ● Fine-mesh strainer – If using canned chickpeas (for extra-silky texture).
- ● Measuring cups/spoons – Precision matters for balance!
- ○ Citrus juicer – Optional but handy for fresh lemon juice.
Step-by-Step Instructions for Hummus Without Food Processor
You’ll be amazed how simple it is to create velvety hummus using just a bowl and some elbow grease!
Soften the Chickpeas for Maximum Creaminess
Start by draining and rinsing your canned chickpeas thoroughly. I like to rub them between my fingers under running water to remove as many skins as possible—this makes for ultra-smooth hummus. Then transfer them to a large mixing bowl.
Here’s the secret: pour in about ½ cup of hot water (just boiled is perfect) over the chickpeas. Let them soak for 5 minutes—this softens them dramatically and makes mashing much easier. You’ll notice the chickpeas plump up and become more tender to the touch.
After soaking, drain the chickpeas again but reserve that starchy soaking water—it’s liquid gold for adjusting your hummus consistency later. The softer your chickpeas are at this stage, the creamier your final hummus will be.
Mash the Chickpeas with a Potato Masher
Now comes the fun part! Add your tahini, lemon juice, minced garlic, and salt to the softened chickpeas. Using a sturdy potato masher, start breaking down the chickpeas with firm, circular motions. Press down and twist as you go—you’re essentially creating your own food processor action.
Work at it for about 5-7 minutes until you’ve achieved a mostly smooth paste with just a few small chunks remaining. Don’t worry about getting it perfectly smooth yet—the next steps will take care of that. The mixture should look like thick, chunky oatmeal at this point.
If your arm gets tired (and it probably will!), take a quick break—this is a workout! The more energy you put into this mashing step, the creamier your final hummus will be. I promise it’s worth the effort.
Whisk in the Olive Oil for Emulsion
Here’s where the magic happens! Slowly drizzle in your olive oil while vigorously whisking the chickpea mixture. Start with about half the oil and whisk for 2-3 minutes until the mixture starts to emulsify and lighten in color.
You’ll notice the texture transform before your eyes—it becomes glossier and smoother as the oil incorporates. This whisking action creates tiny air bubbles that give hummus its characteristic light, fluffy texture. Keep whisking until your arm feels like it’s getting a good workout!
Now add the remaining oil and continue whisking for another 2 minutes. The hummus should become noticeably creamier and develop a beautiful sheen. If it’s still too thick, add some of that reserved chickpea water 1 tablespoon at a time until it reaches your desired consistency.
Adjust Seasoning and Texture to Perfection
Taste your hummus and adjust the seasoning—this is where you make it truly your own. I usually add a bit more salt and lemon juice at this stage to brighten the flavors. The hummus should taste vibrant and well-balanced, with no single ingredient overpowering the others.
For the smoothest possible texture, press the hummus through a fine-mesh sieve using a rubber spatula. This extra step removes any remaining chickpea skins and creates that restaurant-quality silkiness. It takes a few minutes but makes a world of difference in the final texture.
Give it one final whisk to incorporate everything beautifully. The hummus should be smooth, creamy, and hold its shape when you scoop it, yet still be light enough to spread easily. You’ve just created something truly special without any fancy equipment!
Rest and Serve for Optimal Flavor
Transfer your hummus to a serving bowl and let it rest at room temperature for 15-20 minutes before serving. This resting time allows the flavors to meld together beautifully. You’ll notice the texture becomes even smoother as it sits.
Create a little well in the center and drizzle with your best extra virgin olive oil. Sprinkle with paprika or za’atar for color and extra flavor. Serve with warm pita bread, fresh veggies, or as a spread in sandwiches.
The hummus will keep in an airtight container in the refrigerator for up to 5 days, though it’s so delicious it probably won’t last that long! The flavors actually deepen and improve after a day in the fridge, so consider making it ahead if you can resist eating it all immediately.
Tips and Common Mistakes for Perfect Handmade Hummus
Here’s what I’ve learned from making countless batches—these little details make all the difference when creating silky hummus by hand.
Chickpea Prep Secret: In Step 1, don’t rush the 5-minute soaking time with hot water. This isn’t just about softening—it’s about activating the starches in the chickpeas. I’ve found that using water straight from the kettle (just off boil) makes the chickpeas plump up faster and mash more easily. The difference between lukewarm water and truly hot water is noticeable in the final texture.
Mashing Technique: When you get to Step 2, use a potato masher with a grid pattern rather than a flat one. The grid creates more friction against the chickpeas, breaking them down faster. Work in small circles while applying downward pressure—this mimics the blade action of a food processor. I promise those 5-7 minutes of mashing will pay off when you taste how creamy it becomes.
Emulsion Mastery: Step 3 is where most people under-whisk. The 2-3 minutes of initial whisking isn’t arbitrary—it’s when the oil and chickpea mixture start to bind. I like to use a balloon whisk and really get my forearm into it. You’ll feel the mixture resist at first, then suddenly become lighter as the emulsion forms. This is the magic moment that creates that signature hummus texture.
Texture Perfection: For Step 4, don’t skip pressing the hummus through a fine-mesh sieve. This removes the last stubborn chickpea skins that can make your hummus grainy. I use the back of a ladle to force it through—it takes about 3 minutes but transforms good hummus into exceptional hummus. The difference is like comparing homemade to store-bought.
Pro Tips for Hummus Without Food Processor
- Here’s what I’ve learned from making countless batches—these little details make all the difference when creating sil…
- Chickpea Prep Secret: In Step 1, don’t rush the 5-minute soaking time with hot water. This isn’t just about softening…
- Mashing Technique: When you get to Step 2, use a potato masher with a grid pattern rather than a flat one. The grid c…
Frequently Asked Questions
Can I make hummus without a food processor if I don’t have a blender either?
A fork, potato masher, or mortar and pestle work great for mashing chickpeas. Soak dried chickpeas overnight (or use canned) and peel them for extra smoothness. Mix in tahini, lemon, and garlic by hand—it’ll take 10-15 minutes of elbow grease but delivers creamy results!
How long does handmade hummus last in the fridge?
Store it in an airtight container with a drizzle of olive oil on top to prevent drying. It stays fresh for 4-5 days refrigerated. If it thickens, stir in a splash of cold water or lemon juice to revive the texture.
Why is my hummus grainy or chunky when made by hand?
Graininess usually means unpeeled chickpeas or insufficient mashing. Try:
- Rubbing chickpeas between your fingers to remove skins.
- Mashing longer (or using a mortar and pestle for finer control).
- Adding tahini last—it helps emulsify the mix.
Can I use a substitute for tahini in handmade hummus?
Yes! Swap tahini for:
- Natural peanut butter (adds nuttiness).
- Greek yogurt (for tangy creaminess).
- Olive oil + sesame seeds (toast seeds first for depth).
Is handmade hummus healthier than store-bought?
Often, yes! You control the sodium, preservatives, and oil quality. Homemade versions skip stabilizers and excess salt found in many brands. Plus, you can boost nutrition with extras like roasted red pepper or spinach. Check labels if comparing!
Who knew creamy, dreamy hummus could be this easy—no fancy gadgets required? 🥄 With just a bowl, a fork (or mortar and pestle), and a little elbow grease, you’ve got a foolproof method for silky-smooth hummus anytime. Whether you’re whipping up a quick snack or meal-prepping for the week, this technique proves that great flavor doesn’t need complicated tools.
Ready to level up? Try experimenting with roasted garlic, smoked paprika, or lemon zest for your next batch—your taste buds (and dinner guests) will thank you! 🌟 Save this method for later, or share it with a friend who’s always borrowing your food processor. Happy mashing!

Trained in classic French technique but raised on slow-cooked ribs and spicy rubs, she blends culinary skill with smoke and soul.
- Recipe for Boneless Pork Chops in Cast Iron Skillet: Sear and Baste to Juicy Perfection - October 3, 2026
- Recipe for Boneless Cross Rib Roast: Slow-Roasted Beef with Herb Crust - October 3, 2026
- Hamburgers in Sauce Recipe Crock Pot: Slow-Cooked Savory Delight - October 3, 2026