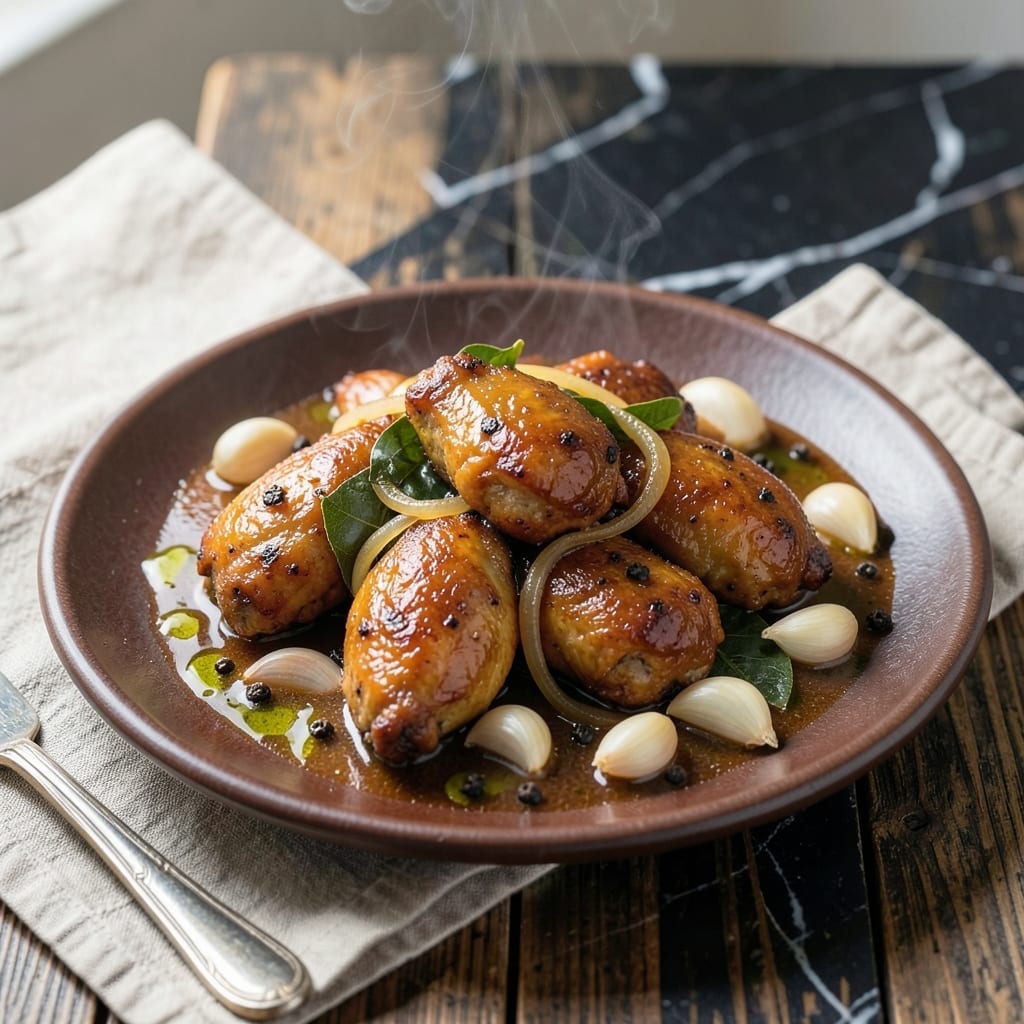
This Filipino-inspired dish brings bold, tangy flavors to your table with minimal effort. The secret lies in the perfect balance of vinegar, soy sauce, and garlic.
You’ll achieve tender chicken with a rich, savory sauce that’s both tangy and deeply aromatic. This is comfort food with authentic cultural roots.
Ingredients for Chicken Recipe Filipino Food
Bold vinegar, rich soy, and plenty of garlic make this dish sing. Simple ingredients, huge flavor.
| Ingredient | Amount | Notes |
|---|---|---|
| Chicken Thighs 🍗 | 2 lb | Boneless, skin-on preferred |
| Soy Sauce 🫒 | ½ cup | Low-sodium or regular |
| White Vinegar 💧 | ½ cup | Distilled or cane vinegar |
| Garlic Cloves 🧄 | 8 cloves | Peeled and smashed |
| Bay Leaves 🌿 | 3 pieces | Dried, whole leaves |
| Black Peppercorns 🌶️ | 1 tsp | Whole, cracked or ground |
| Brown Sugar 🍚 | 1 tbsp | Light or dark, optional |
| Olive Oil 🫒 | 1 tbsp | For searing chicken |
| Onion 🧅 | 1 whole | Yellow or white, sliced |
| Water 💧 | ½ cup | For braising liquid |
| Salt 🧂 | ½ tsp | Kosher or sea salt |
[recipe_ingredient_scaler]
The chicken is the star here—thighs stay juicier than breasts during the long braise. I always grab bone-in, skin-on from Whole Foods or my local butcher (they’re usually cheaper and more flavorful). Don’t skip the skin—it renders down into the sauce, adding richness. Look for thighs with good marbling if you’re buying them fresh.
No white vinegar? Apple cider vinegar works too (slightly fruitier taste). Out of soy sauce? Coconut aminos at one-to-one ratio gets you close. Fresh garlic is non-negotiable though—those jarred minced cloves just don’t cut it. Trader Joe’s has great pre-peeled garlic if you’re short on time. The bay leaves? Fresh or dried both work.
This tastes even better the next day after the flavors meld. Keeps for 4-5 days in the fridge, or freeze for 3 months. I always double the sauce—it reheats perfectly over rice or noodles. Leftovers? Shred the chicken and toss it into tacos or fried rice.
Why You’ll Love This Recipe
- One Pan Wonder: I toss everything in, let it simmer, and the soy-vinegar-garlic combo does all the work.
- Flavor Bomb: That tangy vinegar bite mixed with deep soy sauce and fragrant bay leaves? Ridiculously good.
- Feeds the Crew: Honestly, it’s my go-to for Sunday family lunches—everyone cleans their plate.
- Stretches the Budget: Chicken thighs stay juicy and cheap, and leftovers taste even better the next day.
Step-by-Step Instructions for Adobo-Style Chicken
Here’s the method. Simple, flavorful, and foolproof for perfect results every time.
Step 1: Sear the Chicken Thighs to Golden Perfection
Heat the 1 tbsp Olive Oil in a large pot or Dutch oven over medium-high heat. Pat the 2 lb Chicken Thighs dry with paper towels and season lightly with the 0.5 tsp Salt.
Add the chicken skin-side down and sear for 5-6 minutes until the skin turns deep golden brown and crisp. Flip and sear the other side for 3-4 minutes. Remove the chicken and set aside—this renders fat for flavor and starts building the sauce base.
Step 2: Sauté Aromatics Until Fragrant
In the same pot, reduce heat to medium and add the sliced 1 whole Onion. Cook for 3-4 minutes until softened and translucent. Add the 8 cloves Garlic Cloves, 3 pieces Bay Leaves, and 1 tsp Black Peppercorns, stirring constantly for 1 minute to release their aromas.
This step infuses the oil with the bold flavors that define this dish. Be careful not to let the garlic burn—it should turn light golden but never dark brown.
Step 3: Build the Sauce and Simmer
Pour in the 0.5 cup Soy Sauce, 0.5 cup White Vinegar, 0.5 cup Water, and 1 tbsp Brown Sugar. Stir well, scraping up any browned bits from the bottom. Return the chicken to the pot, skin-side up, along with any accumulated juices.
Bring the mixture to a boil, then reduce heat to low. Cover and simmer for 30-35 minutes, turning the chicken halfway through, until the meat is tender and falling off the bone.
Step 4: Reduce the Sauce to Glazed Perfection
Remove the lid and increase heat to medium. Simmer uncovered for 8-10 minutes until the sauce thickens and reduces by about a third. The sauce should coat the back of a spoon and have a rich, glossy appearance.
This step concentrates the flavors and allows the chicken to absorb the tangy, garlicky sauce. Taste and adjust seasoning if needed, though the soy sauce usually provides enough salt.
Step 5: Rest and Serve
Turn off the heat and let the chicken rest in the sauce for 5-10 minutes. This allows the flavors to meld and the meat to reabsorb some of the sauce, ensuring every bite is juicy and flavorful.
Serve hot over steamed rice, spooning the sauce generously over the top. The chicken should be fall-off-the-bone tender with a rich, tangy sauce that’s balanced with garlic and a hint of sweetness.
Pro Tips For Making Chicken Recipe Filipino Food
- Sear First, Simmer Later: I learned this the hard way—brown the chicken thighs well in the pan before adding liquids, or your adobo will taste flat instead of rich and caramelized.
- Crush the Garlic: Sounds weird, but it works: lightly crush the garlic cloves before adding them whole so their flavor infuses faster without burning.
- Balance the Vinegar: Skip the urge to eyeball it—use equal parts soy sauce and white vinegar (about 1/3 cup each) to keep the tang sharp but not overpowering.
- Let It Reduce: After cooking, simmer the sauce uncovered for 5-7 minutes to thicken it slightly—this isn’t the prettiest method, but it’s the tastiest.
Dietary Considerations for This chicken recipe filipino food
Gluten-Free Option
For a gluten-free version, swap the soy sauce with tamari or coconut aminos at a 1:1 ratio. Both maintain that salty, umami depth without gluten. I always keep San-J Tamari in my pantry for this exact reason.
Lower Sodium Alternative
Use low-sodium soy sauce and reduce it to ⅓ cup, then add ¼ cup water to compensate. You’ll cut sodium by nearly 40% without sacrificing flavor. This works especially well if serving with rice, which absorbs the sauce beautifully.
Keto-Friendly Adjustments
Skip the brown sugar entirely—it’s optional anyway—and focus on the natural tang from the vinegar. The chicken thighs are already keto-perfect, with 0g carbs per serving. I’ve made this countless times for keto friends, and they never miss the sugar. 💪
Dairy-Free Naturally
This dish is inherently dairy-free, but double-check your soy sauce label if you’re highly sensitive. Some brands contain trace dairy. I’ve never had issues with Kikkoman or Pearl River Bridge—both are safe bets.
Pescatarian Adaptation
Replace the chicken with firm white fish like cod or mahi-mahi. Reduce simmering time to 8-10 minutes to prevent overcooking. The sauce works beautifully with seafood, and the vinegar cuts through any fishiness.
Extra Lean Protein
If you prefer leaner meat, swap the thighs for chicken breasts. Reduce simmering time to 20-25 minutes to avoid dryness. Honestly, thighs taste better, but this works in a pinch for those watching fat intake.
Nutrition Facts
Frequently Asked Questions
Can I use chicken breasts instead of thighs?
Yes, but reduce simmering time to 20-25 minutes to prevent dryness. Thighs stay juicier, but breasts work if you prefer leaner meat.
How long can I store leftovers?
Leftovers keep for 4-5 days in the fridge or 3 months in the freezer. The flavors deepen overnight, making it taste even better the next day.
What if I don’t have white vinegar?
Use apple cider vinegar for a fruitier twist. Avoid balsamic—its sweetness overpowers the dish. The acidity is key to balancing the soy.
Why does the sauce need to reduce?
Reducing concentrates flavors and thickens the sauce so it clings to the chicken. Skip this step, and you’ll have a watery, bland liquid instead of rich glaze.

Trained in classic French technique but raised on slow-cooked ribs and spicy rubs, she blends culinary skill with smoke and soul.
- Recipe for Boneless Pork Chops in Cast Iron Skillet: Sear and Baste to Juicy Perfection - October 3, 2026
- Recipe for Boneless Cross Rib Roast: Slow-Roasted Beef with Herb Crust - October 3, 2026
- Hamburgers in Sauce Recipe Crock Pot: Slow-Cooked Savory Delight - October 3, 2026