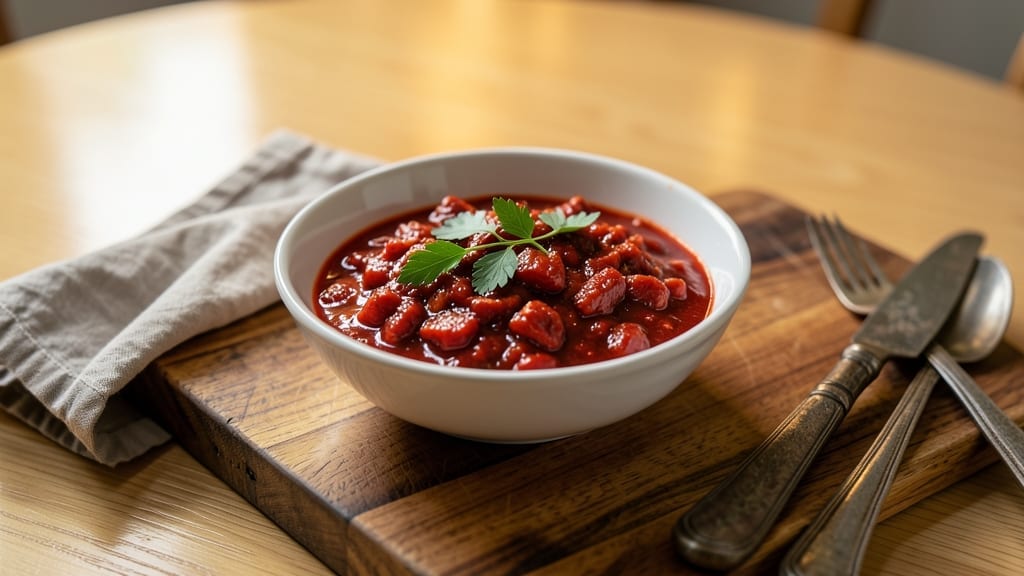
This chili recipe with smoked paprika transforms humble ingredients into a deeply smoky, hearty stew that lingers on your palate like a campfire memory. The secret lies in that first toasted spice—where the smoky aroma builds into layers of warmth that define this dish.
I perfected it during a coastal ride when I needed comfort food that traveled well, and now it’s my go-to for feeding crowds or slow weeknights.
The foundation starts with browning ground beef until deeply caramelized, locking in flavor before adding onions, garlic, and that crucial smoked paprika. A slow simmer lets the spices meld while beans and tomatoes develop their own depth.
The result is a chili with complex smoky-sweet notes that balance perfectly with the richness of the meat.
By the time you serve it, you’ll have a pot of chili so rich and aromatic it feels like a hug in bowl form. The smoky paprika doesn’t just flavor—it transforms, creating a depth that store-bought blends simply can’t match.
Serve with crusty bread or cornbread to soak up every last drop of that smoky goodness.
This recipe works beautifully with ground turkey for a lighter version, or swap in lentils for a vegetarian option. The smoky profile remains the star regardless of protein choice. Let’s get cooking—your taste buds will thank you.
Ingredients for chili recipe smoked paprika
Pantry staples meet smoky magic—just a few ingredients for chili that tastes like campfire comfort.
| Ingredient | Amount | Notes |
|---|---|---|
| Ground Beef 🥩 | 1 ½ lb | 80% lean, finely ground |
| Yellow Onion 🧅 | 1 whole | Medium, diced small |
| Garlic Cloves 🧄 | 4 cloves | Fresh, minced fine |
| Smoked Paprika 🌶️ | 2 tbsp | High quality, toasted |
| Ground Cumin 🌿 | 1 tbsp | Freshly toasted preferred |
| Chili Powder 🌶️ | 1 tbsp | Mild or medium blend |
| Salt 🧂 | 1 ½ tsp | Kosher or sea salt |
| Black Pepper 🌶️ | ½ tsp | Freshly ground preferred |
| Canned Kidney Beans 🫘 | 15 oz | Drained and rinsed |
| Canned Black Beans 🫘 | 15 oz | Drained and rinsed |
| Crushed Tomatoes 🍅 | 28 oz | High quality canned |
| Beef Broth 💧 | 2 cups | Low sodium preferred |
| Dark Brown Sugar 🍚 | 1 tbsp | For depth of flavor |
| Olive Oil 🫒 | 1 tbsp | For browning beef |
[recipe_ingredient_scaler]
The smoked paprika is non-negotiable here. Penzeys or Goya are my go-tos for that authentic smoky depth—avoid the generic grocery store brands that taste like dust. The ground beef should be 80% lean for that perfect meat-to-fat ratio. Costco or local butchers often have the best prices for bulk packs. Toast your spices (paprika, cumin) in a dry pan for 30 seconds before adding—the aroma alone is worth it. For the tomatoes, San Marzano is ideal, but any high-quality canned works. The beans? Low-sodium is key unless you’re adding extra salt later.
No smoked paprika? Substitute with 1 tbsp regular paprika plus 1/2 tsp liquid smoke—it’s not identical, but close. Using turkey instead of beef? Add 1 extra tbsp of cumin to compensate for the milder flavor. Short on beans? Lentils or extra crushed tomatoes stretch it further. The beef broth can be swapped for water plus 1 beef bouillon cube, but quality matters—Swanson or Pacific Foods are reliable. For a vegetarian version, use mushrooms and extra beans to mimic the meaty texture. The brown sugar might seem odd, but it balances the smokiness beautifully—muscovado sugar adds even more depth if you’re feeling fancy.
This chili tastes even better the next day—make extra and freeze portions. Keeps in the fridge for 5 days or freezes for 3 months. I portion it into containers with a scoop of cornbread mix on top—just microwave and eat. The smoky flavor actually intensifies after a day of resting. For reheating, add a splash of water or broth to prevent drying out. If you’re feeding a crowd, double the recipe—it scales perfectly.
Why You’ll Love This Recipe
- One-Pot, One-Spoon Magic: I love that this chili turns a single Dutch oven into my kitchen hero. No endless cleanup—just brown the beef in that same pan for the spices, toss in the onions and garlic, and boom, you’re done. The beans and tomatoes handle themselves while you’re doing other things, like pretending to organize your spice rack.
- Smoky Depth Explosion: The smoked paprika and cumin? Chef’s kiss. That first bite hits you with that campfire aroma, then the dark brown sugar adds just enough sweetness to keep it from being too one-note. My roommate, who’s not a chili fan, asked for seconds because of this combo—proof it’s not just flavor, it’s addictive flavor.
- Feeds a Crowd (or Your Couch): This makes enough for leftovers that actually taste better the next day—trust me, I’ve tested it. Bring it to game day, pack it for work lunches, or just eat it straight from the pot on a Tuesday night. The beans stretch it out, so you’re not stuck with a meat-heavy mess that disappears in one sitting.
- Budget-Friendly Powerhouse: For under $15, you’re getting a meal that feels like a restaurant special. The ground beef and canned beans keep costs low, while the spices (especially that smoked paprika) turn it into something special. My wallet and my taste buds both thank me every time I make this.
Step-by-step instructions for chili recipe with smoked paprika
Here’s the method that delivers deep, smoky flavor with rich layers of texture.
Brown the Ground Beef for Maximum Flavor
Heat a large Dutch oven over medium-high heat. Add the 1 tablespoon olive oil and swirl to coat the bottom evenly. Break the 1½ lb ground beef into small crumbles and add it to the pan, spreading it out in an even layer. Let it cook undisturbed for 3-4 minutes until the beef loses its raw color and begins to brown.
Here’s the thing—don’t stir during the initial browning. You want those meat pieces to develop a deep crust that adds incredible depth to your chili. Once you see the edges starting to crisp and pull away from the pan, use a wooden spoon to gently break up the beef into smaller pieces. Continue cooking for another 2-3 minutes until the beef is fully browned and any pink remains are gone.
Transfer the browned beef to a bowl and set it aside. This step is crucial because it develops the rich, meaty base that carries all the smoky flavors. If you skip browning and go straight to cooking, your chili will taste more like a stew than a flavor-packed chili.
Sauté Aromatics and Build the Spice Base
In the same Dutch oven (no need to clean it—the browned bits are flavor gold), add the diced 1 yellow onion and cook over medium heat for 5-6 minutes, stirring occasionally, until softened and translucent. Add the 4 minced garlic cloves and cook for another 30 seconds until fragrant—you should smell that garlic releasing its sweet aroma.
Now it’s time to build that signature smoky flavor. Reduce the heat to medium-low and add the 2 tablespoons smoked paprika, 1 tablespoon ground cumin, 1 tablespoon chili powder, 1½ teaspoons salt, and ½ teaspoon black pepper. Stir constantly for 1-2 minutes until the spices are toasted and the mixture smells deeply aromatic. This is where the magic happens—the spices should coat the onions and garlic evenly, creating a flavorful crust.
Here’s a pro tip: If you notice the spices burning (they’ll darken too quickly), immediately reduce the heat to low. Burnt spices taste bitter and will overpower the delicate flavors of your chili. You want them to be fragrant, not smoky from burning.
Simmer the Chili for Deep, Rich Flavor
Return the browned beef to the Dutch oven and add the 28 ounces crushed tomatoes, 2 cups beef broth, 1 tablespoon dark brown sugar, 15 ounces drained and rinsed canned kidney beans, and 15 ounces drained and rinsed canned black beans. Stir everything together until well combined, scraping up any browned bits from the bottom of the pan.
Bring the mixture to a gentle boil over medium-high heat, then immediately reduce the heat to low. Here’s the key: cover the pot and let it simmer for 45-60 minutes. You want the chili to bubble gently but not vigorously—this ensures the flavors meld together without the liquid evaporating too quickly. Stir occasionally to prevent the beans from sticking to the bottom.
After 30 minutes, taste the chili and adjust the seasoning if needed. You might need a little more salt or a pinch of chili powder to reach your preferred level of heat. The dark brown sugar will caramelize slightly during cooking, adding a subtle sweetness that balances the smoky and spicy flavors. This is the moment that matters: let it simmer undisturbed so the flavors develop fully.
Finish and Serve with Perfect Texture
Once the chili has simmered for the full 45-60 minutes, it should be thick and rich with a beautiful, glossy surface. If it’s too thick, add a splash of water or beef broth to reach your desired consistency. If it’s too thin, uncover the pot and let it simmer uncovered for another 5-10 minutes to reduce slightly.
Give it one final taste and adjust the seasoning one more time if needed. The chili should be deeply flavorful with a perfect balance of smoky, spicy, and slightly sweet notes. Real talk: the longer it sits, the better it gets as the flavors continue to meld together.
Serve the chili hot with your favorite toppings—sour cream, shredded cheese, or fresh cilantro all work beautifully. This chili is hearty enough to stand alone but also versatile enough to pair with cornbread or crusty bread. Enjoy it immediately while it’s warm, or let it rest for a few hours to let the flavors deepen even more.
Pro Tips For Making Chili Recipe Smoked Paprika
- LET IT CRUST, DON’T STIR YET: That first 3-4 minutes of browning the 1.5 lb ground beef is where the real flavor happens. I used to rush and stir too soon, and my chili always tasted flat—no crust means no depth. Let those beef bits sizzle undisturbed until the edges pull away, then break them up. It’s messy, but it’s worth it for that rich, meaty foundation.
- TOAST THOSE SPICES LOW AND SLOW: When you add the 2 tbsp smoked paprika and 1 tbsp ground cumin, the heat’s your enemy. I learned this after burning three batches—now I keep it at medium-low and stir like my life depends on it. You want them fragrant, not bitter. If they darken too fast, drop the heat immediately. This is where the smoky soul of your chili gets built.
- SCRAPE THE BROWNED BITS: After browning the beef, don’t just dump the spices in and call it a day. Those dark, sticky bits stuck to the Dutch oven? They’re flavor gold. When you add the 28 oz crushed tomatoes and 2 cups beef broth, scrape every last bit off the bottom with a wooden spoon. It’s a little extra effort, but it turns a good chili into a great one.
- SIMMER COVERED, STIR OCCASIONALLY: The 45-60 minute simmer is non-negotiable, but how you do it matters. Cover the pot and let it bubble gently—no hard boiling, or you’ll end up with a thin, watery mess. Stir every 10 minutes or so to keep the kidney beans and black beans from sticking. I used to walk away and come back to a stuck-on disaster. Trust me, this step saves you from scrubbing a pot later.
Essential equipment for chili recipe smoked paprika
Dutch Oven Essentials
Your chili starts and finishes in a heavy-bottomed Dutch oven—I swear by my Le Creuset cast iron for its even heat distribution and ability to handle long simmers. Look for a 5-6 quart size to accommodate your ingredients without crowding.
The lid locks in moisture while allowing steam to escape, creating that perfect balance of thickness and depth. Pro tip: Preheat your Dutch oven empty for 5 minutes before adding oil—this prevents temperature spikes when you introduce the beef. 🔥
Wooden Spoon & Ladle
A sturdy wooden spoon is non-negotiable for stirring without scratching your pot or burning the bottom. I use a 12-inch spoon from OXO that fits comfortably in my Dutch oven. Pair it with a metal ladle for serving—its wide rim helps scoop out thick chili without splatter.
Both should be heat-resistant; test yours by holding the handle over the pot’s edge for 10 seconds without discomfort.
Instant-Read Thermometer
While chili doesn’t require precise temperature control like steak, an instant-read thermometer (like Thermoworks) lets you verify your beef reaches 160°F internal temperature before adding liquids. This prevents undercooked meat while ensuring the spices fully bloom.
I keep mine on the counter near my stove—it’s become my go-to for all protein checks. For extra accuracy, check the beef broth temperature at 160°F before adding to avoid temperature drops.
Spice Grinder & Mortar
Freshly toasted spices make all the difference, and a spice grinder or mortar and pestle elevates your smoked paprika and cumin to restaurant quality. I grind my Penzeys smoked paprika for 30 seconds before adding to the pot—this releases more aroma and prevents clumping.
For a rustic touch, crush whole spices like cumin seeds in the mortar first. Even a rolling pin works in a pinch for quick toasting in a dry pan.
Bean Mashers & Rinsing Tools
Drained beans can be a chili’s downfall if not handled properly. Use a bean masher or potato ricer to gently crush them before adding to the pot—this prevents mushiness and ensures even cooking.
For rinsing, a fine-mesh strainer with a handle (like OXO Good Grips) speeds up the process while removing excess sodium. I rinse my beans under cold water for 10 seconds to wash away excess starch and improve texture.
Optional Upgrades
Investing in a digital scale (like Escali) lets you measure spices to the gram for perfect balance, especially when adjusting heat levels. A smoke detector nearby while toasting spices prevents kitchen fires—trust me, I’ve learned the hard way.
For crowd-pleasing presentations, a chili server with a ladle attachment makes serving effortless. These extras aren’t essential, but they’ll transform your chili from good to unforgettable. 💫
Nutrition facts
Frequently asked questions
Why does browning the beef first matter so much in this chili?
Browning the beef creates a rich, deep crust that locks in all those meaty flavors—this is what makes your chili taste like more than just a stew. The 3-4 minutes of undisturbed cooking develops those delicious Maillard reactions, giving your final dish that irresistible depth. Skipping this step means missing out on the smoky-savory foundation that pairs perfectly with the smoked paprika.
How can I adjust the spice level if I prefer it milder?
Start by reducing the 1 tablespoon chili powder to ½ tablespoon—this cuts heat significantly. You can also remove the seeds from your 15 oz canned beans before adding them, as seeds contain most of the capsaicin. For extra mildness, stir in ¼ cup sour cream at the end—it mellows the flavors beautifully. Taste as you go!
What’s the best way to prevent my chili from getting too thick?
If your chili thickens too much during simmering, simply add ¼ cup of water or beef broth at a time while stirring. The key is to maintain that gentle bubble—45-60 minutes at low heat with occasional stirring keeps it perfect. You can also reduce it later if needed by simmering uncovered for 5-10 minutes. Consistency comes with practice!
Can I make this chili ahead of time?
This chili actually tastes better the next day as the flavors meld together. Let it cool completely, then store in an airtight container in the fridge for 5 days or freeze portions for up to 3 months. When reheating, add a splash of water or broth to prevent drying out. The smoky notes only get more pronounced with time.

Trained in classic French technique but raised on slow-cooked ribs and spicy rubs, she blends culinary skill with smoke and soul.
- Smoked Brisket Recipe: Low and Slow to Fall-Apart Tenderness - November 2, 2026
- Smoked Turkey Breast Recipe: Juicy Pink Center With Crispy Skin Every Time - November 2, 2026
- Leftover Smoked Pulled Pork Chili Recipe: Rustic Flavor Revival in One Pot - November 2, 2026