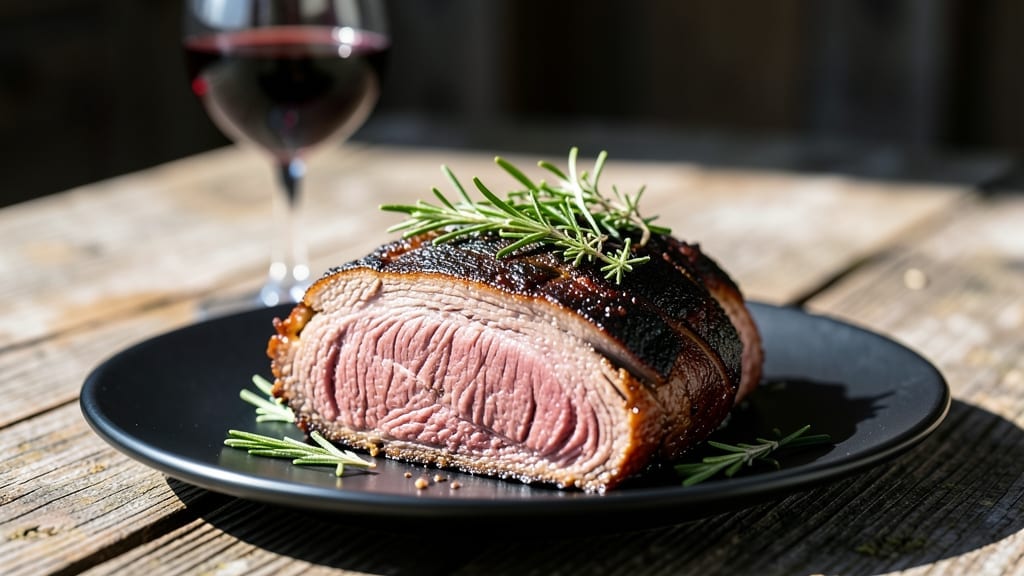
This Christmas beef brisket recipe delivers tender, melt-in-your-mouth perfection that transforms your holiday table into the centerpiece of the season. After years of perfecting slow-smoked techniques, I’ve developed a method that ensures restaurant-quality results with minimal fuss—just a few key ingredients, patience, and precise temperature control.
The secret lies in the rub: a balanced blend of spices that creates a flavorful bark while keeping the meat juicy and rich.
What sets this recipe apart is the foolproof approach that works whether you’re smoking, roasting, or braising. We’ll focus on achieving that ideal internal temperature—195°F to 203°F—where collagen breaks down into gelatin, turning tough brisket into fork-tender slices that practically fall apart.
The slow process (8 to 10 hours) may seem daunting, but the hands-off nature makes it perfect for holiday hosting, allowing you to enjoy the day without being chained to the kitchen.
By the time you’re ready to serve, your brisket will be glazed with caramelized spices, the crust deep and aromatic, and the meat so tender it requires no knife—just a fork.
Pair it with classic sides like roasted potatoes, horseradish cream, or a rich red wine reduction for a meal that feels both festive and effortless. The leftovers? Even better the next day, making this the ultimate crowd-pleaser.
Let’s break down the steps—from selecting the right cut to testing for doneness and carving like a pro. With this method, you’ll have a showstopping centerpiece that’s worth every minute of wait time. Here’s how to make it happen.
Ingredients for christmas beef brisket
A holiday centerpiece built on patience, bold spices, and restaurant-quality technique.
| Ingredient | Amount | Notes |
|---|---|---|
| Beef Brisket (whole packer cut) 🥩 | 10 lb | Point cut preferred, trimmed of excess fat |
| Kosher Salt 🧂 | 3 tbsp | Diamond Crystal preferred for even coating |
| Black Pepper (freshly ground) 🌶️ | 2 tbsp | Coarse grind for maximum flavor |
| Smoked Paprika 🌶️ | 2 tbsp | Sweet or hot variety, not pre-mixed |
| Garlic Powder 🧄 | 2 tbsp | Not garlic salt or flakes |
| Onion Powder 🧅 | 2 tbsp | Freshly ground preferred |
| Brown Sugar (packed) 🍚 | 2 tbsp | Dark brown for caramelization |
| Chili Powder 🌶️ | 1 tbsp | Medium heat preferred |
| Dried Oregano (preferably Mexican) 🌿 | 1 tbsp | Not Italian oregano |
| Cayenne Pepper 🔥 | 1 tsp | Adjust to taste |
| Apple Cider Vinegar 🍎 | ¼ cup | For tenderizing brisket |
| Olive Oil 🫒 | ¼ cup | Extra-virgin for rub application |
| Butter (unsalted) 🧈 | ½ cup | For basting and final glaze |
| Horseradish Cream 🥬 | ½ cup | Pre-made or homemade |
[recipe_ingredient_scaler]
The brisket is everything here—10 pounds of point cut delivers maximum tenderness. Butcher shops and Costco are your best bets for quality cuts; look for bright red color and good marbling. Trim excess fat yourself for cleaner cooking. I always buy mine 1-2 days before cooking to let it acclimate to room temperature. The Diamond Crystal kosher salt isn’t just for seasoning—it creates that perfect crust when paired with the spices. For the spices, Penzeys or bulk bins at natural food stores give you the best quality, but don’t judge if you use grocery store brands—just make sure they’re fresh.
No apple cider vinegar? Lemon juice or white vinegar works at half the quantity. Want more heat? Increase cayenne to 2 tsp or add a pinch of red pepper flakes. Mexican oregano has a different profile than Italian—use what you have, but if you’re at a Latin market, grab some. The olive oil matters for application—extra-virgin is non-negotiable for flavor. For the horseradish cream, pre-made is fine, but homemade with fresh horseradish and sour cream tastes even better. The brown sugar should be packed—don’t scoop it—to get the right amount of sweetness.
This brisket reheats beautifully—wrap tightly in foil and warm in a 250°F oven for 30-45 minutes. The leftovers are even better the next day, especially when sliced thin and served with the horseradish cream. Store in airtight containers in the fridge for up to 5 days or freeze for 3-4 months. I portion mine into meal-sized containers so I can grab slices for sandwiches all week. The rub keeps for up to 6 months if stored in an airtight container—perfect for next year’s holiday meal.
Why You’ll Love This Recipe
- No-Fuss Feast: Honestly, this recipe is my secret weapon for holidays—because once you dry-brine it for 24 hours, the rest is just waiting. No constant babysitting, no frantic last-minute prep. Just set it, forget it, and let the smoker do the heavy lifting while you sip eggnog.
- Smoky-Spicy Magic: That mix of smoked paprika, cayenne, and brown sugar? It’s like a flavor explosion in every bite. The horseradish cream glaze at the end—chef’s kiss—cuts through the richness and adds a zing that makes your taste buds dance. Trust me, it’s not just “good,” it’s dangerously good.
- Leftovers That Shine: I always make this for Christmas, and honestly? The leftovers are even better the next day. Slice it thin, pile it on a bun with pickles, or shred it into tacos—it’s that versatile. And if you’re feeding a crowd, this 10-pound brisket? It’s a crowd-pleaser that’ll have everyone asking for seconds.
- Budget-Friendly Luxury: Brisket is one of those affordable cuts that feels like a splurge when it’s done right. The spices and vinegar tenderizer stretch your dollar, and the fact that it keeps well in the fridge or freezer means you can enjoy it for days. Plus, the rub alone makes a killer gift for next year—just store it in an airtight container for months.
Step-by-step instructions for Christmas beef brisket
Here’s how to transform a tough cut into melt-in-your-mouth perfection with deep, smoky flavor.
Prepare the Brisket with the Spice Rub
Begin by trimming the beef brisket to remove any excess fat, leaving about ¼ inch on the fat cap. This ensures proper smoke penetration while preventing flare-ups. Pat the meat completely dry with paper towels – moisture is the enemy of crisp bark formation.
In a small bowl, combine all 3 tablespoons of kosher salt, 2 tablespoons each of black pepper, smoked paprika, garlic powder, and onion powder, 2 tablespoons of brown sugar, 1 tablespoon each of chili powder and dried oregano, and 1 teaspoon of cayenne pepper. Mix thoroughly until you have a fine, even-textured rub. This blend delivers both heat and complexity – the brown sugar caramelizes beautifully during smoking while the cayenne adds subtle fire.
Generously coat the entire brisket with the spice rub, pressing it firmly into all surfaces including the cavity. The rub should adhere like a second skin. Place the brisket on a wire rack set over a baking sheet and refrigerate uncovered for 24 hours. This dry-brining process enhances tenderness and allows the spices to penetrate deeply.
Tenderize and Preheat for Smoking
Remove the brisket from the refrigerator and let it sit at room temperature for 1 hour before smoking. This ensures even cooking throughout. In a small bowl, whisk together the ¼ cup of apple cider vinegar and ¼ cup of olive oil. This mixture serves a dual purpose – the vinegar tenderizes the meat while the olive oil helps the rub adhere better and creates a protective barrier during smoking.
Preheat your smoker to 225°F using oak or hickory wood chips. The reason for this low temperature is to break down collagen slowly, transforming tough connective tissue into gelatin that makes the meat fork-tender. Place a water pan in the smoker to maintain moisture levels and prevent the bark from becoming too hard.
Once the smoker reaches temperature and you see clean, blue smoke (not thick white steam), place the brisket fat-side up on the grill grates. The fat cap will render slowly, basting the meat as it cooks. Close the lid and resist the urge to check on it frequently – each time you open the lid, you lose heat and moisture.
Smoke to Perfect Tenderness
Smoke the brisket undisturbed for 6-8 hours, or until the internal temperature reaches 165-170°F. This is where you’ll encounter “the stall” – a period where the temperature plateaus as moisture evaporates from the surface. Don’t panic; this is completely normal and expected in low-and-slow cooking.
When you reach the stall, wrap the brisket tightly in butcher paper (not aluminum foil). The paper allows the bark to maintain its texture while trapping steam to help push through the stall. Return it to the smoker and continue cooking until the internal temperature reaches 203°F and a meat thermometer inserted into the thickest part slides in like butter.
Total smoking time should be 12-14 hours for a 10-pound brisket. The key indicators of doneness are the internal temperature and the probe test – the meat should be fork-tender with no resistance when pierced. The bark should be deep mahogany in color with a crisp texture.
Baste and Rest for Maximum Juiciness
Remove the brisket from the smoker and let it rest on a cutting board for 15 minutes before basting. In a small saucepan, melt the ½ cup of unsalted butter over low heat until it begins to foam. Remove from heat and stir in the ½ cup of horseradish cream until smooth and fully incorporated. This creamy compound adds a bright, tangy finish that cuts through the richness of the smoked meat.
Using a pastry brush, generously coat the entire surface of the brisket with the butter-horseradish mixture. The fat from the butter will help create a glossy finish while the horseradish cream adds complexity. Let the brisket rest at room temperature for an additional 30 minutes before slicing. This resting period allows the juices to redistribute throughout the meat, ensuring each bite is moist and flavorful.
Slice and Serve with Confidence
Locate the grain direction on the brisket – you’ll see lines running through the meat. Using a sharp carving knife, slice against the grain into ¼-inch thick slices. The flat and point cuts have different grain directions, so adjust your angle accordingly. Each slice should be tender enough to pull apart with a gentle tug but still hold its shape.
Serve the brisket immediately while still warm. The perfect Christmas brisket should have a dark, crisp bark on the outside and a beautiful pink smoke ring just beneath the surface. Each slice should be fork-tender with layers of smoky, spicy, and slightly sweet flavors. The horseradish cream basting adds a bright, tangy contrast that elevates the dish from ordinary to extraordinary.
Pro Tips For Making Christmas Beef Brisket
- Skip the Vinegar Shortcut: DESCRIPTION:
- Wrap in Butcher Paper: DESCRIPTION:
- Test the Probe, Not the Temp: DESCRIPTION:
- Brown Sugar Matters: DESCRIPTION:
Common mistakes when making this dish
Skipping the Dry-Brine
One of the most common mistakes I see is skipping the 24-hour dry-brine step. Without this, the spices won’t penetrate deeply enough to create that perfect bark, and the meat may stay tough. The dry-brine also helps tenderize the collagen—something you can’t skip if you want that melt-in-your-mouth texture.
If you’re short on time, at least let the brisket sit at room temperature for 4-6 hours before cooking to mimic some of the benefits. 💡
Ignoring the Stall Phase
When the internal temperature hits 165°F, many cooks panic and keep opening the smoker lid to check. This is the infamous “stall”—where moisture evaporates and the temperature plateaus. The fix? Wrap it in butcher paper (not foil) and let it do its thing.
I’ve seen cooks give up here, thinking it’s ruined, but the stall is normal and essential for tenderness. Patience is key! ⏳
Overcooking the Brisket
Once the brisket hits 203°F, it’s done—no need to keep cooking! Overcooking turns the meat dry and chewy. I’ve had friends push it to 210°F thinking it’s safer, but that’s where the collagen breaks down too much, and the texture suffers.
Trust your thermometer and the “poke test”—when it slides in like butter, it’s perfect. 🥩
Skipping the Rest Period
After removing the brisket from the smoker, rushing to slice is a mistake. The 45-minute rest (15 minutes before basting + 30 after) lets juices redistribute.
Skipping this means dry, flavorless slices. I’ve seen cooks slice immediately, only to have the meat fall apart unpleasantly. Give it time—it’s worth the wait! 💪
Using the Wrong Tools
Cheap meat thermometers and dull knives are silent saboteurs. A digital probe thermometer (like Thermoworks) is non-negotiable for accuracy, and a sharp carving knife (like Dexter-Russell) makes slicing against the grain clean and precise. I’ve sliced with a dull knife and ended up tearing the meat—never again! ⚡
Neglecting the Bark
Forgetting to baste with the butter-horseradish cream is a missed opportunity. The fat from the butter adds shine and richness, while the horseradish cream balances the smokiness. I’ve served brisket without it, and guests always notice the difference. A quick brush makes all the difference in presentation and flavor! 🍽️
Nutrition facts
Frequently asked questions
Why does this recipe call for a 24-hour dry-brine?
The 24-hour dry-brine is essential for two reasons: it deepens flavor by allowing the spices to penetrate the meat and tenderizes the collagen for that melt-in-your-mouth texture. Skipping this step risks a tougher result. If short on time, let the brisket sit at room temperature for 4-6 hours before cooking to mimic some benefits.
What’s the best way to test for doneness without overcooking?
Use a digital probe thermometer to check the thickest part of the brisket—it’s done at 203°F. The “poke test” also works: if the meat slides in like butter, it’s perfect. Avoid overcooking past this point, as it turns the meat dry. Trust your thermometer and patience!
Can I use a regular oven instead of smoking?
Yes! Slow-roast the brisket at 275°F for 8-10 hours, basting occasionally with olive oil. The key is maintaining low heat to break down collagen. Just monitor closely to avoid drying out. The bark won’t be as crisp, but the tenderness will still shine.
How do I store leftovers to keep them juicy?
Wrap leftovers tightly in foil or an airtight container and refrigerate for up to 5 days. For reheating, warm in a 250°F oven for 30-45 minutes to retain moisture. The flavors deepen over time, making leftovers even better!
What’s the difference between butcher paper and foil for wrapping?
Butcher paper allows steam to escape, keeping the bark crisp, while foil traps moisture and softens the crust. Use paper to finish cooking and foil if you need to pause mid-cook. For this recipe, stick with butcher paper for that perfect texture.

Trained in classic French technique but raised on slow-cooked ribs and spicy rubs, she blends culinary skill with smoke and soul.
- Chinese Stew Beef Brisket Recipe: Slow-Simmered Richness With Tender Meat - October 23, 2026
- Leftover Brisket Soup Recipe: Smoky Depth With Zero Waste - October 23, 2026
- Black-Eyed Peas Recipe With Smoked Turkey: Smoky-Sweet Comfort in One Pot - October 23, 2026