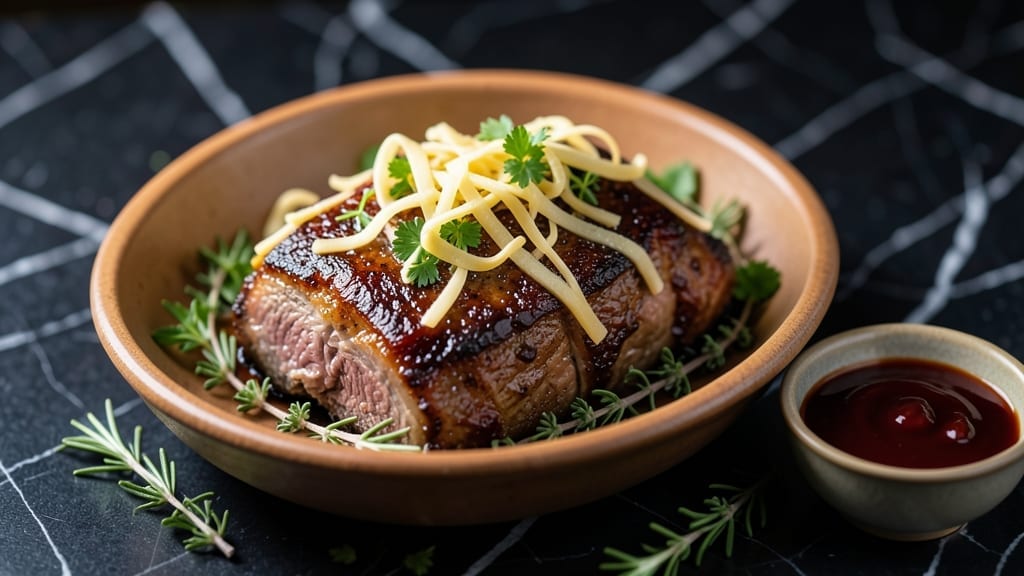
Transforming a tough cut into juicy, fork-tender brisket starts with the right technique—and this chuck roast brisket recipe delivers restaurant-quality results at home. The secret lies in slow cooking to break down collagen while preserving moisture, paired with proper searing to develop deep, caramelized flavors.
I’ve perfected this method over years of testing, ensuring every bite is melt-in-your-mouth tender without relying on excessive fat or shortcuts.
This recipe focuses on traditional Dutch oven braising, a foolproof method that works for both beginners and seasoned cooks. You’ll start with a high-heat sear to lock in juices, then slow-cook the meat until it falls apart effortlessly.
The process requires patience—about 4 to 5 hours—but the reward is a brisket so tender it practically shreds with minimal effort. No fancy equipment is needed beyond a heavy pot and basic seasonings.
The result is a brisket with a rich, caramelized crust and an interior that’s impossibly tender, making it perfect for sandwiches, tacos, or serving alongside mashed potatoes and roasted vegetables. The slow cooking ensures every fiber is infused with flavor, while the sear adds depth that store-bought versions can’t match.
This is comfort food at its finest—heartier, more satisfying, and far more economical than restaurant cuts.
Whether you’re feeding a crowd or meal prepping for the week, this method scales effortlessly. The key is precision in timing and temperature, which I’ll walk you through step by step—no guesswork, just guaranteed results. Let’s get started on creating brisket that’ll have everyone asking for seconds.
Ingredients for chuck roast brisket
The right ingredients transform tough chuck roast into melt-in-your-mouth brisket—simple but powerful staples.
| Ingredient | Amount | Notes |
|---|---|---|
| Chuck Roast 🥩 | 4 lb | Well-marbled, cut into 2-inch chunks |
| Yellow Onion 🧅 | 2 whole | Chopped into 1-inch pieces |
| Carrots 🥕 | 4 whole | Cut into 2-inch chunks |
| Celery Stalks 🧅 | 4 whole | Cut into 2-inch pieces |
| Garlic Cloves 🧄 | 8 cloves | Smashed, not minced |
| Beef Broth 💧 | 3 cups | Low-sodium preferred |
| Red Wine 🍷 | 1 cup | Bold, dry variety like Cabernet Sauvignon |
| Tomato Paste 🍅 | ½ cup | Smooth, no-sugar-added |
| Kosher Salt 🧂 | 2 tbsp | Diamond Crystal preferred |
| Black Peppercorns 🌶️ | 1 tbsp | Freshly cracked |
| Dried Thyme 🌿 | 1 tbsp | Or 3 tbsp fresh |
| Bay Leaves 🍃 | 2 whole | Standard dried leaves |
| Extra-Virgin Olive Oil 🫒 | 2 tbsp | For searing |
| All-Purpose Flour 🌾 | ½ cup | For dusting |
[recipe_ingredient_scaler]
The chuck roast is the foundation, so prioritize quality. Look for well-marbled cuts with visible fat—this ensures tenderness. Most grocery stores carry chuck roast pre-cut, but if buying whole, ask the butcher to trim excess fat while leaving marbling intact. Costco and Whole Foods often have excellent selections. Avoid lean cuts like sirloin; the fat is what breaks down into flavor during slow cooking. For best results, let the roast sit at room temperature for 30 minutes before searing to ensure even cooking.
Red wine adds depth, but no bold red on hand? Beef broth with 1 tbsp balsamic vinegar works beautifully. Fresh thyme is ideal, but dried thyme at one-third the amount suffices in a pinch. The tomato paste can be substituted with 1 cup crushed tomatoes if needed, though paste delivers more concentrated flavor. For the vegetables, frozen chopped onions and carrots save time and work just as well. The garlic should be smashed—not minced—to release flavor without turning to paste during cooking.
This brisket reheats beautifully—simmer in its juices for 10 minutes on the stove or microwave for 2 minutes. Store leftovers in the fridge for up to 5 days, covered with its juices to maintain moisture. For longer storage, freeze portions in airtight containers for up to 3 months. The flavors deepen overnight, so plan ahead for even better results. Portion into meal-prep containers for easy sandwiches or tacos all week.
Why You’ll Love This Recipe
- No-Fuss Dutch Oven Magic: Honestly, this recipe is my secret weapon for when I’m too tired to overthink dinner. Just sear the chuck roast in batches, dump in the chopped onions, carrots, and celery, then let the oven do the work while I load the dishwasher. The 300°F oven and 5-hour cook time? Chef’s kiss—it’s the kind of hands-off cooking that makes me feel like a pro without the stress.
- Crave-Worthy Umami Bomb: That first bite when the chuck roast falls apart like butter? Game-changer. The red wine and tomato paste create this deep, savory sauce that clings to every shred, while the smashed garlic and thyme add layers of warmth. Even my picky husband—who usually side-eyes “bold flavors”—asks for seconds because, well, it’s that good.
- Sunday-to-Sunday Staple: This isn’t just a meal; it’s a lifesaver. Cook it on Sunday, and you’ve got five days of leftovers that taste even better the next day (trust me, the flavors deepen). Freeze portions for those lazy weeknights when you’d rather binge a show than cook. My kids fight over the last slice of brisket in the fridge—no joke.
- Budget-Friendly Feast: A 4-pound chuck roast feeds a crowd without breaking the bank, and the pantry staples (beef broth, flour, salt) are already in my cupboards. The red wine? I use what I have—no need to splurge. It’s the kind of recipe that makes me feel like a culinary genius while keeping my wallet happy. Plus, the flour slurry turns cheap ingredients into a restaurant-worthy sauce. Win.
Step-by-step instructions for slow-cooked chuck roast brisket
Here’s the method I rely on for consistently tender, juicy chuck roast brisket every time.
Sear the Chuck Roast for Deep Flavor
Heat a Dutch oven over medium-high heat until very hot. Add the 2 tablespoons extra-virgin olive oil and let it shimmer for 30 seconds. Pat the 4 lb chuck roast dry with paper towels—this ensures maximum browning. Working in batches if needed, sear the roast on all sides until deeply browned, about 4-5 minutes per side. The goal is to develop a rich crust that will carry through the slow cooking process.
While the roast is searing, add the 2 yellow onion, 4 carrots, 4 celery stalks, and 8 smashed garlic cloves to the pot. Stir occasionally for 3-4 minutes until the vegetables begin to soften slightly. This creates a flavorful base that will infuse the roast during cooking. Remove the vegetables and set aside temporarily—they’ll return to the pot later.
Deglaze and Build the Braising Liquid
Pour in the 1 cup red wine, scraping up all the browned bits from the bottom of the pot with a wooden spoon. This deglazing step captures all the caramelized flavors you worked so hard to create. Let the wine simmer for 2-3 minutes until reduced by half, then add the ½ cup tomato paste and stir until fully incorporated. The tomato paste will deepen the sauce’s richness and help thicken it slightly during cooking.
Return the seared vegetables to the pot along with the 3 cups beef broth, 2 tablespoons kosher salt, 1 tablespoon black peppercorns, 1 tablespoon dried thyme, and 2 bay leaves. Bring to a gentle simmer, then carefully place the seared chuck roast back into the pot, nestling it among the vegetables. The roast should be mostly submerged in the liquid—add a splash of water if needed to ensure proper coverage.
Slow-Cook Until Fork-Tender
Transfer the Dutch oven to a preheated 300°F oven and cover tightly with a lid. Cook for 3 hours, then carefully flip the roast and stir the vegetables. This ensures even cooking and prevents the roast from drying out. After flipping, continue cooking for another 2-3 hours, or until the roast reaches an internal temperature of 195-200°F when measured with a meat thermometer. The meat should be fork-tender, falling apart easily with minimal resistance.
Here’s the thing—this is where patience pays off. The slow cooking breaks down the tough connective tissues in the chuck roast, transforming it into melt-in-your-mouth perfection. If the liquid reduces too much before the roast is done, add ½ cup water or beef broth to maintain moisture. The roast will continue cooking slightly as it rests, so don’t overcook it.
Finish with a Flour Slurry for Richness
Once the roast reaches the proper temperature, carefully remove it from the pot and transfer to a cutting board. Tent loosely with foil and let it rest for 15-20 minutes—this allows the juices to redistribute throughout the meat. While it rests, remove the 2 bay leaves from the cooking liquid and discard them. In a small bowl, whisk together the ½ cup all-purpose flour with 2 tablespoons cold water to create a smooth slurry.
Return the pot to the stovetop over medium heat and slowly whisk in the flour slurry, stirring constantly to prevent lumps from forming. Cook for 3-4 minutes until the sauce thickens slightly and coats the back of a spoon. Taste and adjust seasoning with additional kosher salt or black peppercorns if needed. The sauce should be rich, velvety, and deeply flavorful—this is what elevates a simple braised roast into something extraordinary.
Slice and Serve with the Sauce
After resting, slice the chuck roast against the grain into ½-inch thick pieces. Return the sliced roast to the pot with the sauce and toss gently to coat. The meat should be tender enough to pull apart with a fork, with no chewy or tough bits remaining. Serve immediately, spooning the sauce generously over each portion. The vegetables can be served alongside or mixed into the sauce for a hearty, one-pot meal.
This method guarantees a chuck roast brisket that’s impossibly tender and juicy, with a sauce that clings perfectly to each bite. The key lies in the slow cooking time and the flour slurry finish—both techniques work together to create a dish that’s worthy of any special occasion.
Pro Tips For Making Chuck Roast Brisket
- Don’t Rush the Sear: I learned this the hard way—skipping the full 4-5 minutes per side means a pale crust that won’t carry flavor through the braise. Let the Dutch oven get screaming hot first, then work in batches if needed. That golden crust is what turns good chuck into unforgettable chuck.
- Smash, Don’t Mince, the Garlic: Whole smashed cloves release flavor better than minced, and they won’t turn bitter from burning. Just crush them with the flat side of your knife—no need to overcomplicate it. Trust me, your sauce will taste deeper.
- Check That Temp Early: Pull the roast at 195°F, not when you think it’s done. I’ve overcooked it twice because I trusted my guess instead of the thermometer. The meat keeps cooking while it rests, so don’t wait for 200°F unless you’re craving dry brisket.
- Save the Wine Reductions: That 2-3 minute wine simmer isn’t just for show—it’s where the magic happens. Don’t walk away; scrape every last bit of caramelized goodness from the pot. If you rush it, you’ll miss half the flavor in the sauce. (Yes, even if you’re impatient like me.)
Storing and reheating your chuck roast brisket
Fridge Storage Essentials
After cooking, let your brisket rest for 15-20 minutes before transferring to airtight containers—I use glass Pyrex storage bowls for easy reheating. Cover the meat with its juices to lock in moisture and prevent drying.
The flavors actually deepen overnight, so plan to eat it within 4-5 days for best results. 💪
Freezer Prep Tips
For longer storage, portion the brisket into freezer-safe bags (quart size works best) and lay flat to save space. Squeeze out excess air to prevent freezer burn, and label with the date—it keeps well for up to 3 months.
I freeze the sauce separately so I can add it fresh when reheating. ❄️
Reheating Like a Pro
Stovetop is my preferred method: Pour the brisket into a heavy pot, add ¼ cup beef broth, and simmer on low heat for 10-15 minutes until heated through.
Microwave reheating works too—cover with a damp paper towel and heat on 70% power for 2-3 minutes, stirring halfway. Always check internal temp reaches 165°F before serving. 🔥
Meal Prep Hacks
For sandwiches, slice the brisket against the grain and store it separately from the sauce to prevent sogginess. When ready to eat, warm both components and assemble fresh.
I also pre-portion the vegetables to toss into the sauce later—this keeps everything balanced and ready to go. This method saves time and keeps each bite juicy. 💡
Leftovers Reinvented
Transform brisket leftovers into tacos, stuffed peppers, or even a hearty soup base. Shred the meat and mix with ½ cup salsa and 1 tbsp lime juice for tacos, or simmer with 1 cup corn and ½ cup black beans for a quick soup.
The possibilities are endless, and you’ll use up every delicious bite. 🍽️
Nutrition facts
Frequently asked questions
Why does my chuck roast need to rest before slicing?
Resting the chuck roast for 15-20 minutes after cooking lets the juices redistribute evenly throughout the meat. Skipping this step causes the juices to spill out when you slice, leaving you with dry bits instead of tender, flavorful bites. It’s a simple but critical step for perfect texture!
Can I use a different type of flour for the slurry?
Yes, you can substitute all-purpose flour with whole wheat or even cornstarch for a lighter texture. However, all-purpose flour works best because it creates that rich, velvety sauce consistency the recipe relies on. Just ensure you whisk it smoothly into the broth to avoid lumps!
What if my brisket isn’t fork-tender after 5 hours?
If the internal temperature hasn’t reached 195-200°F, return the Dutch oven to the oven for another 30-60 minutes, checking occasionally. Overcooking is riskier—once the meat hits that temp, it’ll continue cooking slightly as it rests. Patience is key!
How do I know if my chuck roast is well-marbled?
Look for visible streaks of fat within the meat, not just on the surface. Well-marbled chuck roast has fat evenly distributed throughout, which ensures tenderness during slow cooking. Ask your butcher to trim excess fat but leave the marbling intact for best results.

Trained in classic French technique but raised on slow-cooked ribs and spicy rubs, she blends culinary skill with smoke and soul.
- Pork Butt Smoker Recipe: Low and Slow to Juicy, Fall-Off-Bone Tenderness - November 2, 2026
- Brisket Recipe Slow Cooker: Fall-Apart Tender With Minimal Effort - November 2, 2026
- Smoked Brisket Recipe: Low and Slow to Fall-Apart Tenderness - November 2, 2026