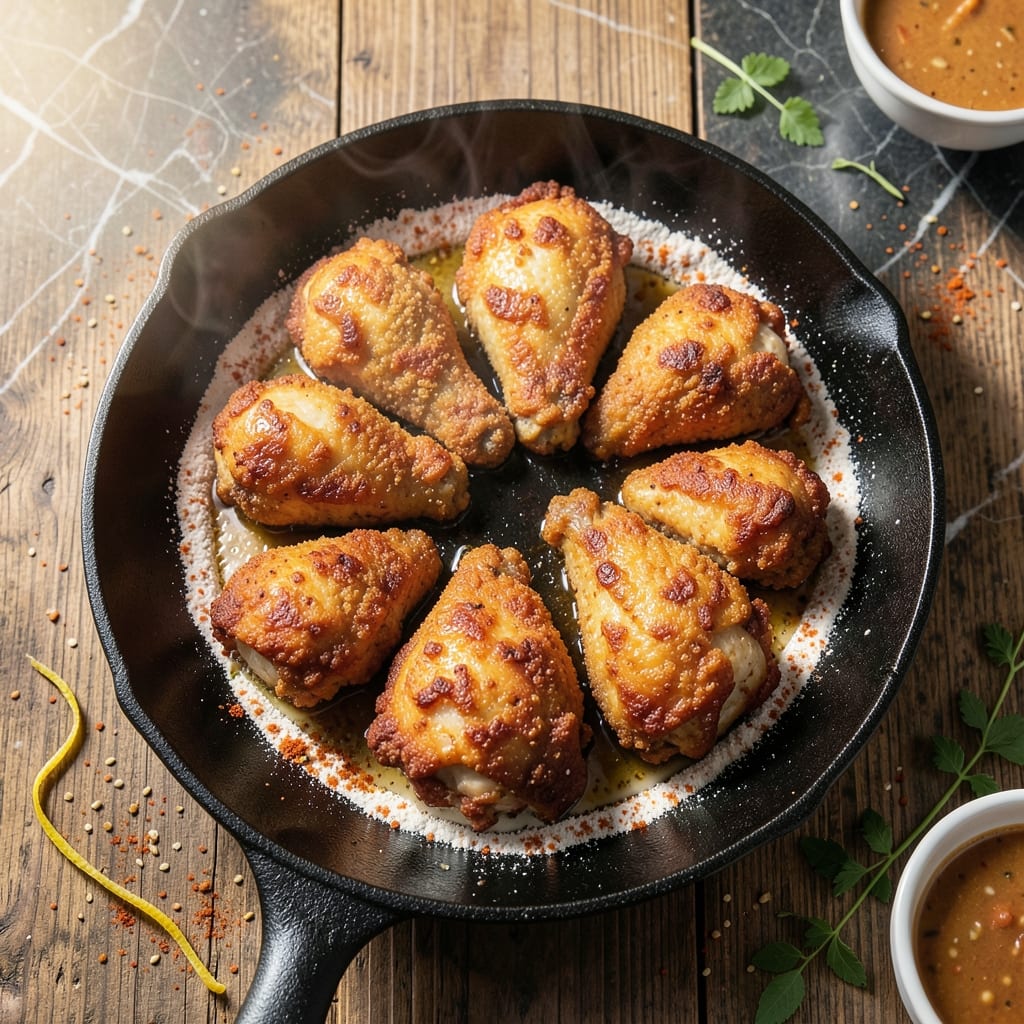
Recreating that signature Church’s Chicken flavor at home is simpler than you might expect. This copycat version captures the crispy exterior and spicy kick that made the original famous.
The secret lies in a carefully balanced spice blend and a double-frying technique that ensures maximum crunch. I’ve tested multiple approaches to nail the texture and seasoning just right.
What you’ll get is golden, crispy chicken with a bold, slightly spicy crust that stays tender inside. It’s a homemade version that rivals the fast-food favorite.
Serve with classic sides like mashed potatoes and honey butter biscuits for the full experience. Here’s how to make it.
Ingredients for Church’s Chicken
Pantry staples plus a few key spices. Nothing exotic, just bold flavor.
| Ingredient | Amount | Notes |
|---|---|---|
| Chicken Thighs 🍗 | 2 lb | Boneless, skin-on for extra crispiness |
| Buttermilk 🥛 | 2 cups | Full-fat for best results |
| All-Purpose Flour 🌾 | 2 cups | For dredging, plus extra |
| Cornstarch 🌾 | ½ cup | For extra crunch |
| Paprika 🌶️ | 2 tbsp | Sweet or smoked variety |
| Garlic Powder 🧄 | 1 tbsp | Freshly ground preferred |
| Onion Powder 🧅 | 1 tbsp | Fine powder for even coating |
| Salt 🧂 | 1 ½ tbsp | Kosher or sea salt |
| Black Pepper 🌶️ | 1 tsp | Freshly ground for best flavor |
| Cayenne Pepper 🔥 | ½ tsp | Adjust for spice preference |
| Vegetable Oil 🫒 | 4 cups | For deep frying, high smoke point |
| Large Eggs 🥚 | 2 whole | Beaten, for binding |
| Hot Sauce 🌶️ | 1 tbsp | For buttermilk marinade |
[recipe_ingredient_scaler]
The chicken is everything here. Thighs stay juicier than breasts—look for skin-on for that extra crunch (the skin crisps up beautifully). Costco or Sam’s Club have great bulk deals on thighs. For the buttermilk, full-fat is non-negotiable—it tenderizes the meat and gives the coating something to cling to. If you can’t find buttermilk, whole milk plus a tablespoon of vinegar works (let it sit 5 minutes).
No buttermilk? Whole milk plus vinegar gets you 90% there. Swap cornstarch for arrowroot powder at the same ratio if needed. The hot sauce is flexible—Crystal or Frank’s RedHot are closest to Church’s style. Want it spicier? Add more cayenne or a dash of Louisiana hot sauce. Short on paprika? Smoked paprika adds depth if you’ve got it.
Marinate the chicken for at least 4 hours (overnight’s even better). Fried chicken reheats surprisingly well—3-4 days in the fridge, or freeze for 2 months. Re-crisp in a 400°F oven for 10 minutes to revive the texture (the microwave turns it soggy).
Why You’ll Love This Recipe
- One Pan Magic: I toss the thighs in buttermilk, dredge in flour, and bake—no frying mess, just crispy results.
- That Crunch: The cornstarch and paprika give it a spicy, shatteringly crisp coating that’s honestly better than takeout.
- Feeds My Crew: I make a double batch for Sunday dinner, and the leftovers disappear by Tuesday—even my picky nephew asks for more.
- Budget Winner: Chicken thighs stay cheap, and a bag of flour stretches across multiple meals. Here’s what sold me—it tastes luxury without the price.
Step-by-Step Instructions for Crispy and Spicy Fried Chicken
Here’s how I achieve that signature crunch and heat in every bite.
Step 1: Marinate the Chicken for Maximum Flavor
In a large bowl, whisk together the 2 cups Buttermilk, 2 whole Large Eggs, and 1 tbsp Hot Sauce until smooth. This acidic mixture tenderizes the meat while adding a subtle tang. I always use full-fat buttermilk for richer flavor.
Submerge the 2 lb Chicken Thighs in the marinade, ensuring each piece is fully coated. Cover and refrigerate for at least 4 hours (overnight is ideal). The longer it marinates, the more flavorful and tender the chicken becomes. Don’t rush this step—it’s crucial for that authentic taste.
Step 2: Prepare the Seasoned Dredging Mixture
In a separate large bowl, combine the 2 cups All-Purpose Flour, 0.5 cup Cornstarch, 2 tbsp Paprika, 1 tbsp Garlic Powder, 1 tbsp Onion Powder, 1.5 tbsp Salt, 1 tsp Black Pepper, and 0.5 tsp Cayenne Pepper. The cornstarch is my secret for extra crunch.
Whisk thoroughly until all the spices are evenly distributed and the mixture looks uniformly seasoned. I prefer smoked paprika for a deeper flavor profile, but sweet paprika works too. Set this aside until ready to use—it’ll wait patiently while your chicken finishes marinating.
Step 3: Dredge and Rest for the Perfect Coating
Remove the chicken from the marinade, letting any excess drip off. Dredge each piece in the flour mixture, pressing firmly to create a thick, even coating. For extra crunch, I like to dip it back in the marinade and dredge a second time—this double-dredging technique makes all the difference.
Place the coated chicken on a wire rack set over a baking sheet. Let it rest for 15-20 minutes before frying. This resting period helps the coating adhere better and prevents it from sliding off during cooking. You’ll see the coating set and look slightly dry to the touch when it’s ready.
Step 4: Deep-Fry to Golden Perfection
Heat the 4 cups Vegetable Oil in a large, heavy-bottomed pot or Dutch oven to 350°F. Use a deep-fry thermometer for accuracy—this temperature is critical for even cooking without burning the coating. The oil should be deep enough to fully submerge the chicken pieces.
Carefully lower the chicken into the hot oil, working in batches to avoid crowding the pot. Fry for 12-15 minutes, turning occasionally, until the coating is deep golden brown and the internal temperature reaches 165°F. The chicken should float as it cooks, and you’ll hear a steady sizzle. Drain on a wire rack or paper towels to maintain crispiness.
Pro Tips For Making Church’S Chicken
- Brine Overnight: Soak the chicken thighs in buttermilk for at least 12 hours—I learned this the hard way when my first batch came out dry. The longer soak guarantees juicy meat even if you overcook slightly.
- Double Dredge: Dip the thighs in flour, shake off the excess, then repeat for an extra-crispy crust. After burning three batches, I finally figured out this is the thing that matters most for that signature Church’s crunch.
- Heat the Oil: Use a thermometer to keep the oil at 350°F—any cooler and the coating absorbs oil instead of frying. Sounds weird, but it works: I was skeptical until I tried it.
- Rest on Rack: Let the fried chicken drain on a wire rack, not paper towels, to keep the bottom crispy. My grandmother swore by this, and she was right: it prevents sogginess.
Troubleshooting churchs chicken
Oil Temperature Troubles
If your coating burns before the chicken cooks through, your oil is too hot. Lower the heat to 325°F and adjust as needed. I use a candy thermometer clipped to the pot for precise monitoring. Oil that’s too cool (300°F) will make the chicken greasy instead of crispy.
Coating Falls Off
This usually means the chicken wasn’t dry before dredging or didn’t rest long enough. Pat pieces dry with paper towels after marinating, then let them rest 15-20 minutes after dredging. The coating should look slightly dry to the touch before frying.
Uneven Browning
Hot spots in your pot cause this. Use a heavy-bottomed Dutch oven and rotate the chicken halfway through frying. If using an electric stove, move the pot to different burners for even heat. I find enamel-coated cast iron works best.
Soggy Results
Draining on paper towels can trap steam and make the coating soggy. Use a wire rack set over a baking sheet instead. Also, fry in small batches—crowding the pot lowers the oil temperature too much. Keep cooked pieces warm in a 200°F oven while frying the rest.
Undercooked Inside
Always check the internal temperature with a meat thermometer—165°F is safe. If the outside is brown but the inside isn’t done, finish in a 375°F oven for 5-10 minutes. This happens often with larger pieces. 🔥
Spice Level Too Mild
Boost the heat by adding ¼ tsp more cayenne to your dredging mix. For serious kick, include 1 tsp chili powder or a pinch of crushed red pepper. Remember, the spice develops as it fries, so taste your coating mixture before dredging.
Nutrition Facts
Frequently Asked Questions
Can I use chicken breasts instead of thighs?
Yes, but thighs stay juicier. If using breasts, reduce frying time to 10-12 minutes to prevent dryness. Brining them for 30 minutes first helps maintain moisture.
What oil works best for frying?
Use oils with high smoke points like peanut, canola, or vegetable oil. Avoid olive oil—its low smoke point burns easily. Maintain oil at 350°F for perfect crispiness.
How do I keep it crispy when reheating?
Reheat in a 400°F oven for 10 minutes on a wire rack. Microwaves make it soggy. For air fryers, use 375°F for 5-6 minutes.
Can I bake this instead of frying?
Yes, bake at 400°F for 25-30 minutes, flipping halfway. Spray with oil before baking for extra crunch. It won’t be identical but still delicious.

Trained in classic French technique but raised on slow-cooked ribs and spicy rubs, she blends culinary skill with smoke and soul.
- Recipe for Boneless Pork Chops in Cast Iron Skillet: Sear and Baste to Juicy Perfection - October 3, 2026
- Recipe for Boneless Cross Rib Roast: Slow-Roasted Beef with Herb Crust - October 3, 2026
- Hamburgers in Sauce Recipe Crock Pot: Slow-Cooked Savory Delight - October 3, 2026