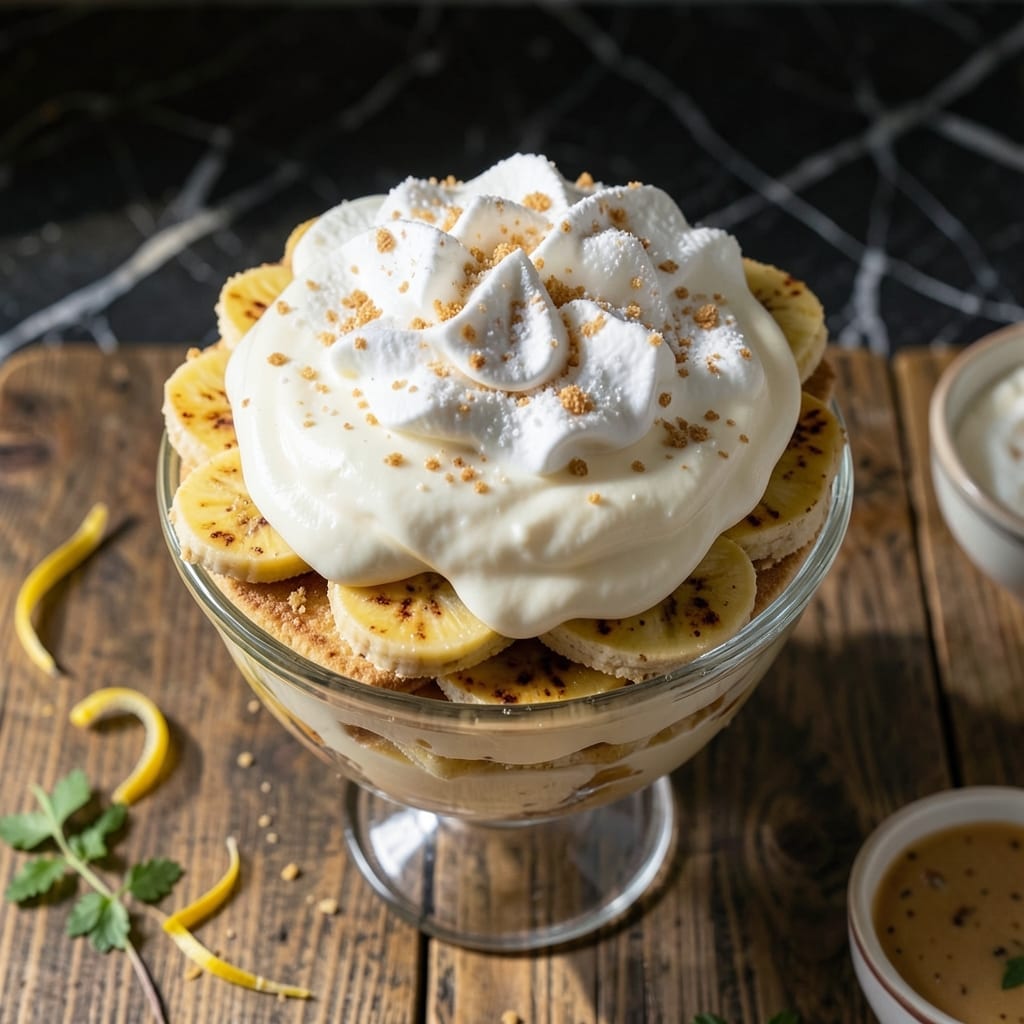
This copycat version captures the essence of the beloved restaurant dessert with creamy vanilla layers and Nilla wafer magic.
I developed this recipe to bring that familiar comfort home, using simple ingredients and proven techniques for authentic flavor. The result is a dessert that rivals the original.
Ingredients for City Bbq Banana Pudding Copycat
Simple pantry staples recreate this nostalgic dessert with layers of creamy vanilla and crisp wafers.
| Ingredient | Amount | Notes |
|---|---|---|
| Vanilla Wafers 🍪 | 12 oz | Nilla brand preferred |
| Ripe Bananas 🍌 | 6 whole | Sliced into rounds |
| Instant Vanilla Pudding Mix 🥣 | 2 boxes | 3.4 oz size each |
| Whole Milk 🥛 | 4 cups | Cold, for pudding mix |
| Heavy Whipping Cream 🥛 | 2 cups | Well-chilled for whipping |
| Granulated Sugar 🧂 | ¼ cup | For sweetening cream |
| Vanilla Extract 🌿 | 2 tsp | Pure extract preferred |
| Sweetened Condensed Milk 🥛 | 1 can | 14 oz can, standard size |
| Unsalted Butter 🧈 | 4 tbsp | For pudding mixture |
| Salt 🧂 | ¼ tsp | Balances sweetness |
[recipe_ingredient_scaler]
The vanilla wafers are non-negotiable here. Nilla brand delivers the authentic texture and flavor that defines this dessert. Look for them in the cookie aisle at any major supermarket—Walmart or Target always have them in stock. For the pudding mix, Jell-O brand instant vanilla produces the creamiest results. Avoid cook-and-serve varieties, as they won’t set properly in the layers.
No instant pudding? Homemade vanilla pudding works (use the same amount of liquid), but requires cooking and cooling time. For a shortcut, vanilla pastry cream from the bakery section can substitute in a pinch. The heavy cream can be swapped for coconut cream (from a can, not the beverage) if avoiding dairy. Bananas should be ripe but firm—overripe ones turn mushy in the layers.
This keeps beautifully for 3-4 days in the fridge, though the wafers soften the longer it sits. For best texture, assemble 2-3 hours before serving. Leftovers? They won’t last long, but they freeze surprisingly well for up to 1 month (thaw overnight in the fridge).
Why You’ll Love This Recipe
- No Fuss Mixing: I just dump the pudding mix, milk, and cream together—no stove, no fuss. The wafers and bananas do the rest.
- That Nostalgic Bite: The vanilla wafers soften just enough to soak up the pudding, and the ripe bananas add that sweet, creamy texture I crave.
- Potluck MVP: I bring this to every summer cookout, and it’s always the first dish gone. Feeds a crowd without breaking the bank.
- Better Next Day: Honestly, it tastes even richer after 24 hours in the fridge. The flavors meld, and the wafers turn into this dreamy, cake-like layer.
Step-by-Step Instructions for City BBQ Banana Pudding
The secret lies in layering textures and flavors. Precision matters with each component.
Step 1: Prepare the Vanilla Pudding Base
In a medium saucepan, combine the 4 cups Whole Milk, 2 boxes Instant Vanilla Pudding Mix, 1 can Sweetened Condensed Milk, 4 tbsp Unsalted Butter, and 0.25 tsp Salt. Cook over medium heat while whisking constantly.
Continue whisking for 5-7 minutes until the mixture thickens noticeably and coats the back of a spoon. You’re aiming for a consistency similar to thick custard. Remove from heat and stir in the 2 tsp Vanilla Extract. Let it cool to room temperature, stirring occasionally to prevent a skin from forming.
Step 2: Whip the Cream to Stiff Peaks
In a chilled mixing bowl, combine the 2 cups Heavy Whipping Cream and 0.25 cup Granulated Sugar. Using an electric mixer, beat on medium-high speed until the mixture begins to thicken, about 2-3 minutes.
Gradually increase the speed to high and continue beating for another 1-2 minutes until stiff peaks form. The cream should hold its shape when the beaters are lifted, with just the tips folding over slightly. Be careful not to over-whip, as this can cause the cream to separate and become grainy.
Step 3: Fold the Cream into the Pudding
Once the pudding has cooled completely, gently fold in the whipped cream using a silicone spatula. Work in 3 additions, carefully incorporating each portion before adding more. This maintains the air in the whipped cream, ensuring a light and fluffy texture.
The mixture should be smooth and homogeneous, with no streaks of cream visible. The final consistency should be thick but still spreadable, like a rich mousse. Avoid vigorous stirring, which can deflate the cream and result in a dense pudding layer.
Step 4: Assemble the Layers
In a 9×13-inch dish or individual serving glasses, begin layering the components. Start with a layer of Vanilla Wafers, arranging them in a single, even layer. Follow with a portion of the sliced 6 whole Ripe Bananas, covering the wafers completely.
Spoon a generous layer of the pudding mixture over the bananas, spreading it evenly to the edges. Repeat the layers, ending with a final layer of pudding on top. The dish should have at least 3 complete layers of wafers, bananas, and pudding.
Step 5: Chill and Serve
Cover the dish with plastic wrap, pressing it directly onto the surface of the pudding to prevent a skin from forming. Refrigerate for at least 4 hours, or preferably overnight. This chilling time allows the Vanilla Wafers to soften and absorb the flavors of the pudding and bananas.
Before serving, garnish with additional wafer crumbs or banana slices if desired. The pudding should be thick and creamy, with distinct yet harmonious layers. Serve chilled for the best texture and flavor experience.
Pro Tips For Making City Bbq Banana Pudding Copycat
- Chill the Pudding: After mixing the instant pudding with milk, let it set in the fridge for at least 30 minutes—I learned this the hard way when my layers turned to soup.
- Slice Bananas Last: Cut the bananas just before assembling to prevent browning; I used to prep them early and ended up with sad, mushy slices.
- Whip Cream Separately: Beat the heavy whipping cream to soft peaks first, then fold it into the pudding for a lighter texture—my grandmother swore by this, and she was right.
- Layer Twice: Do two layers of wafers, bananas, and pudding instead of one; it looks like more work but actually changes the outcome for the better.
Make-Ahead Tips for This Recipe
Prep the Pudding
The vanilla pudding base can be made 1 day ahead and stored in an airtight container in the fridge. This actually improves the flavor as the ingredients meld together. Just bring it to room temperature before folding in the whipped cream. 💡
Whip the Cream
Whip the cream up to 2 hours before assembling and keep it chilled in the mixing bowl. Cover tightly with plastic wrap to prevent it from absorbing fridge odors. I’ve found this timing keeps the peaks stable without deflating.
Slice Bananas Later
Don’t slice your bananas until right before assembly—ripe bananas will oxidize and turn brown if cut too early. Toss the slices in 1 tbsp lemon juice to slow browning if you need to prep them 30 minutes ahead.
Assemble Ahead
You can fully assemble the dessert 6-8 hours before serving. This gives the Vanilla Wafers time to soften perfectly without becoming mushy. Cover tightly with plastic wrap pressed directly onto the surface.
Overnight Option
For the deepest flavor, assemble the entire dish the night before. The pudding will thicken slightly and the wafers will absorb more of the vanilla flavor. Just add fresh banana slices on top before serving. ❄️
Freezing Tips
This pudding freezes well for up to 1 month. Portion into individual servings and wrap tightly in plastic wrap and foil. Thaw overnight in the fridge—it’ll soften to the perfect texture.
Nutrition Facts

Trained in classic French technique but raised on slow-cooked ribs and spicy rubs, she blends culinary skill with smoke and soul.
- Recipe for Boneless Pork Chops in Cast Iron Skillet: Sear and Baste to Juicy Perfection - October 3, 2026
- Recipe for Boneless Cross Rib Roast: Slow-Roasted Beef with Herb Crust - October 3, 2026
- Hamburgers in Sauce Recipe Crock Pot: Slow-Cooked Savory Delight - October 3, 2026