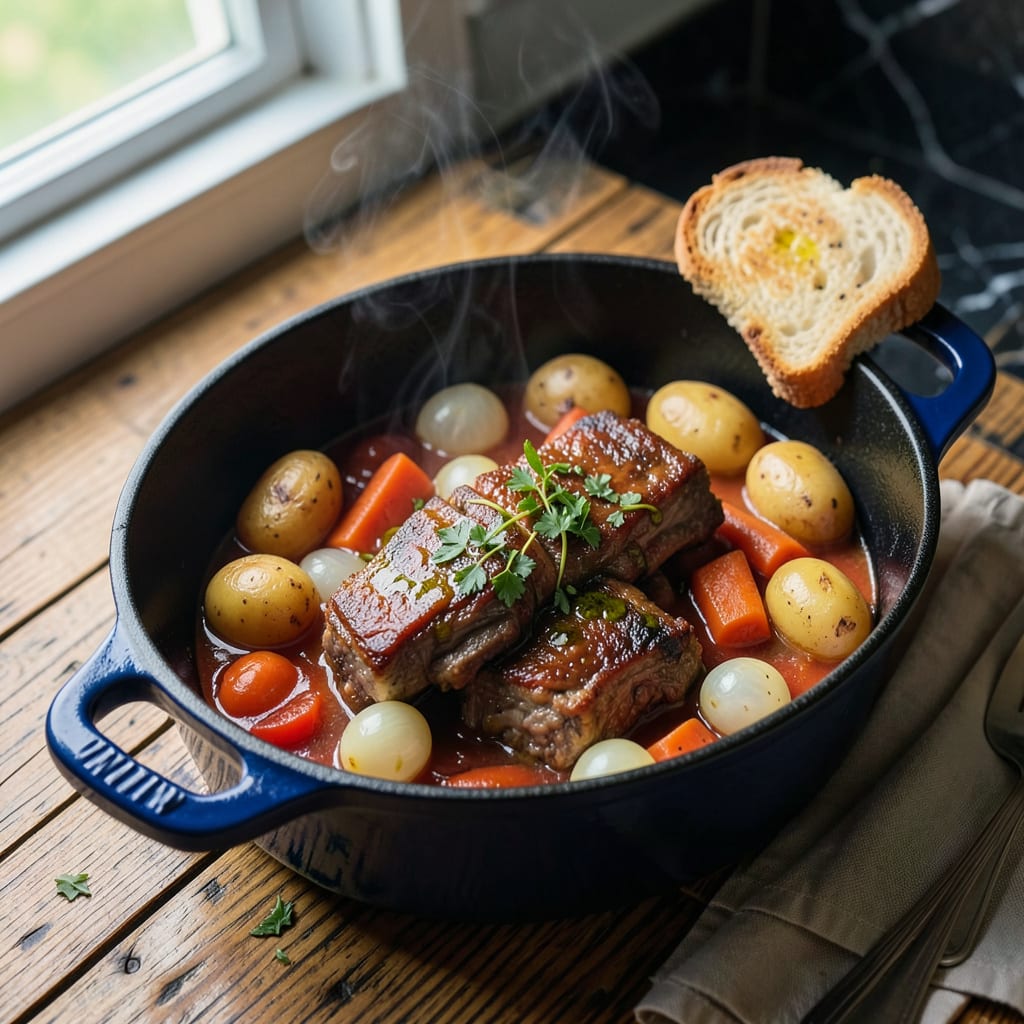
Converting Instant Pot recipes to stovetop requires understanding fundamental differences in heat transfer and moisture control. The pressure cooker’s sealed environment traps steam and intensifies flavors, while stovetop cooking demands careful liquid management and temperature monitoring. I’ve developed a reliable method that accounts for these variables, ensuring your adapted recipes maintain their intended texture and depth of flavor.
Liquid ratios become critical when transitioning from pressure cooking. Stovetop versions typically need 25-30% more liquid to prevent scorching during the longer cooking process. For example, converting Instant Pot beef stew requires increasing broth by about 1 cup and adjusting the simmer time to 2-3 hours for proper tenderization. Heat levels must be maintained at a gentle simmer—not a rolling boil—to replicate the even cooking of pressure systems.
The layering technique also changes significantly. While Instant Pot recipes often combine all ingredients at once, stovetop cooking benefits from staged additions. Start with aromatics, then brown proteins before adding liquids and vegetables. This builds flavor foundations that pressure cooking achieves through steam infusion. Safety becomes paramount—unattended stovetop cooking carries burn risks that pressure cookers eliminate through their sealed design.
My tested conversion of Instant Pot beef stew to stovetop demonstrates these principles perfectly. The adapted version delivers fall-apart tender meat and rich, reduced sauce when paired with crusty bread for soaking up every flavorful drop. This method works equally well for soups, braises, and even risotto-style dishes when you understand these core adaptation techniques.
📚 In This Guide
- What You’ll Need
- Instructions
- Tips and Common Mistakes
What Youll Need
- ● Heavy-bottomed pot or Dutch oven (5–7 quarts for most recipes; ensures even heat distribution)
- ● Lid (tight-fitting for simmering; glass lids let you peek without lifting!)
- ● Wooden spoon or silicone spatula (gentle on pots and great for stirring)
- ● Measuring cups and spoons (precision matters—especially for liquids!)
- ● Kitchen timer (or your phone’s timer for hands-off simmering)
- ● Liquid (broth, water, or wine—add ¼–½ cup extra to account for evaporation)
- ○ Heat diffuser (optional but handy for delicate sauces or long simmers)
- ○ Instant-read thermometer (optional for meat dishes—aim for safe internal temps! 🌡️)
- ● Tongs or slotted spoon (for removing solids like meat or veggies)
- ● Patience! (Stovetop cooking takes a little longer—but it’s worth it 😉)
Instructions
Converting Instant Pot recipes to stovetop requires precise adjustments for timing, liquid ratios, and heat control.
Adjust Liquid Ratios for Stovetop Cooking
Instant Pot recipes typically use less liquid due to minimal evaporation. For stovetop conversion, increase liquid by 25-30% to account for evaporation during simmering. If the original recipe calls for 1 cup of broth, use 1¼ to 1⅓ cups in your pot or Dutch oven.
Use a heavy-bottomed pot with a tight-fitting lid to minimize moisture loss. The additional liquid prevents burning while allowing proper heat distribution. For recipes with thick sauces (like stews or braises), reserve some liquid initially and add it gradually to control consistency.
Modify Cooking Times Based on Technique
Instant Pot pressure cooking reduces time significantly. For stovetop conversion, multiply the original cook time by 2.5 to 3 for most dishes. A 20-minute Instant Pot recipe will typically require 50-60 minutes of simmering on the stovetop.
Begin with medium-high heat to bring liquids to a boil, then reduce to low heat for gentle simmering. For tough cuts of meat, extend cooking by an additional 30 minutes to achieve proper tenderness. Use a fork to test doneness – meat should pull apart easily, and vegetables should be tender but not mushy.
Adapt Sautéing and Browning Steps
Instant Pot sauté functions work differently than stovetop browning. Use a separate skillet for initial browning when converting recipes. Heat 1-2 tablespoons of oil over medium-high heat until shimmering before adding proteins or aromatics.
Brown meat in batches to avoid steaming, allowing each piece to develop a deep caramelized crust. For vegetables, cook until softened but not fully tender, as they’ll continue cooking during the simmering phase. Deglaze the pan with a splash of liquid to capture all browned bits before transferring to your main cooking pot.
Monitor and Adjust Heat Throughout Cooking
Unlike the Instant Pot’s consistent pressure, stovetop cooking requires active heat management. Maintain a gentle simmer where small bubbles occasionally break the surface. If using a lid, leave it slightly ajar to prevent boiling over while still retaining moisture.
Check liquid levels every 20-30 minutes, adding small amounts of hot water or broth if needed. For recipes requiring reduction, remove the lid during the final 15-20 minutes of cooking. Stir occasionally to prevent sticking, especially for grain-based dishes like risotto or congee.
Verify Doneness with Multiple Indicators
Instant Pot recipes rely on pressure indicators, but stovetop versions require sensory checks. For proteins, use an instant-read thermometer to verify internal temperatures: 165°F for poultry, 145°F for pork, and 160°F for ground meats.
For grains and legumes, taste test for texture – they should be tender but still hold their shape. Sauces should coat the back of a spoon without being watery. Let dishes rest for 5-10 minutes off heat before serving to allow flavors to meld and liquids to thicken slightly.
Tips and Common Mistakes
Mastering the conversion from Instant Pot to stovetop requires attention to subtle details that can make or break your dish.
Liquid Ratio Precision: When increasing liquid by 25-30% as outlined in Step 1, remember that different ingredients absorb moisture differently. For bean-based dishes, start with the lower end (25%) since they release starch during cooking. For meat-heavy recipes, use the full 30% increase to account for protein absorption. Always use hot liquid when adding more during cooking to prevent temperature fluctuations that could extend your 50-60 minute simmer time.
Heat Management Technique: The transition from medium-high to low heat in Step 2 is more critical than it appears. Use a heavy-bottomed pot to prevent hot spots that can cause scorching during the extended stovetop cooking. For recipes requiring the additional 30 minutes for tough cuts, maintain heat at the lowest setting that still produces occasional bubbles – this gentle simmer breaks down collagen without drying out the meat.
Browning Optimization: In Step 3, the 1-2 tablespoons of oil over medium-high heat creates the ideal environment for Maillard reactions. Don’t overcrowd your skillet – work in batches if needed. The shimmering oil should just begin to smoke when you add your proteins. For vegetables, cook until they develop color at the edges but remain slightly firm, as they’ll continue cooking during the 50-60 minute simmer.
Doneness Verification: While the temperature guidelines in Step 5 (165°F for poultry, 145°F for pork, 160°F for ground meats) are essential, develop your sensory skills too. Meat should yield easily to a fork but not fall apart completely. For grains, they should offer slight resistance when bitten – they’ll soften further during the 5-10 minute resting period. Sauces should leave a clean path when you draw a finger through them on a spoon.
Pro Tips for Convert Instant Pot Recipe To Stovetop
- Mastering the conversion from Instant Pot to stovetop requires attention to subtle details that can make or break you…
- Liquid Ratio Precision: When increasing liquid by 25-30% as outlined in Step 1, remember that different ingredients a…
- Heat Management Technique: The transition from medium-high to low heat in Step 2 is more critical than it appears. Us…
Frequently Asked Questions
Got questions about converting your favorite Instant Pot recipes to stovetop? You’re not alone! Here are the most common concerns—and quick answers to keep your cooking on track.
How do I adjust cooking times when converting Instant Pot recipes to stovetop?
As a rule of thumb, multiply Instant Pot high-pressure times by 3 (e.g., 10 mins → 30 mins simmering). For low-pressure, multiply by 2. Start checking doneness 5–10 minutes early, as stovetop heat varies. Slow-cooker conversions? Use the “low” setting time as a guide.
Can I use the same liquid amounts in stovetop recipes?
Yes, but reduce by ¼ to ½ cup—stovetop cooking evaporates more liquid. If the dish seems dry, add broth or water gradually. For soups/stews, keep liquid levels similar but cover the pot partially to control thickness.
What’s the best stovetop alternative for Instant Pot’s “Sauté” function?
A heavy-bottomed pot (like Dutch ovens or stainless steel) works best. Use medium-high heat and stir frequently to mimic the Instant Pot’s even browning. Nonstick pans are great for delicate foods like eggs or rice!
Why does my stovetop version taste different than the Instant Pot original?
Pressure cooking locks in flavors and tenderizes faster. To compensate, sear meats first (for depth), add herbs/spices early, and simmer low and slow. A splash of acid (lemon, vinegar) at the end can brighten flavors too!
Help! My stovetop recipe is burning or sticking. What went wrong?
Common culprits: heat too high, not enough liquid, or thin pots. Always preheat the pot with oil, use medium-low heat for simmering, and stir occasionally. If burning occurs, transfer to a new pot (don’t scrape burned bits—they’ll bitter the dish).
Converting Instant Pot recipes to stovetop doesn’t have to be tricky—just follow the liquid ratios, adjust cooking times, and keep an eye on heat levels. With a little practice, you’ll master the art of adapting pressure-cooker favorites to your trusty stovetop! 🎯
Now that you’ve got the basics, pick a recipe and give it a try. Start with something simple, like soups or stews, and soon you’ll be converting like a pro! Happy cooking! 🍲

Trained in classic French technique but raised on slow-cooked ribs and spicy rubs, she blends culinary skill with smoke and soul.
- Recipe for Boneless Pork Chops in Cast Iron Skillet: Sear and Baste to Juicy Perfection - October 3, 2026
- Recipe for Boneless Cross Rib Roast: Slow-Roasted Beef with Herb Crust - October 3, 2026
- Hamburgers in Sauce Recipe Crock Pot: Slow-Cooked Savory Delight - October 3, 2026