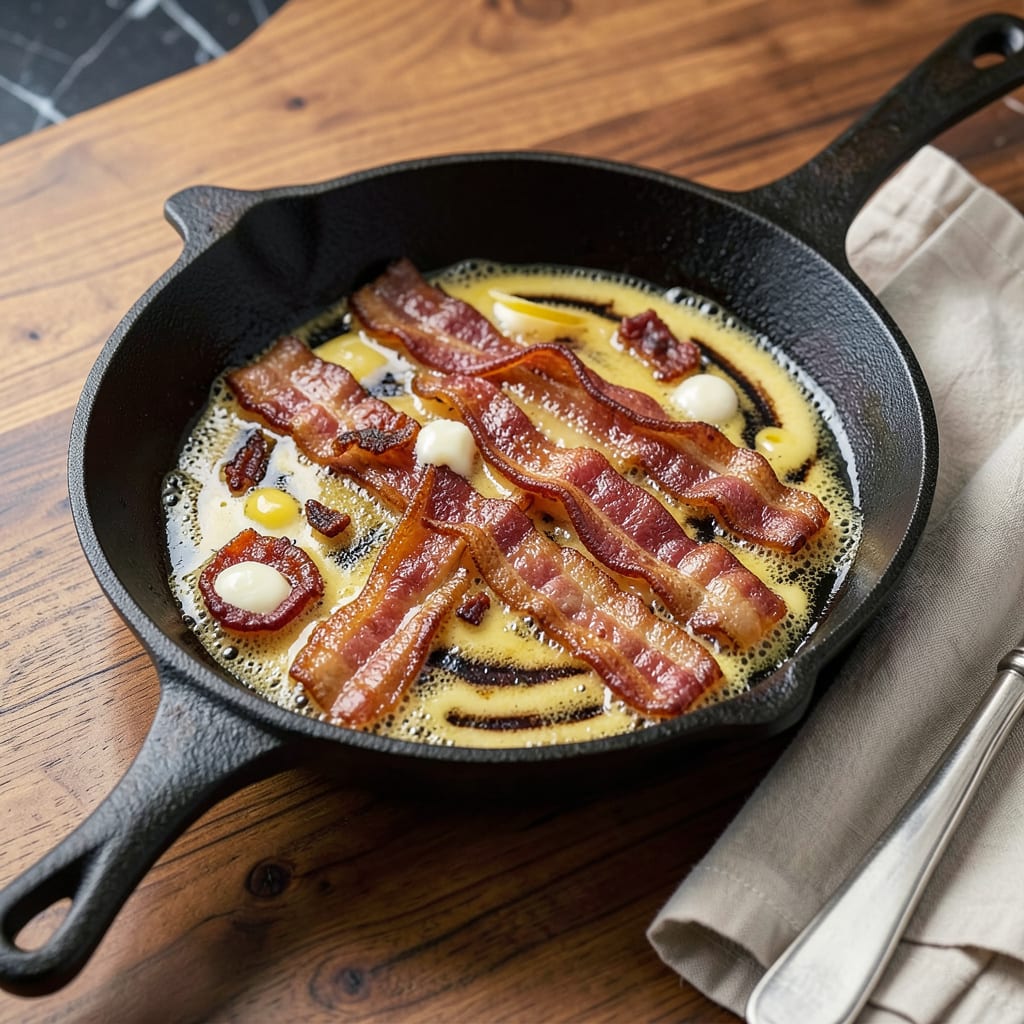
I’ll be real with you: cooking bacon in butter changes everything. That first sizzle when crispy pork hits melted butter? Pure magic. After years of testing, I’ve found this method delivers restaurant-style results every time – extra-crispy edges with tender centers that practically melt in your mouth.
The butter does more than just prevent sticking. It browns as the bacon cooks, creating nutty, caramelized flavors that oil just can’t match. I learned this trick during my French training, where they use butter for everything – even bacon. The key is starting with cold butter so it melts gradually, basting the bacon as it crisps.
You’ll end up with bacon that’s golden and shatteringly crisp, with rich buttery notes in every bite. No more dry, leathery strips or greasy pans. This technique works for thick-cut, regular, or even turkey bacon – though I always recommend starting with quality pork from your local butcher.
Serve it alongside eggs for breakfast, crumble over salads, or use in sandwiches where the bacon needs to stand out. Just be warned: once you try this method, you’ll never go back to plain pan-frying.
📚 In This Guide
- What You’ll Need
- Instructions
- Tips and Common Mistakes
What Youll Need
- ● Bacon: 8–12 oz (thick-cut preferred for extra crispiness)
- ● Unsalted butter: 2–4 tbsp (adjust based on bacon quantity)
- ● Cooking pan: Heavy-bottomed skillet (cast iron or stainless steel works best)
- ● Tongs or spatula: For flipping and handling bacon
- ● Paper towels: To drain excess grease
- ● Plate or wire rack: For resting cooked bacon
- ○ Optional: Freshly cracked black pepper or a pinch of brown sugar for extra flavor
- ○ Optional: Splatter guard (to keep your stovetop clean)
Instructions
Here’s how to achieve that perfect balance of crispy edges and buttery richness every time.
Choose the Right Pan and Prep the Bacon
Start with a heavy-bottomed skillet—cast iron works best for even heat distribution. I prefer a 10-inch pan for cooking 4 servings of bacon, as it gives the slices enough room to crisp without steaming. Place your pan over medium-low heat to begin warming gradually.
While the pan heats, separate your bacon slices and pat them dry with paper towels. This step is crucial—moisture is the enemy of crispiness. I always lay the slices out on a plate first to ensure they’re not overlapping, which helps them cook more evenly later.
Add Butter and Begin Cooking
Add 2 tablespoons of unsalted butter to the pan and let it melt completely. You’ll know it’s ready when the foaming subsides and you see tiny golden specks forming in the butter. This is when the butter is at the perfect temperature to start cooking the bacon without burning it.
Lay the bacon slices in the pan in a single layer, working in batches if needed to avoid crowding. The butter should sizzle gently when the bacon hits the pan—if it’s too aggressive, your heat is too high. Cook for 3-4 minutes before flipping, giving the first side time to develop that golden crust.
Flip and Crisp to Perfection
Using tongs, flip each slice carefully. The bacon should release easily from the pan—if it sticks, give it another 30 seconds before trying again. Cook the second side for another 3-4 minutes, watching closely as the edges begin to curl and turn a deep amber color.
Here’s the thing—bacon continues cooking after you remove it from the pan, so pull it out when it’s just shy of your desired crispness. I aim for slices that are mostly crisp but still have a hint of chewiness in the center. Transfer the cooked bacon to a paper towel-lined plate to drain excess fat.
Step 4: Utilize the Buttery Bacon Fat
Don’t pour out that beautiful browned butter and bacon fat! Let it cool slightly, then strain it through a fine-mesh sieve into a heatproof jar. This liquid gold will keep in your fridge for 2-3 weeks and adds incredible flavor to everything from scrambled eggs to roasted vegetables.
If you’re serving the bacon immediately, you can use some of this fat to toast bread for BLTs or to sauté potatoes. Just remember that bacon fat burns at a lower temperature than regular oil, so keep the heat at medium or below when cooking with it.
Serve While Warm and Crispy
Bacon is best enjoyed immediately while still warm and at its crispiest. If you need to hold it for a few minutes, place the cooked slices on a wire rack set over a baking sheet in a 200°F oven. This keeps them warm without making them soggy.
For that true restaurant-style experience, serve the bacon on a warm plate with a sprinkle of flaky sea salt. The contrast between the crispy edges, tender center, and rich buttery flavor is what makes this method so special. I promise you’ll never go back to plain pan-fried bacon after trying this!
Tips and Common Mistakes
Here’s what I’ve learned from years of perfecting this method—small details that make a big difference.
Heat Control: The medium-low heat specified in Step 1 is crucial for even cooking. Too high and the butter burns before the bacon crisps; too low and you’ll end up with limp slices. I’ve found that cast iron holds this temperature beautifully, but if using stainless steel, you may need to adjust slightly lower to prevent hot spots. Watch for that gentle sizzle when the bacon hits the butter—it should sound like a quiet conversation, not a shouting match.
The Technique That Changed Everything: In Step 2, when you’re cooking that first side for 3-4 minutes, resist the urge to peek or move the bacon. Let it develop that golden crust undisturbed. The butter will pool around the edges—this is good! Those pools create the crispy lacy edges that make this method so special. If your bacon sticks when flipping, give it the extra 30 seconds mentioned in Step 3; forcing it too soon tears the crust.
Storage Wisdom: That buttery bacon fat you save in Step 4 is liquid gold, but it needs proper handling. After straining, let it cool completely before sealing in a jar—this prevents condensation that could lead to spoilage. I label mine with the date and use it within 2 weeks for optimal flavor (though it’s technically safe for 3). It’s fantastic for frying eggs or making the crispiest roasted potatoes you’ve ever tasted.
Serving Tip: The 200°F oven mentioned in Step 5 for holding bacon works perfectly, but here’s my trick: place a sheet of parchment under the wire rack. It catches any drips and makes cleanup effortless. And don’t skip the flaky sea salt at the end—it elevates the buttery richness to restaurant quality with just a simple sprinkle.
Pro Tips for Cooking Bacon In Butter
- Here’s what I’ve learned from years of perfecting this method—small details that make a big difference.
- Heat Control: The medium-low heat specified in Step 1 is crucial for even cooking. Too high and the butter burns befo…
- The Technique That Changed Everything: In Step 2, when you’re cooking that first side for 3-4 minutes, resist the urg…
Frequently Asked Questions
Is it safe to cook bacon in butter instead of oil?
Yes! Butter is safe for bacon if you use medium-low heat to prevent burning. Its lower smoke point (300°F) means you’ll need to monitor it closely—unlike oils like avocado or vegetable. For extra safety, mix butter with a high-smoke-point oil (like ghee) or clarify the butter first.
How long does it take to cook bacon in butter?
Expect 8–12 minutes for crispy bacon, flipping every 2–3 minutes. Thick-cut bacon may need 15+ minutes on lower heat. Watch for golden-brown edges—butter speeds up browning, so stay nearby! Pro tip: Preheat the pan 1–2 minutes to avoid soggy strips.
Can I use margarine or plant-based butter for bacon?
Technically yes, but results vary. Margarine has a higher water content, which can make bacon steam instead of crisp. For best texture, use vegan butter with no added oils (like Miyoko’s) or stick to traditional butter. Check labels for smoke points!
Why does my bacon stick to the pan when cooking in butter?
Sticking happens if the pan isn’t hot enough before adding bacon or if butter solids burn. Fix it by:
- Patting bacon dry before cooking.
- Using a stainless steel or cast-iron pan (nonstick can’t handle high butter heat).
- Adding a splash of oil to the butter for a nonstick boost.
What’s the best way to save leftover bacon butter?
Strain the browned butter through a fine mesh sieve to remove bacon bits, then pour into a jar. It’ll keep in the fridge for 1–2 weeks or freeze for 3 months. Use it for eggs, pancakes, or roasting veggies—flavor bomb alert!
Cooking bacon in butter isn’t just a trick—it’s a game-changer for richer flavor, perfect crispiness, and that restaurant-worthy shine. 🍳 Whether you’re whipping up a weekend brunch or elevating a simple sandwich, this method turns ordinary bacon into something extraordinary with minimal effort.
Ready to try it? Grab your skillet, some thick-cut bacon, and a pat of butter—your taste buds will thank you! For even more breakfast inspiration, check out our guide on pairing crispy bacon with fluffy pancakes or mastering the art of buttery scrambled eggs. Happy cooking! 🥓✨

Trained in classic French technique but raised on slow-cooked ribs and spicy rubs, she blends culinary skill with smoke and soul.
- Recipe for Boneless Pork Chops in Cast Iron Skillet: Sear and Baste to Juicy Perfection - October 3, 2026
- Recipe for Boneless Cross Rib Roast: Slow-Roasted Beef with Herb Crust - October 3, 2026
- Hamburgers in Sauce Recipe Crock Pot: Slow-Cooked Savory Delight - October 3, 2026