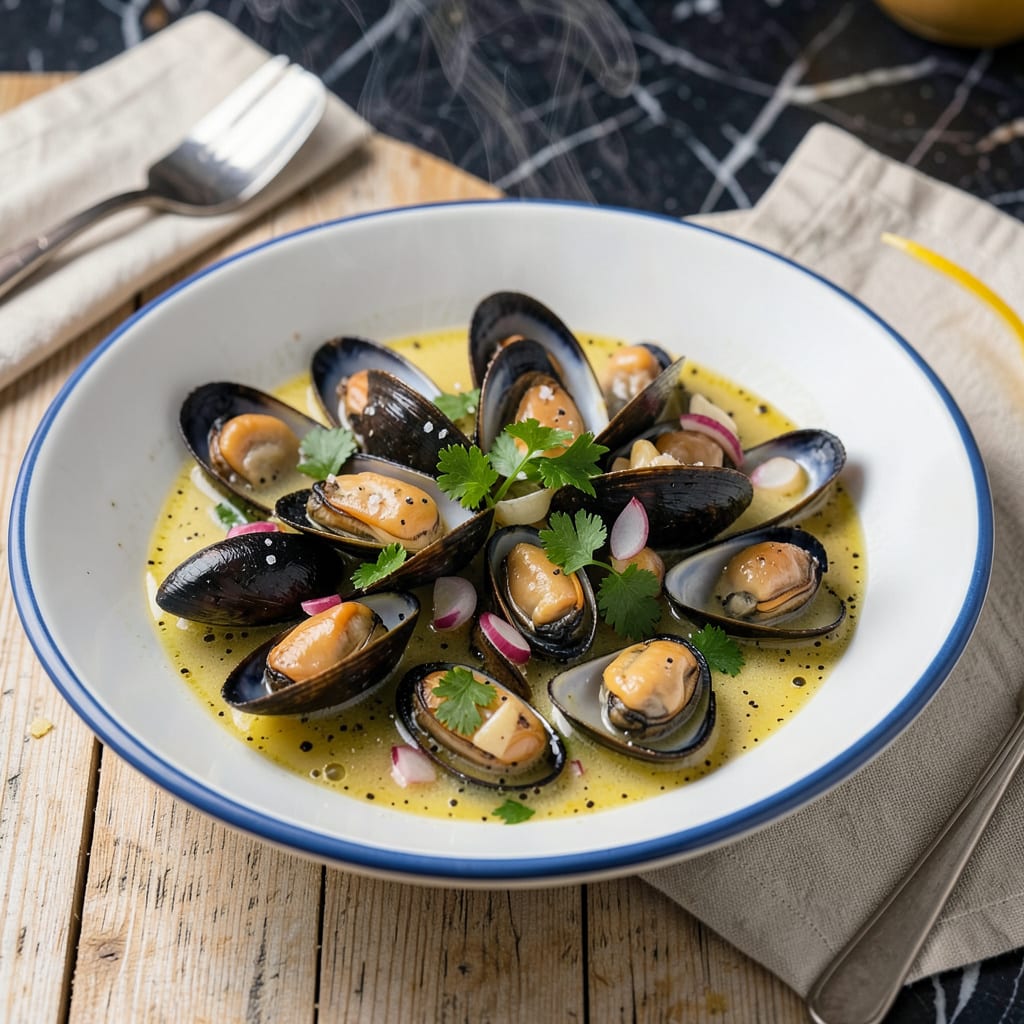
I’ll be real with you—cooking frozen mussels can feel intimidating, but it’s actually one of the easiest seafood dishes you can master. No fancy techniques, no special equipment, just 20 minutes and a few simple ingredients standing between you and restaurant-quality results. The key is understanding how to handle them properly from frozen to plate.
Here’s the thing—frozen mussels are pre-cooked and pre-cleaned, which means you skip the most tedious parts of mussel prep. I’ve found they actually hold their texture better than fresh when cooked right, opening up to reveal plump, tender meat every time. The secret is gentle heat and just enough liquid to create steam, letting the mussels do most of the work themselves.
What you’ll end up with is a dish that looks and tastes like it came from a seaside bistro—tender mussels in a fragrant broth, ready to soak up with crusty bread or toss with pasta. The aroma alone will have everyone gathering around the table before you’ve even finished cooking. And the best part? Cleanup is minimal since everything cooks in one pot.
Whether you’re making a quick weeknight dinner or impressing guests with minimal effort, this method delivers. The mussels practically cook themselves while you focus on building flavors in the broth. Let me show you how to turn that bag of frozen mussels into something extraordinary.
📚 In This Guide
- What You’ll Need
- Instructions
- Tips and Common Mistakes
What Youll Need
- ● Frozen mussels: 1–2 lbs (450–900g) debearded, pre-cleaned (check packaging for shell size—smaller = tenderer!)
- ● Large pot or deep skillet: 5–6 quart capacity with a tight-fitting lid (steam is key! 💨)
- ● Cooking liquid: 1 cup (240ml) dry white wine, broth, or water (wine adds depth—pick something you’d drink!)
- ● Aromatics (required): 2 tbsp minced garlic, 1 small shallot or ½ onion (diced), 1 tbsp butter or olive oil
- ○ Fresh herbs (optional but recommended): 2 tbsp chopped parsley, 1 tsp thyme leaves, or 1 bay leaf
- ● Lemon: 1 juiced (2 tbsp) + wedges for serving (brightens flavors! 🍋)
- ● Salt & pepper: To taste (go light—mussels are naturally briny)
- ● Tongs or slotted spoon: For safe, easy serving (no burned fingers!)
- ● Bowl for discards: To toss unopened mussels (safety first!)
- ○ Crusty bread (optional but highly encouraged): 1 baguette or sourdough loaf (for soaking up that golden broth! 🥖)
Instructions
Here’s how to transform frozen mussels into tender, flavorful perfection in just minutes.
Thaw the Mussels Safely
Remove the frozen mussels from their packaging and place them in a colander. Rinse under cold running water for 1-2 minutes to begin the thawing process. This quick rinse removes any ice crystals while keeping the mussels cold enough to prevent bacterial growth.
Transfer the mussels to a large bowl and cover with cold water. Let them sit for 10-15 minutes, changing the water once halfway through. You’ll know they’re ready when you can easily separate any that are stuck together. Drain well and discard any mussels with broken shells or that don’t close when tapped.
Prepare Your Cooking Liquid
In a large pot with a tight-fitting lid, combine 1 cup of water, 1 cup of white wine, and 2 cloves of minced garlic. Bring this mixture to a rolling boil over high heat. The wine adds acidity that helps tenderize the mussels while creating a flavorful broth.
Add 1 tablespoon of butter and 1 tablespoon of olive oil to the pot. The butter enriches the broth while the oil prevents the butter from separating. When the butter has fully melted and the liquid is boiling vigorously, you’re ready for the next step. This entire process should take about 5 minutes.
Cook the Mussels to Perfection
Add the drained mussels to the pot in a single layer if possible. Cover immediately with the lid. The steam is what cooks the mussels quickly and evenly. Cook for exactly 5-7 minutes – you’ll know they’re done when all the shells have opened wide.
Gently shake the pot once or twice during cooking to ensure even heat distribution. Don’t peek too often though – you’ll lose valuable steam. After 5 minutes, start checking for doneness. Any mussels that haven’t opened after 7 minutes should be discarded as they may not be safe to eat.
Finish and Serve Immediately
Using a slotted spoon, transfer the cooked mussels to serving bowls. The meat should be plump and opaque, not shriveled or tough. If you’d like a richer broth, swirl in another tablespoon of butter to the cooking liquid and pour it over the mussels.
Serve immediately with crusty bread for dipping in that delicious broth. I like to garnish with fresh parsley and a squeeze of lemon for brightness. Remember that mussels continue to cook slightly after being removed from heat, so serve them right away for the best texture.
Tips and Common Mistakes
Cooking mussels from frozen doesn’t have to be intimidating—here’s what I’ve learned from years of perfecting this quick method.
The Thawing Process: In Step 1, that 1-2 minute cold water rinse is crucial for removing ice crystals without warming the mussels too quickly. When you soak them for 10-15 minutes, changing the water halfway prevents the temperature from rising too much. I always set a timer—this isn’t the time to multitask. Trust me, properly thawed mussels open more evenly during cooking.
Steam Control: During Step 3, resist the urge to peek under the lid while cooking for those 5-7 minutes. Every time you lift that lid, you lose precious steam that’s gently cooking your mussels. I gently shake the pot once at the 5-minute mark to redistribute the mussels, then let them finish undisturbed until exactly 7 minutes maximum.
Broth Enhancement: For Step 4, here’s what nobody tells you—that extra tablespoon of butter you swirl in at the end isn’t just for richness. It creates an emulsion that makes the broth cling beautifully to the mussels. I always use cold butter and swirl it off-heat to prevent separation. This small step makes your broth taste like it simmered for hours.
Serving Timing: Mussels wait for no one. The moment they’re done, transfer them to bowls immediately. I learned this the hard way after watching perfectly cooked mussels turn rubbery in the residual heat. Have your bread ready and garnishes prepped before you even start cooking—those 5-7 minutes go faster than you think.
Pro Tips for Cooking Mussels From Frozen
- Cooking mussels from frozen doesn’t have to be intimidating—here’s what I’ve learned from years of perfecting this qu…
- The Thawing Process: In Step 1, that 1-2 minute cold water rinse is crucial for removing ice crystals without warming…
- Steam Control: During Step 3, resist the urge to peek under the lid while cooking for those 5-7 minutes. Every time y…
Frequently Asked Questions
Do I need to thaw frozen mussels before cooking?
Nope! In fact, cooking mussels straight from frozen is safer—thawing can cause bacterial growth. Just rinse them under cold water to remove ice crystals before tossing them into the pot. They’ll release liquid as they cook, so no extra prep is needed.
How long does it take to cook frozen mussels?
About 5–7 minutes in a steaming liquid (like wine, broth, or water) over medium-high heat. Once the shells pop open, they’re done! Discard any that stay shut—they’re not safe to eat.
Can I use frozen mussels in recipes that call for fresh?
Just adjust the cooking time slightly—frozen mussels may need an extra minute or two. They work great in paella, pasta, or garlic butter sauces. Avoid overcooking, or they’ll turn rubbery.
Why do my frozen mussels taste gritty?
Grit usually means they weren’t cleaned well before freezing. Rinse them thoroughly under cold water and agitate gently to dislodge sand. If they’re pre-cooked, a quick soak in saltwater (1 tbsp salt per cup) for 10 minutes can help.
What’s the best liquid to cook frozen mussels in?
White wine, garlic butter, or seafood stock add the most flavor! Avoid plain water—it dilutes taste. For a quick fix, try 1 cup liquid + 2 tbsp lemon juice + herbs. Pro tip: Save the cooking liquid for dipping bread or sauces!
Cooking mussels from frozen doesn’t have to be intimidating—with the right steps, you can achieve tender, flavorful results in under 20 minutes! 🎉 Whether you’re steaming, sautéing, or simmering in wine, the key is gentle heat and patience. Now that you’ve got the know-how, why not pick up a bag of frozen mussels and try a recipe tonight? Your taste buds (and dinner guests) will thank you! For extra inspiration, explore our top 5 mussel recipes to take your seafood game to the next level.

Trained in classic French technique but raised on slow-cooked ribs and spicy rubs, she blends culinary skill with smoke and soul.
- Recipe for Boneless Pork Chops in Cast Iron Skillet: Sear and Baste to Juicy Perfection - October 3, 2026
- Recipe for Boneless Cross Rib Roast: Slow-Roasted Beef with Herb Crust - October 3, 2026
- Hamburgers in Sauce Recipe Crock Pot: Slow-Cooked Savory Delight - October 3, 2026