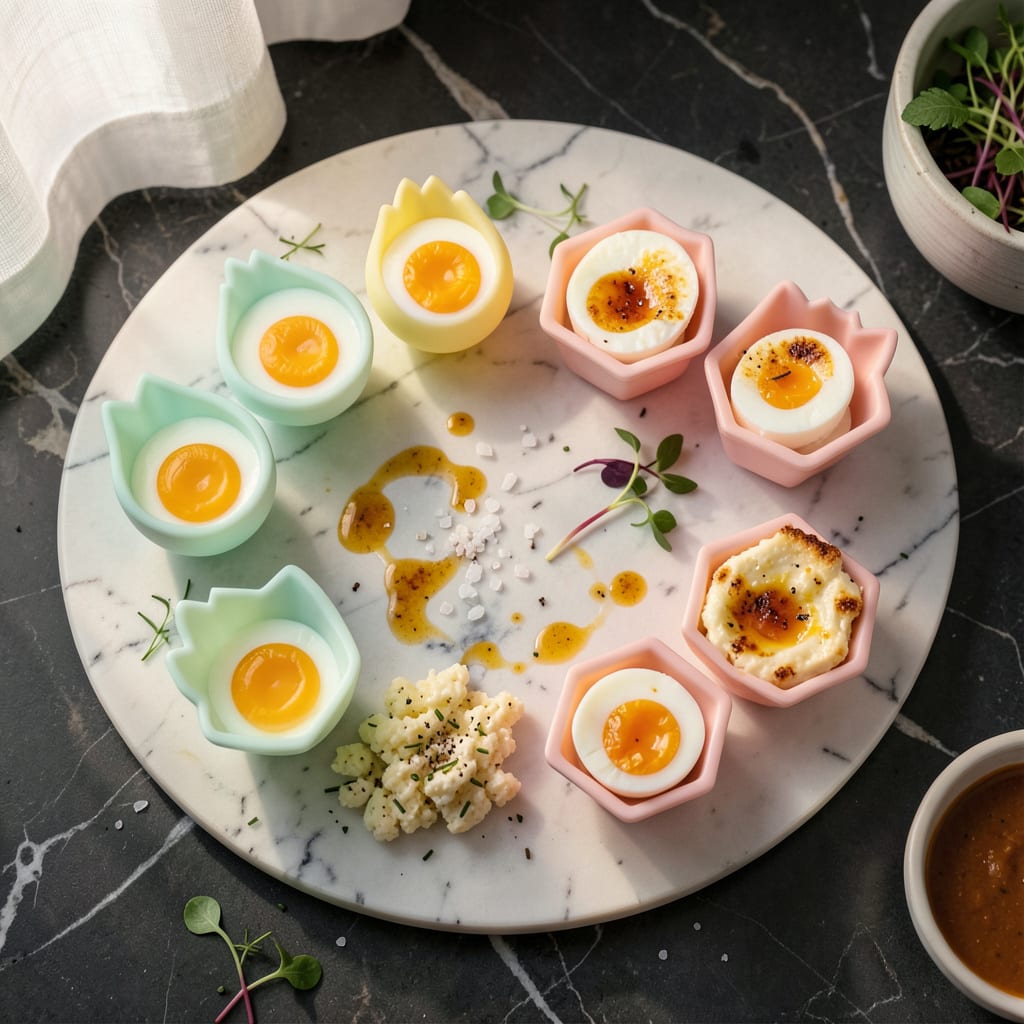
I’ll be real with you: making eggs in silicone molds changed my breakfast game completely. No more scrambled messes or uneven omelets—just perfectly shaped bites every single time. I started using this method when I needed grab-and-go breakfasts for my early morning rides, and now it’s my go-to for everything from meal prep to fancy brunches.
The beauty here is how fast and foolproof it is. Crack your eggs into greased molds, add whatever mix-ins you’re craving (cheese, herbs, diced veggies—go wild), and let the oven do the work. In 15 minutes, you’ve got cute little egg cups that look like they came from a café but taste even better because you made them exactly how you like.
What comes out of those molds will surprise you: tender centers with just the right amount of set, no rubbery edges, and all the good stuff evenly distributed. I’ve done everything from classic egg cups to mini frittatas to even custard-like bites for dessert. The silicone molds make demolding effortless—just a little flex and they pop right out, keeping their shape.
Perfect for feeding a crowd or just prepping your week. These little egg bites reheat beautifully and travel well, which means breakfast is handled no matter how hectic your morning gets. Let’s get those molds filled!
📚 In This Guide
- What You’ll Need
- Instructions
- Tips and Common Mistakes
What Youll Need
- ● Silicone egg molds – 1 or more (choose shapes like hearts, circles, or squares; ensure they’re oven-safe and food-grade silicone).
- ● Eggs – 6–12 (fresh, large or extra-large for best results).
- ● Non-stick cooking spray or neutral oil (like avocado or coconut oil) – 1 tsp per mold (to prevent sticking).
- ○ Mix-ins (optional) – Cheese (¼ cup shredded), cooked bacon (2 strips crumbled), diced veggies (2 tbsp), or herbs (1 tsp dried or 1 tbsp fresh).
- ● Whisk or fork – 1 (for beating eggs smoothly).
- ● Mixing bowl – 1 medium (8–10 inches wide).
- ● Oven or air fryer – Preheated to 350°F (175°C) (conventional oven) or 300°F (150°C) (air fryer).
- ● Tongs or oven mitts – 1 pair (for safe handling).
- ○ Cooling rack – 1 (optional, for even cooling).
- ● Salt & pepper – To taste (don’t skip—flavor matters!).
Instructions
Here’s how to make perfectly shaped eggs every time—simple steps, foolproof results.
Prepare Your Silicone Molds
Start by selecting your silicone molds. I recommend using food-grade, oven-safe molds with smooth surfaces for easy release. Lightly coat each mold with nonstick cooking spray or brush with a thin layer of melted butter, even if the molds claim to be nonstick.
This extra step guarantees your eggs will slide out effortlessly after cooking. Place the prepared molds on a baking sheet or in a muffin tin for stability—this prevents any wobbling when you transfer them to the oven. Preheat your oven to 350°F while you prepare the eggs.
Whisk and Season Your Eggs
Crack your eggs into a mixing bowl and whisk them until the yolks and whites are fully combined. I like to add a splash of milk or cream (about 1 tablespoon per 2 eggs) for extra richness, but this is optional. Season with salt and pepper—don’t be shy, as eggs need proper seasoning to shine.
For extra flavor, consider adding finely chopped herbs, grated cheese, or a pinch of smoked paprika. Whisk everything together until the mixture is uniform with no streaks of white or yolk remaining. This ensures even cooking and consistent texture in every bite.
Fill and Bake the Molds
Pour the egg mixture into each prepared mold, filling them about ¾ full. This leaves room for the eggs to puff slightly without overflowing. If you’re adding mix-ins like cheese, cooked vegetables, or pre-cooked bacon, sprinkle them into the molds before pouring in the eggs.
Place the filled molds in the preheated oven and bake for 12-15 minutes. You’ll know they’re done when the tops are set and just barely beginning to turn golden, with no visible liquid egg remaining. Avoid overbaking—they’ll continue to cook slightly from residual heat after you remove them.
Cool and Release the Eggs
Once baked, remove the molds from the oven and let them cool for 2-3 minutes. This brief rest allows the eggs to firm up just enough for easy removal. Gently press on the bottom of each mold to pop the eggs out, or carefully run a small silicone spatula around the edges if needed.
If any eggs stick slightly, don’t force them—let them cool for another minute or two. The residual heat will help them release cleanly. Serve immediately while warm, or let them cool completely for meal prep. These keep beautifully in the fridge for up to 4 days in an airtight container.
Tips and Common Mistakes
Perfectly shaped eggs require attention to detail—here’s what I’ve learned from making hundreds of batches.
Mold Preparation: In Step 1, don’t skip the nonstick spray even if your molds claim to be nonstick. I’ve found that butter creates a better release than spray, especially for intricate shapes. Place molds on a baking sheet before filling—the stability prevents spills when transferring to the oven, and the sheet catches any potential overflow during baking.
Baking Precision: The 12-15 minute range in Step 3 is critical. Start checking at 12 minutes—you want the tops just set with no visible liquid, but still slightly jiggly in the center. Overbaking by even 2 minutes can make them rubbery. I pull mine at 13 minutes for that perfect custardy texture that firms up during the 2-3 minute cooling period.
Seasoning Strategy: When whisking eggs in Step 2, season more aggressively than you think you need. Eggs require about ¼ teaspoon salt per 2 eggs to taste properly seasoned after cooking. The optional tablespoon of milk per 2 eggs isn’t just for richness—it creates a smoother texture that releases more cleanly from molds.
Release Technique: For Step 4, the 2-3 minute cooling time is non-negotiable. If eggs stick, don’t force them—let them cool another minute. I’ve ruined perfect eggs by rushing this step. Gently press the mold bottoms first; if that doesn’t work, run a thin silicone spatula around edges while molds are still warm but not hot.
Pro Tips for Eggs In Silicone Molds
- Perfectly shaped eggs require attention to detail—here’s what I’ve learned from making hundreds of batches.
- Mold Preparation: In Step 1, don’t skip the nonstick spray even if your molds claim to be nonstick. I’ve found that b…
- Baking Precision: The 12-15 minute range in Step 3 is critical. Start checking at 12 minutes—you want the tops just s…
Frequently Asked Questions
Can I use silicone molds for scrambled eggs, or just hard-boiled?
Silicone molds work for both! For scrambled eggs, grease the mold lightly, pour in whisked eggs, and bake at 350°F (175°C) for 12–15 minutes. Hard-boiled eggs peel easier when cooked in molds—just boil water, place eggs inside, and simmer for 9–12 minutes.
How do I prevent eggs from sticking to the silicone mold?
Always lightly coat the mold with oil, butter, or nonstick spray before adding eggs. For hard-boiled eggs, a quick rinse with cold water after cooking helps release them. Avoid overfilling—leave ¼-inch space at the top for easy removal!
What’s the best alternative if I don’t have silicone molds?
Try muffin tins (line with parchment paper) or ramekins for similar shapes. For hard-boiled eggs, traditional boiling works, but shapes won’t be as uniform. Silicone’s flexibility makes it the top pick for easy release and fun designs!
Why did my eggs crack in the silicone mold while boiling?
Cracks happen if eggs are too fresh (high moisture) or water boils too vigorously. Use eggs 7–10 days old, and keep water at a gentle simmer. Prick the round end with a pin before cooking to release air and reduce cracking.
How long do molded eggs last in the fridge?
Hard-boiled eggs in silicone molds stay fresh for up to 1 week in an airtight container. Scrambled egg bites last 3–4 days. For longer storage, freeze scrambled egg molds (without toppings) for up to 3 months—reheat in the microwave!
Using eggs in silicone molds is a game-changer for effortless, creative breakfasts! 🌟 Whether you’re whipping up cute egg bites for meal prep or impressing guests with perfectly shaped dishes, these molds make it simple. With the right technique and a little practice, you’ll master foolproof, mess-free eggs every time.
Ready to try it? Grab your favorite silicone mold and start experimenting with flavors—think cheesy, veggie-packed, or even sweet options! Don’t forget to share your creations and tag us. Happy cooking! 🍳

Trained in classic French technique but raised on slow-cooked ribs and spicy rubs, she blends culinary skill with smoke and soul.
- Recipe for Boneless Pork Chops in Cast Iron Skillet: Sear and Baste to Juicy Perfection - October 3, 2026
- Recipe for Boneless Cross Rib Roast: Slow-Roasted Beef with Herb Crust - October 3, 2026
- Hamburgers in Sauce Recipe Crock Pot: Slow-Cooked Savory Delight - October 3, 2026