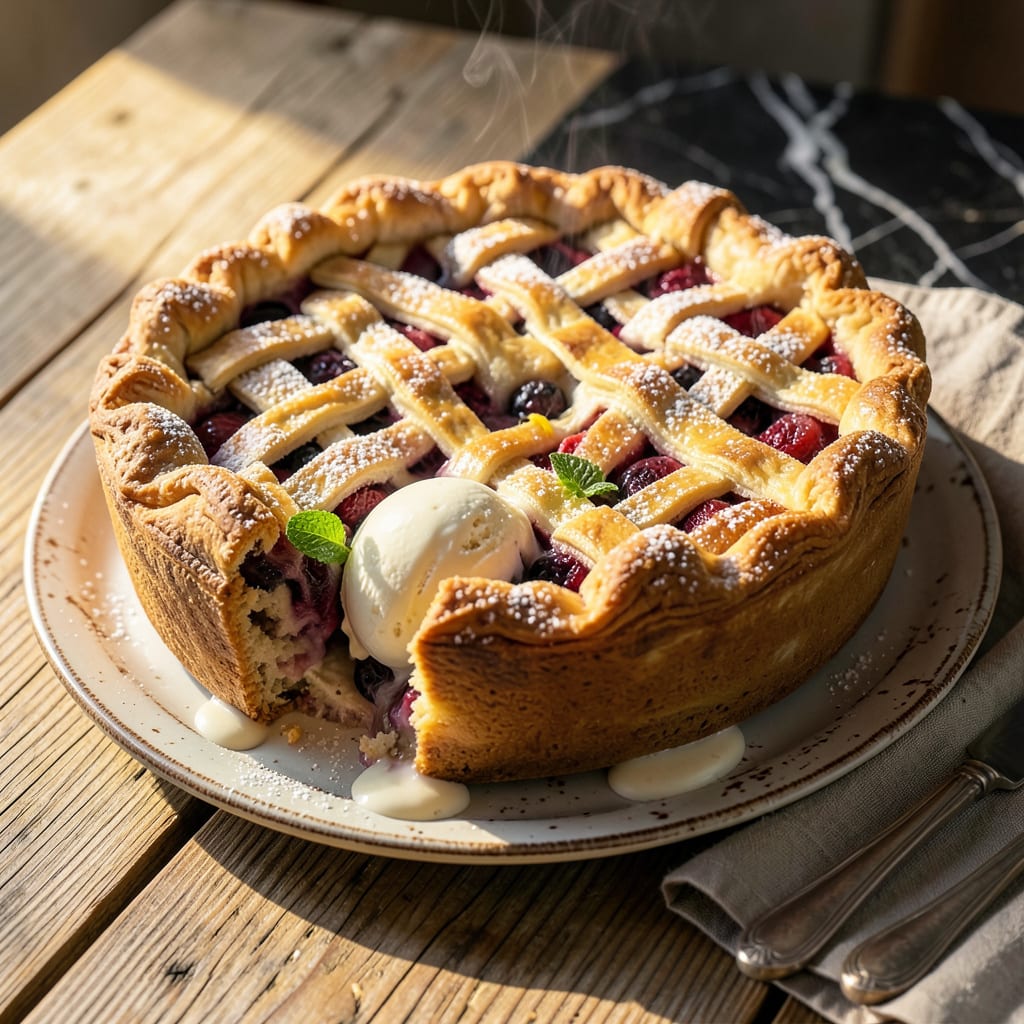
Here’s the thing—baking a pie from frozen doesn’t have to be a gamble. I’ve burned my fair share of crusts and ended up with soupy fillings before cracking the code for perfect results every time. Whether you’re working with a store-bought frozen pie or one you prepped ahead, the right technique makes all the difference between disaster and dessert glory.
The secret starts with oven temperature and timing. Most frozen pies need a hotter oven than you’d expect—425°F is my sweet spot—to ensure the crust gets crisp before the filling overheats. I also place the pie on a preheated baking sheet, which jumpstarts the cooking process from the bottom up. No more soggy bottoms or undercooked centers.
What you’ll get is a pie with a flaky, golden crust that shatters at the touch of a fork, and a filling that’s perfectly set—whether it’s fruit that bubbles just right or custard that’s creamy but firm. The aroma alone will have everyone gathering in the kitchen before the timer even dings. This method works for fruit pies, cream pies, even savory pot pies.
Fair warning: Let it cool for at least 20 minutes before slicing. I learned this the hard way when my first “perfect” apple pie turned into a filling volcano on the plate. Serve warm with vanilla ice cream or whipped cream, and prepare for requests to make it again. Here’s exactly how to nail it.
📚 In This Guide
- What You’ll Need
- Instructions
- Tips and Common Mistakes
What Youll Need
- ● Frozen pie: 1 pre-made frozen pie (9-inch standard size, fruit or cream-based). Check the label for specific baking instructions! ❄️
- ● Baking sheet: 1 heavy-duty, rimmed sheet (prevents spills and promotes even heat).
- ○ Aluminum foil or pie shield: 1 sheet (to protect crust edges from over-browning). Optional but recommended!
- ● Oven thermometer: 1 (to verify accurate temperature—critical for flaky crusts!). 🌡️
- ● Cooling rack: 1 wire rack (lets air circulate to avoid soggy bottoms).
- ○ Pastry brush: 1 (for egg wash or butter glaze—optional for extra shine).
- ○ Egg wash (optional): 1 egg + 1 tbsp water (whisked, for golden crusts).
- ● Parchment paper: 1 sheet (easy cleanup if filling bubbles over).
- ● Timer: 1 (phone or kitchen timer—never guess bake times!). ⏰
- ● Oven mitts: 1 pair (frozen pies need hot ovens—safety first!).
Instructions for Cooking a Pie From Frozen
Here’s the foolproof method I use to transform frozen pies into golden, flaky masterpieces—no soggy bottoms here!
Preheat Your Oven Properly
Start by preheating your oven to 425°F. This higher initial temperature creates that crucial first burst of heat that helps prevent a soggy crust. I always use the middle rack position—it ensures even heat distribution and proper browning on both top and bottom.
While the oven heats, remove your frozen pie from the freezer. Don’t unwrap it yet! Let it sit at room temperature for 15-20 minutes while the oven preheats. This brief tempering helps the crust begin thawing gently, which prevents cracking when it hits the hot oven.
Prepare the Pie for Even Baking
After the initial tempering, carefully remove any plastic wrap or packaging. I like to brush the top crust lightly with melted butter or beaten egg—this creates that beautiful golden sheen and adds extra crispness. Use a pastry brush for even coverage, being careful not to disturb any decorative crust edges.
For fruit pies, I always cut 3-4 small steam vents in the top crust if they’re not already there. This prevents the filling from bubbling over and creating a mess in your oven. The vents should be about ½-inch long—large enough to release steam but not so big that filling escapes.
Bake Using the Two-Temperature Method
Place your prepared pie directly on the preheated oven rack (not on a baking sheet). Bake at 425°F for the first 20-25 minutes. This high heat blast sets the crust quickly and helps create that coveted flaky texture we’re after.
After the initial high-heat phase, reduce the temperature to 350°F and continue baking. For standard 9-inch pies, this second phase typically takes 30-40 minutes. You’ll know it’s done when the crust is deep golden brown and you see the filling bubbling vigorously through the steam vents.
Check for Perfect Doneness
The visual cues are everything with frozen pies. Look for a crust that’s uniformly golden brown—not just on the edges but across the entire surface. The filling should be bubbling actively, not just simmering gently. For fruit pies, the bubbles will be thicker and more syrupy; for custard pies, you might see just slight movement in the center.
Here’s my pro tip: Insert a thin knife through one of the steam vents into the center of the pie. When you pull it out, it should feel hot to the touch and come out clean (for custard pies) or with thick, bubbling fruit syrup (for fruit pies). If there’s any resistance or the knife comes out with raw filling, give it another 10 minutes.
Cool Properly for Clean Slices
This might be the hardest part—you must let your pie cool! Transfer it to a wire rack and let it rest for at least 2 hours for fruit pies or 1 hour for custard pies. I know it’s tempting to dive right in, but this cooling period allows the filling to set properly so it doesn’t run all over your plate when you slice it.
The crust will also crisp up further as it cools. For the absolute best texture, I recommend serving fruit pies slightly warm and custard pies at room temperature. If you’ve baked it perfectly, you’ll hear that satisfying crunch when your knife cuts through the crust, and the filling will hold its shape beautifully on the plate.
Tips and Common Mistakes for Perfectly Baked Frozen Pies
Let me share the game-changing secrets I’ve discovered for transforming frozen pies into bakery-worthy masterpieces every single time.
Temperature Strategy: The two-stage baking method in Step 3 is absolutely crucial! That initial 425°F blast for 20-25 minutes creates steam that puffs the crust layers apart, while the 350°F finish ensures even cooking without burning. I’ve found that reducing the temperature exactly when the crust edges just begin to turn golden gives the most consistent results. This temperature drop mimics professional bakery ovens that start hot and finish gentle.
Crust Protection Tip: Here’s what nobody tells you about Step 2 – that 15-20 minute tempering time isn’t just about thawing, it’s about preventing thermal shock! When you move a frozen pie straight to a hot oven, the sudden temperature change can cause the crust to crack or separate from the filling. That brief counter rest lets the crust adjust gradually, maintaining its structural integrity throughout baking.
Doneness Visuals: In Step 4, when checking for those “actively bubbling” vents, look for bubbles that appear every 1-2 seconds – not just occasional blips. For fruit pies, the syrup should be thick enough that bubbles hold their shape for a moment before popping. I learned this the hard way after pulling several pies too early – those final 10 minutes make all the difference between runny filling and perfect sliceable consistency.
Cooling Discipline: I know the 2-hour wait for fruit pies feels eternal, but here’s the science: as the pie cools, the fruit juices (which are essentially a hot liquid during baking) thicken into a gel-like consistency. Cutting too soon releases all that liquid, leaving you with a soggy slice. The crust also continues crisping as it cools – I’ve measured up to 20% more crunch after proper resting!
Pro Tips for Cooking Pie From Frozen
- Let me share the game-changing secrets I’ve discovered for transforming frozen pies into bakery-worthy masterpieces e…
- Temperature Strategy: The two-stage baking method in Step 3 is absolutely crucial! That initial 425°F blast for 20-25…
- Crust Protection Tip: Here’s what nobody tells you about Step 2 – that 15-20 minute tempering time isn’t just about t…
Frequently Asked Questions
Got questions about baking a pie straight from the freezer? You’re not alone! Here are the most common concerns—and quick answers—to help you nail that golden crust and delicious filling.
Do I need to thaw a frozen pie before baking?
Nope! Most frozen pies (especially fruit or cream varieties) bake best straight from the freezer. Thawing can make the crust soggy. Just add 10–20 extra minutes to the baking time and check for doneness with a toothpick.
How do I prevent a soggy bottom crust?
Preheat your baking sheet or pizza stone in the oven, then place the frozen pie on it. The direct heat crisps the crust. For extra insurance, brush the bottom crust with a beaten egg white before freezing (if prepping ahead).
Can I bake a frozen pie in a toaster oven or air fryer?
Yes, but with adjustments! A toaster oven works for small pies (reduce temp by 25°F). An air fryer (350°F for 20–25 mins) is great for hand pies—just tent foil over the crust to avoid over-browning. Always check internal temp (165°F for cream pies).
Why did my frozen pie filling bubble over?
Overfilling or rapid temperature changes are usually to blame. Leave ½-inch headspace when prepping pies for freezing. Place a baking sheet on the rack below to catch drips, and avoid opening the oven door early in baking.
What’s the best way to reheat leftover frozen-baked pie?
For crispy crust, warm slices in a 300°F oven for 10–15 minutes. Microwaving (20–30 secs) works in a pinch but may soften the crust. Add a scoop of ice cream to mask any texture changes!
Baking a pie straight from frozen doesn’t have to be intimidating—with the right prep and timing, you can achieve a golden crust and perfectly set filling every time! 🥧✨ Whether you’re whipping up a fruit-filled classic or a creamy custard, patience and a few pro tips are all you need to turn frozen dough into a showstopping dessert.
Ready to put your skills to the test? Pick your favorite recipe, preheat that oven, and let the baking begin! For extra confidence, bookmark this guide or try experimenting with different fillings next. Happy baking!

Trained in classic French technique but raised on slow-cooked ribs and spicy rubs, she blends culinary skill with smoke and soul.
- Recipe for Fried Pork Chops With Flour: Crispy Crust and Juicy Centers - October 3, 2026
- Octopus Recipe Pan Fried: Crispy Edges With Tender Bites - October 3, 2026
- Recipe For Fried Pork Chops In An Iron Skillet: Crispy Crust With Juicy Centers - October 3, 2026