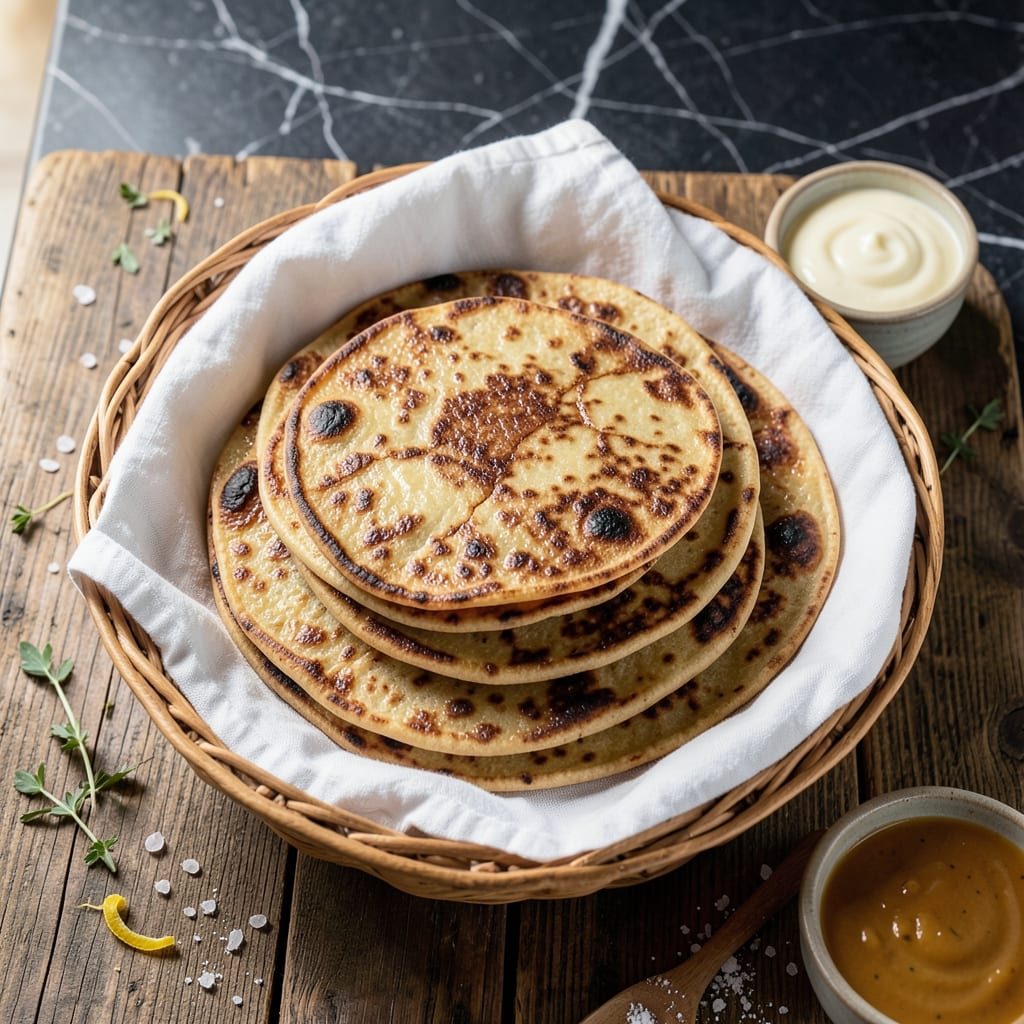
This recipe delivers the authentic taste of Costa Vida tortillas right in your kitchen. The secret lies in the perfect balance of softness and durability, making them ideal for any wrap.
I’ve refined this method to replicate the restaurant-style texture and flavor. Using just a few pantry staples, you’ll create tortillas that are tender yet strong enough to hold all your favorite fillings.
Each bite offers a warm, slightly chewy consistency that pairs beautifully with savory meats, fresh veggies, or bold sauces. These tortillas elevate any meal from ordinary to extraordinary.
Follow the steps carefully, and you’ll have homemade tortillas that rival your favorite restaurant. Let’s begin.
Ingredients for Costa Vida Tortilla
Just seven pantry staples for restaurant-quality tortillas at home.
| Ingredient | Amount | Notes |
|---|---|---|
| All-Purpose Flour 🌾 | 3 cups | Plus extra for dusting |
| Warm Water 💧 | 1 ¼ cups | About 110°F, not boiling |
| Vegetable Shortening 🧈 | ⅓ cup | Melted, or use lard |
| Fine Sea Salt 🧂 | 1 ½ tsp | Diamond Crystal preferred |
| Baking Powder 🍚 | 1 tsp | Ensures slight fluffiness |
| Granulated Sugar 🍬 | 1 tsp | Balances saltiness |
| Neutral-Flavored Oil 🫒 | 2 tbsp | For cooking, like avocado |
[recipe_ingredient_scaler]
The flour is the foundation—King Arthur or Gold Medal give consistent results. I use Crisco shortening for that authentic taste, but lard works too if you’re going old-school. Water temperature matters: too hot kills the yeast-like effect of baking powder, too cold won’t activate it. Aim for warm but not scalding (think bathwater temp). Salt should be fine-grained so it distributes evenly through the dough.
No shortening? Melted coconut oil at a 1:1 ratio gets close. Swap baking powder for baking soda plus buttermilk (½ tsp soda + ¾ cup buttermilk replacing the water), but texture shifts slightly. The sugar can be omitted if you prefer savory-only tortillas. For extra tenderness, replace 2 tbsp water with milk—whole milk adds richness without changing the structure much.
Dough keeps in the fridge for 2 days wrapped tight. Cooked tortillas stay fresh in a towel-lined bag for 3 days. Freeze stacked with parchment between layers for up to 1 month (reheat in a dry skillet).
Why You’ll Love This Recipe
- Mix & Rest: I love that this dough comes together in a bowl with just flour, warm water, and a touch of shortening—no fancy gadgets, just my hands and 10 minutes of resting time.
- Buttery Layers: The vegetable shortening creates these tender, flaky pockets that make every bite feel special, especially with that hint of sea salt.
- Endless Fillings: Honestly, these tortillas hold up to anything—from breakfast burritos to late-night quesadillas with just cheese and salsa.
Step-by-Step Instructions for Authentic Restaurant-Style Tortillas
Here’s the method I’ve perfected to recreate that signature soft, pillowy texture you love.
Step 1: Combine Dry Ingredients for the Base
In a large mixing bowl, whisk together the 3 cups All-Purpose Flour, 1.5 tsp Fine Sea Salt, 1 tsp Baking Powder, and 1 tsp Granulated Sugar. I use Diamond Crystal salt for its clean flavor and consistent grain size.
The baking powder gives these tortillas their signature slight lift, while the sugar balances the saltiness perfectly. Make sure to whisk thoroughly until no streaks of flour remain—this ensures even distribution of leavening agents for consistent texture.
Step 2: Cut in the Shortening Until Crumbly
Add the 0.33 cup Vegetable Shortening to the dry mixture. Using your fingers or a pastry cutter, work the shortening into the flour until the mixture resembles coarse crumbs with some pea-sized pieces remaining.
Here’s the thing—those visible fat pieces create the flaky layers in your finished tortillas. I prefer vegetable shortening over butter for its higher melting point, which creates that authentic restaurant-style texture. The mixture should hold together when pressed but still feel slightly dry.
Step 3: Form the Dough with Warm Water
Gradually add the 1.25 cups Warm Water (about 110°F) while mixing with a wooden spoon until the dough starts to come together. The water temperature matters—too hot and it’ll cook the flour, too cold and the shortening won’t incorporate properly.
Turn the dough onto a lightly floured surface and knead for 3-4 minutes until smooth and elastic. You’ll notice it transforms from shaggy to silky. If it feels too sticky, add a tablespoon of flour, but don’t overdo it—slight tackiness is what you want for tender tortillas.
Step 4: Rest and Portion the Dough
Shape the dough into a ball, place it back in the bowl, and cover with a damp towel. Let it rest at room temperature for 20-30 minutes. This relaxation period allows the gluten to unwind, making the dough easier to roll out.
After resting, divide the dough into 8 equal portions (about 3.5 oz each) and roll each into a ball. I use a kitchen scale for precision—uniform portions ensure even cooking. Cover the balls with plastic wrap to prevent drying while you work.
Step 5: Roll and Cook the Tortillas
On a floured surface, roll each ball into a thin circle about 8 inches in diameter. I find rolling from the center outward with even pressure prevents thick spots. Don’t worry if they’re not perfect circles—authentic tortillas often have rustic edges.
Heat a skillet over medium-high heat and add 1 tablespoon of the Neutral-Flavored Oil. Cook each tortilla for 30-45 seconds per side until lightly browned in spots and puffed in areas. You’ll see small bubbles form—that’s the steam creating those characteristic air pockets. Add the remaining 1 tablespoon of oil as needed between batches.
Transfer cooked tortillas to a clean kitchen towel and cover to keep warm and soft while you finish the batch. They should be pliable with a slight chew, not crispy or dry.
Pro Tips For Making Costa Vida Tortilla
- Rest the Dough: After mixing, let the dough sit for 15-20 minutes under a damp towel—I learned this the hard way when my first batch kept springing back while rolling.
- Use Warm Water: The water should feel just barely hot to the touch, not scalding, or the shortening won’t incorporate properly and you’ll get dense tortillas.
- Roll Thin and Even: Aim for 1/8-inch thickness; any thicker and they won’t puff, any thinner and they’ll tear when cooking.
- Cook on High Heat: Get your skillet screaming hot before adding the tortilla, then flip after 20-30 seconds—this guarantees those signature charred spots.
Storing and Reheating This Dish
Room Temperature Storage
Keep your tortillas wrapped in a clean kitchen towel and stored in an airtight container at room temperature. They’ll stay soft and pliable for up to 3 days this way, perfect for quick meals. I often make a big batch on Sunday for easy lunches. ❄️
Refrigerator Storage
For longer freshness, place cooled tortillas in a zip-top bag with parchment paper between each one. They’ll keep in the fridge for up to 1 week. Before using, warm them briefly to restore that fresh-made texture.
Freezing for Later
Stack tortillas with parchment between each, then seal in a freezer-safe bag. They freeze beautifully for up to 1 month without losing quality. I recommend portioning them in sets of 4-6 for easy meal prep.
Skillet Reheating
Heat a dry skillet over medium heat for 15-20 seconds per side to restore warmth and softness. This method works best for both fresh and frozen tortillas. Add a drop of water to create steam for extra pliability.
Microwave Method
Wrap a stack in a damp paper towel and microwave for 10-15 seconds. This is my go-to for quick reheating. Be careful not to overdo it, or they’ll become chewy rather than soft.
Oven Refresh
For larger batches, wrap tortillas in foil and warm in a 350°F oven for 5-7 minutes. This works especially well for frozen tortillas straight from the freezer. 🔥
Nutrition Facts
Frequently Asked Questions
Can I use butter instead of shortening?
Yes, but expect a slight texture change. Butter has a lower melting point, which can make tortillas less flaky. Use the same amount and chill the dough for 15 minutes before rolling.
Why is my dough too sticky?
Add flour 1 tablespoon at a time until manageable. Too much flour makes tortillas tough, so work with slightly tacky dough. Kneading helps develop the right consistency.
How thin should I roll the dough?
Aim for about 1/8 inch thick for 8-inch tortillas. Use a ruler for precision if needed. Thinner tortillas cook faster but may tear more easily.
Can I make these ahead of time?
Cooked tortillas stay fresh in an airtight container for 3 days at room temperature. For longer storage, freeze with parchment between layers.

Trained in classic French technique but raised on slow-cooked ribs and spicy rubs, she blends culinary skill with smoke and soul.
- Recipe for Boneless Pork Chops in Cast Iron Skillet: Sear and Baste to Juicy Perfection - October 3, 2026
- Recipe for Boneless Cross Rib Roast: Slow-Roasted Beef with Herb Crust - October 3, 2026
- Hamburgers in Sauce Recipe Crock Pot: Slow-Cooked Savory Delight - October 3, 2026