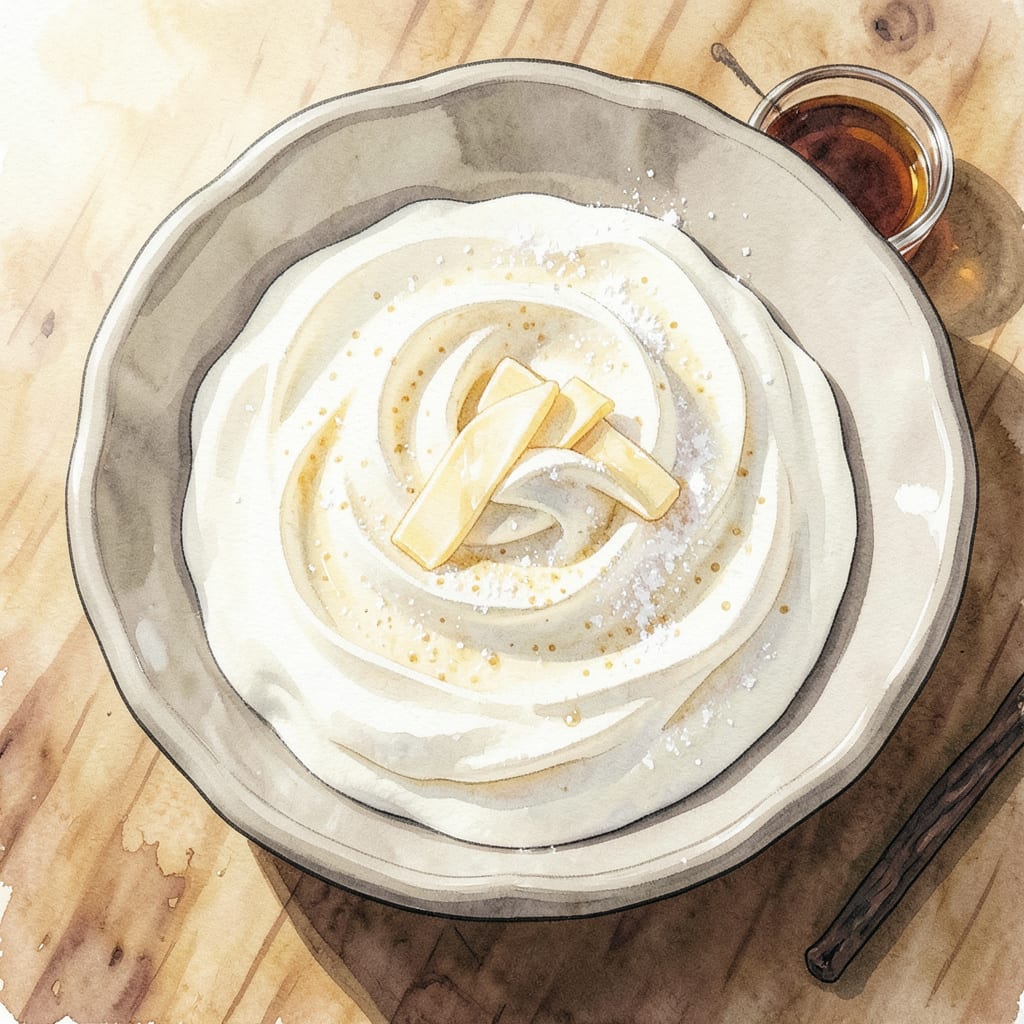
Creating a bakery-quality cake filling at home is simpler than you might expect. This creamy vanilla layer delivers the same smooth texture and balanced sweetness found in professional cakes, without artificial stabilizers or preservatives. The secret lies in precise ingredient ratios and proper emulsification techniques.
The result is a velvety filling that spreads effortlessly between cake layers while maintaining structure. Unlike commercial versions that rely on shelf-stable ingredients, this homemade recipe uses fresh dairy for superior flavor and mouthfeel. Perfect for layer cakes, cupcakes, or even as a fruit dip when slightly thinned.
Ingredients for Costco Cake Filling
These professional-grade ingredients create a velvety, bakery-quality vanilla cake filling with superior texture and flavor balance.
| Ingredient | Amount | Notes |
|---|---|---|
| Heavy Whipping Cream 🥛 | 1 ½ cups | Ultra-pasteurized for stability |
| Full-Fat Cream Cheese 🧀 | 8 oz | Room temperature, block-style |
| Unsalted Butter 🧈 | ½ cup | European-style preferred |
| Powdered Sugar 🍚 | 2 ½ cups | Sifted for smooth texture |
| Pure Vanilla Extract 🌱 | 1 tbsp | Madagascar bourbon variety |
| Vanilla Bean Paste 🌱 | 1 tsp | For visible speckles |
| Kosher Salt 🧂 | ¼ tsp | Diamond Crystal brand |
| Fresh Lemon Juice 🍋 | 1 tsp | For brightness and balance |
| Whole Milk 🥛 | 2 tbsp | For adjusting consistency |
[recipe_ingredient_scaler]
The dairy quality is paramount for professional results. Heavy whipping cream should be ultra-pasteurized (like Organic Valley) for optimal whipping stability. Full-fat cream cheese (Philadelphia brand recommended) must be true block-style—tub products contain stabilizers that alter texture. European-style butter (such as Plugrá or Kerrygold) provides the ideal fat content (82-86%) for proper emulsification. Powdered sugar should be freshly sifted to eliminate any cornstarch clumps that could create graininess in the final product.
For ingredient substitutions, mascarpone cheese may replace cream cheese at a 1:1 ratio for a lighter texture, though structural integrity may be slightly compromised. Clear vanilla extract (like LorAnn) can substitute for regular vanilla if pure white filling is desired, though flavor depth will be reduced. In emergencies, 1/4 cup corn syrup may replace powdered sugar for sweetness, but this will significantly alter the filling’s body and piping capability. The lemon juice is non-negotiable—its acidity prevents curdling and enhances shelf life.
Storage requires meticulous temperature control. The completed filling maintains optimal consistency when refrigerated at 38-40°F for up to 5 days in an airtight container. For longer storage, portion into piping bags and freeze at 0°F for 3 months. Thaw overnight in the refrigerator before use. Avoid storing in plastic containers as they can absorb odors; glass is preferred. Bring to room temperature and rewhip briefly before application to restore the professional bakery texture mentioned in the introduction.
Step-by-Step Instructions for Costco Cake Filling
This professional method delivers the signature creamy texture and balanced sweetness that makes bakery-style cakes unforgettable.
Step 1: Whip the Heavy Cream to Soft Peaks
In a chilled mixing bowl, pour the 1.5 cups Heavy Whipping Cream. Using a whisk attachment, beat on medium-high speed for 2-3 minutes until the cream forms soft peaks that gently curl at the tips. Avoid overwhipping—stiff peaks will make the filling too dense.
The ultra-pasteurized cream provides stability, but monitor closely as temperature and humidity can affect whipping time. You’ll notice the volume increase significantly and the color lighten slightly when properly whipped. This creates the airy foundation for your filling.
Step 2: Create the Cream Cheese Base
In a separate bowl, beat the 8 oz Full-Fat Cream Cheese and 0.5 cup Unsalted Butter together on medium speed for 2-3 minutes until completely smooth and free of lumps. The European-style butter adds richness while the room-temperature cream cheese ensures even incorporation.
Add the 2.5 cups Powdered Sugar gradually, about ½ cup at a time, mixing on low speed between additions to prevent sugar from flying out of the bowl. The sifted sugar dissolves more easily, creating a silky texture without graininess.
Step 3: Incorporate Flavorings and Balance
With the mixer running on low speed, add the 1 tbsp Pure Vanilla Extract, 1 tsp Vanilla Bean Paste, 0.25 tsp Kosher Salt, and 1 tsp Fresh Lemon Juice. The Madagascar bourbon vanilla provides depth while the lemon juice brightens the sweetness.
Increase speed to medium and beat for 1 minute until fully combined. The vanilla bean paste will create visible speckles throughout the filling, mimicking the professional bakery appearance. Taste and adjust salt if needed—the Diamond Crystal brand dissolves evenly for consistent seasoning.
Step 4: Fold Components Together
Using a silicone spatula, gently fold one-third of the whipped cream into the cream cheese mixture to lighten it. Then add the remaining whipped cream in two additions, folding just until no streaks remain. This technique preserves the air you whipped into the cream while creating a uniform texture.
The final mixture should be smooth, creamy, and hold its shape when spooned. If the filling appears too thick, incorporate the 2 tbsp Whole Milk one tablespoon at a time until reaching the desired pipeable consistency for layering cakes.
Step 5: Chill for Optimal Texture
Transfer the filling to an airtight container and refrigerate for at least 1 hour before using. This chilling time allows the flavors to meld completely and the filling to firm up slightly for easier application between cake layers.
When ready to use, give the filling a quick stir. It should spread smoothly with a slight resistance, similar to commercial bakery fillings. The filling will maintain its structure at room temperature for up to 2 hours during cake assembly.
Essential Equipment for Great costco cake filling
Stand Mixer Essentials
For this recipe, a 5-quart stand mixer is non-negotiable—I swear by my KitchenAid Professional 600 for its power and stability. The whisk attachment whips cream to perfect soft peaks in 2-3 minutes, while the paddle attachment handles the cream cheese base without overheating. Trust me, hand mixers just can’t achieve the same professional consistency. 💪
Chill your mixing bowl and whisk for 15 minutes before starting—this helps the cream whip faster and hold its structure better. I keep a spare bowl in the freezer for those last-minute baking sessions. The cold metal makes all the difference in achieving that bakery-quality texture we’re after.
Precision Tools
A digital kitchen scale (I use the Escali Primo) ensures perfect ingredient ratios every time. Weigh your powdered sugar in grams (300g for this recipe) rather than using volume measurements—this eliminates packing inconsistencies that can throw off your filling’s texture.
Don’t overlook a fine-mesh sieve for sifting your powdered sugar. I use a 10-inch stainless steel sieve from my local restaurant supply store. It catches any cornstarch clumps that could create graininess in your final product, giving you that ultra-smooth Costco-style finish.
Specialty Ingredients
Invest in Madagascar bourbon vanilla extract—I prefer Nielsen-Massey for its deep, complex flavor. The vanilla bean paste (also from Nielsen-Massey) adds those beautiful speckles that make your filling look professionally made. These aren’t areas to cut corners if you want authentic bakery results.
For the butter, splurge on European-style like Plugrá or Kerrygold. Their higher fat content (82-86%) creates a richer mouthfeel that’s closer to commercial bakery fillings. I noticed the difference immediately when I made the switch from standard grocery store butter.
Application Tools
A large offset spatula (I use the 13-inch Ateco model) is essential for spreading the filling evenly between cake layers. The offset design gives you better control and prevents your knuckles from dragging through the frosting. For piping decorative borders, I recommend Wilton 1M and 2D tips.
Don’t forget disposable piping bags—they’re not just for professionals. I keep a stack of 18-inch bags on hand for filling cakes. They’re more sanitary than reusable bags and let you pipe with precision. The filling holds its shape beautifully when piped directly from a chilled bag.
Storage Solutions
Glass airtight containers with silicone seals (like OXO Good Grips) are my go-to for storing cake fillings. They prevent odor absorption and maintain the filling’s texture better than plastic. I always label with the date using chalkboard labels—it’s amazing how quickly you forget when you made something!
For portioning, I use silicone half-sphere molds to create perfect dollops of filling. They make assembling layer cakes so much easier, and you can freeze individual portions for up to 3 months. Just pop them out when needed—they thaw in about 2 hours in the fridge. ✨
Temperature Control
An instant-read thermometer (I use ThermoWorks Thermapen) helps monitor your dairy temperatures. The cream cheese and butter should be exactly 65-68°F for optimal mixing. Too cold and you’ll get lumps; too warm and your filling might break.
During summer, I place my mixing bowl over an ice bath while whipping cream to prevent overheating. The ideal filling temperature for application is 55-60°F—cool enough to hold shape but warm enough to spread smoothly. This attention to temperature details separates home bakers from professionals.
Nutrition Facts

Trained in classic French technique but raised on slow-cooked ribs and spicy rubs, she blends culinary skill with smoke and soul.
- Recipe for Boneless Pork Chops in Cast Iron Skillet: Sear and Baste to Juicy Perfection - October 3, 2026
- Recipe for Boneless Cross Rib Roast: Slow-Roasted Beef with Herb Crust - October 3, 2026
- Hamburgers in Sauce Recipe Crock Pot: Slow-Cooked Savory Delight - October 3, 2026