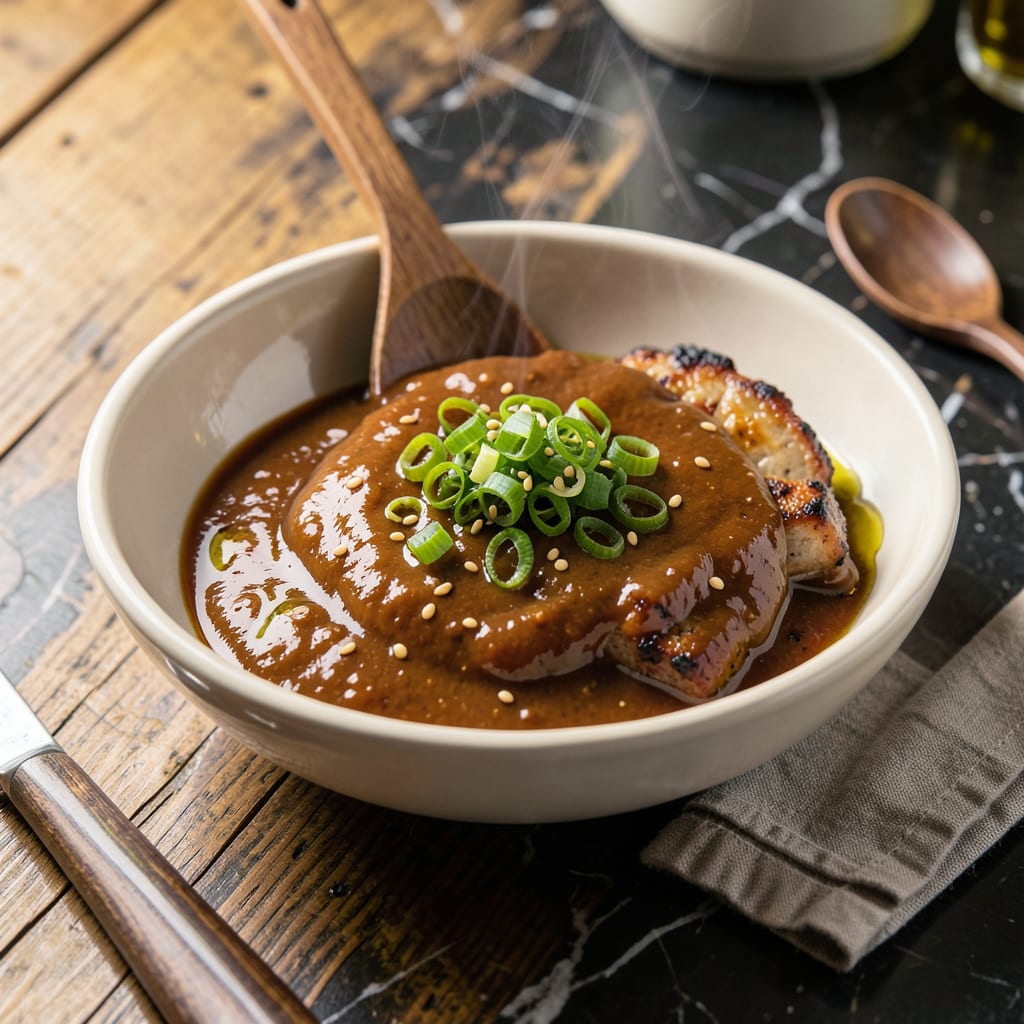
This sauce captures the perfect balance of sweet and savory that makes Japanese BBQ so addictive. I developed this version after testing countless store-bought options, determined to nail that signature umami depth.
With just 10 minutes of simmering, you’ll have a glossy, thick glaze that transforms grilled meats into restaurant-quality yakitori. It keeps beautifully in the fridge for up to 2 weeks.
Ingredients for Costco Japanese Bbq Sauce
Ten ingredients transform into that addictive sweet-savory glaze you crave on yakitori.
| Ingredient | Amount | Notes |
|---|---|---|
| Soy Sauce 🥢 | ¾ cup | Low-sodium preferred for balance |
| Mirin 🍶 | ½ cup | Sweet rice wine, essential for shine |
| Sake 🍶 | ¼ cup | Dry variety for depth |
| Granulated Sugar 🍚 | ⅓ cup | Dissolves evenly in liquid |
| Brown Sugar 🟤 | ¼ cup | Packed, for molasses notes |
| Garlic Cloves 🧄 | 4 cloves | Minced finely for even distribution |
| Fresh Ginger 🌿 | 1 tbsp | Grated, skin removed |
| Rice Vinegar 🍯 | 2 tbsp | Unseasoned for clean acidity |
| Sesame Oil 🫒 | 1 tbsp | Toasted for nutty aroma |
| Cornstarch 🌾 | 1 tbsp | Mixed with 1 tbsp water for slurry |
[recipe_ingredient_scaler]
The soy sauce is the backbone here. Kikkoman low-sodium is my go-to—consistent flavor, easy to find at any grocery store. Mirin and sake are non-negotiable for authenticity; Costco actually carries both in their international aisle. Skip the cooking sake with added salt. Fresh ginger and garlic matter more than you’d think—grate the ginger (don’t mince) for maximum flavor extraction.
No mirin? Mix 2 tbsp sugar with 2 tbsp water per 1/4 cup needed—it’s sweeter but works. Sake can be swapped for dry white wine in a pinch, though the flavor profile shifts slightly. Brown sugar can be all granulated if that’s what you’ve got. The cornstarch slurry is your thickness insurance—don’t skip it or you’ll have a sad, thin sauce.
This keeps for 2 weeks in the fridge in a sealed jar. The flavors actually deepen over the first 48 hours (worth the wait). Freeze extras in ice cube trays for up to 3 months—perfect for impromptu grilling sessions.
Why You’ll Love This Recipe
- 5-Minute Simmer: I just dump the soy sauce, mirin, sake, and sugars in a pot—stir, simmer, done. No fancy techniques, just foolproof flavor.
- Umami Bomb: The combo of mirin and sake gives it that sticky-sweet depth you’d pay extra for in a restaurant. I’ll be real: I lick the spoon every time.
- Marinade or Glaze: I slather it on chicken, brush it on ribs, or even stir it into fried rice. Between us, it’s my weeknight shortcut to takeout taste.
- Pantry Staples: Soy sauce, sugar, and a splash of sake and mirin are all I need—no last-minute grocery runs. Honestly, it’s cheaper than buying the bottled stuff.
Step-by-Step Instructions for Japanese BBQ Sauce
This method delivers a glossy, deeply flavorful sauce with perfect balance every time.
Step 1: Bloom Aromatics in Oil
Heat a medium saucepan over medium heat and add the 1 tbsp Sesame Oil. Once it shimmers, add the 4 cloves Garlic Cloves and 1 tbsp Fresh Ginger. Sauté for 1-2 minutes until the garlic turns light golden and releases its fragrance.
Watch carefully—garlic burns quickly. You want it just soft and aromatic, not browned. This step builds the flavor foundation, so don’t rush it. The sesame oil’s nutty notes will deepen as it heats, creating a rich base for the sauce.
Step 2: Combine Liquids and Sweeteners
Pour in the 0.75 cup Soy Sauce, 0.5 cup Mirin, 0.25 cup Sake, 0.33 cup Granulated Sugar, and 0.25 cup Brown Sugar. Stir well to dissolve the sugars, then add the 2 tbsp Rice Vinegar.
Bring the mixture to a gentle simmer over medium-high heat. The sugars will melt into the liquids, creating a smooth, syrupy consistency. The mirin adds sweetness and shine, while the sake contributes depth and complexity to the umami profile.
Step 3: Thicken the Sauce to Glaze Consistency
In a small bowl, mix the 1 tbsp Cornstarch with 1 tbsp water to create a slurry. Slowly pour this into the simmering sauce while stirring constantly. The mixture will begin to thicken within 30-60 seconds.
Reduce the heat to low and let it simmer for an additional 2-3 minutes, stirring occasionally. The sauce should coat the back of a spoon with a glossy, slightly viscous texture. If it thickens too much, add a splash of water to adjust the consistency.
Step 4: Cool and Finish
Remove the saucepan from heat and let the sauce cool to room temperature. As it cools, it will thicken further, reaching the perfect glaze-like consistency for brushing onto meats or drizzling over dishes.
Taste and adjust if needed—though the balance of sweet, salty, and tangy should already be spot-on. Transfer to an airtight container once fully cooled. This sauce keeps well in the refrigerator for up to 2 weeks.
Pro Tips For Making Costco Japanese Bbq Sauce
- Simmer Low and Slow: Keep the heat at medium-low to avoid burning the sugars in the brown sugar and granulated sugar—after ruining a batch by rushing it, I now let it reduce gradually for 10-12 minutes.
- Balance the Sweetness: If your sauce tastes too sweet, add a splash more soy sauce or sake to cut through the brown sugar’s richness—I learned this the hard way with a cloying first attempt.
- Skip the Substitutes: Use real mirin and sake, not cooking wine or rice vinegar; the depth of flavor suffers otherwise, and I’ve tried both shortcuts with disappointing results.
- Strain for Smoothness: After simmering, strain the sauce through a fine-mesh sieve to remove any undissolved sugar or bits—sounds fussy, but it makes a noticeably smoother finish.
Storing and Reheating This Recipe
Refrigerator Storage
Transfer the cooled sauce to a clean, airtight container—I love using 16-ounce mason jars. It’ll keep beautifully in the fridge for up to 2 weeks. The flavors actually meld and deepen over the first 48 hours. ❄️
Freezer Storage
For longer storage, pour into ice cube trays and freeze for 4-6 hours until solid. Then transfer the cubes to a freezer-safe bag. This method lets you thaw only what you need. The sauce stays fresh for up to 3 months.
Thawing the Sauce
Move frozen cubes to the fridge overnight for slow thawing. For quick use, microwave on 50% power in 30-second bursts, stirring between each. Avoid high heat to prevent separation.
Reheating for Use
Gently warm in a small saucepan over low heat for 2-3 minutes, stirring often. If it thickens too much, whisk in 1-2 tsp water to restore the perfect glaze consistency. 🔥
Pro Storage Tip
Label your container with the date—this sauce looks similar to others in my fridge. I learned this the hard way after mistaking it for teriyaki! Always use a permanent marker for clarity.
Nutrition Facts

Trained in classic French technique but raised on slow-cooked ribs and spicy rubs, she blends culinary skill with smoke and soul.
- Recipe for Boneless Pork Chops in Cast Iron Skillet: Sear and Baste to Juicy Perfection - October 3, 2026
- Recipe for Boneless Cross Rib Roast: Slow-Roasted Beef with Herb Crust - October 3, 2026
- Hamburgers in Sauce Recipe Crock Pot: Slow-Cooked Savory Delight - October 3, 2026