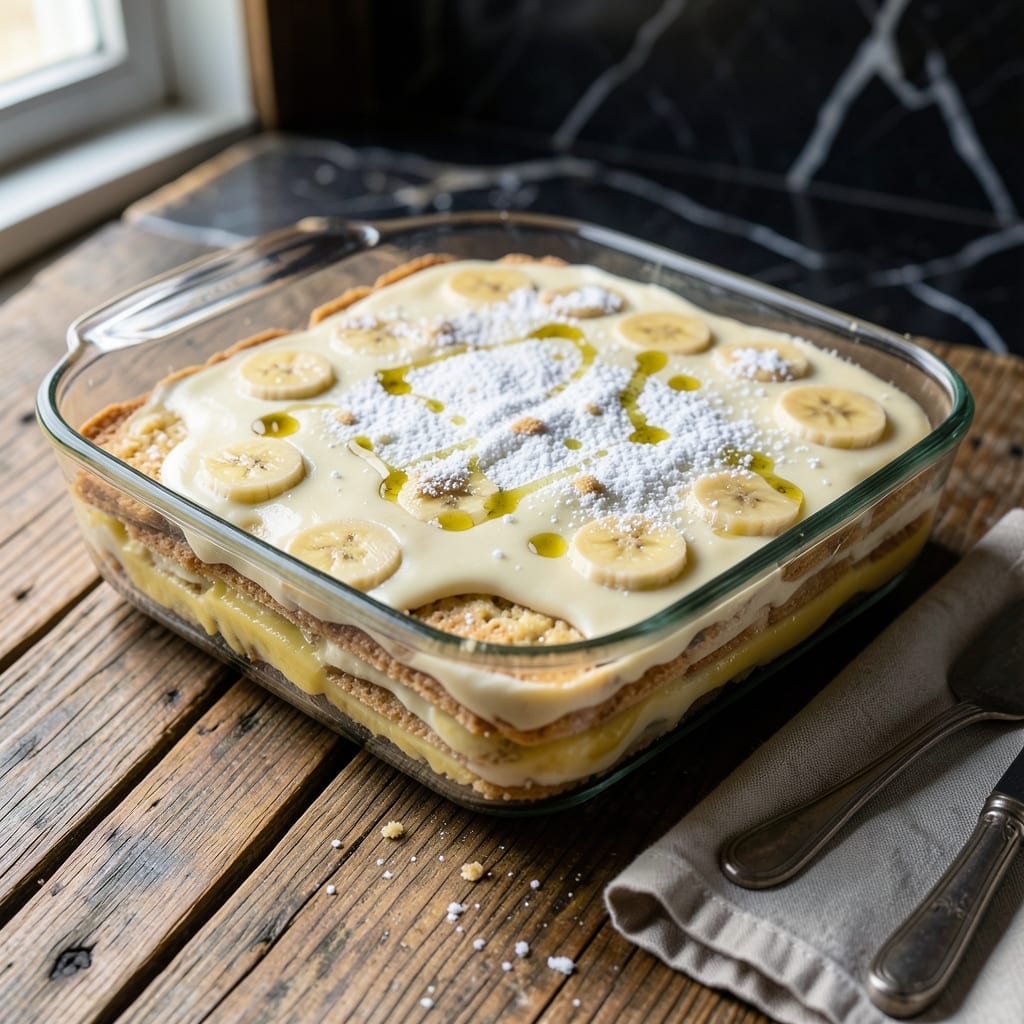
This dessert brings the smoky depth of BBQ to a classic Southern favorite. The vanilla layers gain complexity from a touch of wood-fired flavor, while Nilla wafers add that signature crunch.
I developed this version after a local competition where I wanted to blend my pitmaster roots with traditional techniques. The result is a restaurant-quality pudding that surprises and delights with every bite.
Ingredients for Dead End Bbq Banana Pudding
Southern classics meet pitmaster flair with these carefully chosen layers and toppings.
| Ingredient | Amount | Notes |
|---|---|---|
| Vanilla Wafer Cookies 🍪 | 12 oz | Nilla brand preferred for crunch |
| Ripe Bananas 🍌 | 4 whole | Sliced into rounds |
| Whole Milk 🥛 | 2 cups | Full-fat for creaminess |
| Granulated Sugar 🍚 | ¾ cup | Divided for layers |
| All-Purpose Flour 🌾 | 3 tbsp | For pudding thickening |
| Large Egg Yolks 🥚 | 3 whole | For custard base |
| Unsalted Butter 🧈 | 2 tbsp | For richness in pudding |
| Vanilla Extract 🌿 | 2 tsp | Pure extract for depth |
| Liquid Smoke 🔥 | ½ tsp | For wood-fired BBQ flavor |
| Ground Cinnamon 🌿 | ¼ tsp | Optional for warmth |
| Heavy Whipping Cream 🥛 | 1 cup | Whipped for topping |
| Powdered Sugar 🍚 | 2 tbsp | For sweetened whipped cream |
[recipe_ingredient_scaler]
The vanilla wafers are non-negotiable here—Nilla brand has that perfect crunch and buttery flavor (the generic versions just don’t hold up). I grab mine from Walmart or any major grocery store. For the liquid smoke, Wright’s is the gold standard (just a few drops go a long way). Use whole milk for the pudding—anything less and the texture suffers.
No Nilla wafers? Shortbread cookies work in a pinch, but they’re sweeter. Out of liquid smoke? A pinch of smoked paprika in the pudding adds a similar depth. The bananas should be ripe but firm—overripe ones turn mushy. If you’re skipping the whipped cream, a dollop of Cool Whip (thawed) is an easy swap.
This pudding tastes even better after 24 hours in the fridge—gives the wafers time to soften just right. Keeps for 3-4 days covered. The whipped cream is best fresh, so add it right before serving (or it’ll weep into the layers).
Why You’ll Love This Recipe
- One Bowl Wonder: I mix everything right in the baking dish—no extra bowls, just layer those vanilla wafers, bananas, and custard.
- That BBQ Twist: The smoky depth from the BBQ pit takes the classic banana pudding flavor somewhere unforgettable.
- Potluck MVP: I bring this to every gathering and come home with an empty dish and five new requests for the recipe.
- Budget Friendly: Vanilla wafers, bananas, and pantry staples make this a dessert that won’t break the bank but still steals the show.
Step-by-Step Instructions for Dead End BBQ Banana Pudding
Here’s the method. Straightforward, tested, works every time.
Step 1: Create the Vanilla Wafer Base
Arrange a single layer of the 12 oz Vanilla Wafer Cookies in the bottom of a 2-quart baking dish. I prefer Nilla brand for their superior crunch. Top the wafers with half of the sliced 4 whole Ripe Bananas, arranging them in an even layer.
Dust the banana layer lightly with 0.25 tsp Ground Cinnamon for warmth and a touch of spice. This first layer sets the foundation for the pudding’s texture and flavor, so take your time to make it even.
Step 2: Make the Smoky Vanilla Pudding
In a saucepan, whisk together 0.75 cup Granulated Sugar, 3 tbsp All-Purpose Flour, and a pinch of salt. Gradually whisk in 2 cups Whole Milk until smooth. Cook over medium heat until the mixture begins to thicken, about 5-7 minutes.
In a separate bowl, whisk the 3 whole Large Egg Yolks. Slowly temper the yolks by whisking in about 1 cup of the hot milk mixture. Return the tempered yolks to the saucepan, then add 2 tbsp Unsalted Butter, 2 tsp Vanilla Extract, and 0.5 tsp Liquid Smoke. Cook for another 2-3 minutes until thickened to a pudding consistency.
Step 3: Assemble the Layers
Pour half of the smoky vanilla pudding over the banana and wafer layer in the baking dish. Add another layer of Vanilla Wafer Cookies, followed by the remaining sliced Ripe Bananas. Top with the remaining pudding, spreading it evenly.
Gently press down on the layers to ensure everything is well-coated with the pudding. The liquid smoke in the pudding will give it that signature BBQ flavor that makes this dish unique.
Step 4: Chill and Top with Whipped Cream
Cover the dish with plastic wrap, pressing it directly onto the surface to prevent a skin from forming. Refrigerate for at least 4 hours or overnight. Chilling allows the wafers to soften slightly and the flavors to meld together beautifully.
Just before serving, whip 1 cup Heavy Whipping Cream with 2 tbsp Powdered Sugar until soft peaks form. Spread or pipe the whipped cream over the top of the chilled pudding. For best results, serve within 2 hours of adding the whipped cream to maintain its freshness.
Pro Tips For Making Dead End Bbq Banana Pudding
- Chill the Layers: After assembling each layer of wafers, bananas, and pudding, refrigerate for at least 30 minutes before adding the next. I learned this the hard way—skipping it turns the wafers into a soggy mess.
- Use Spotty Bananas: Pick bananas with plenty of brown spots—they’re sweeter and mash easier into the pudding. Sounds weird, but it works: underripe bananas just don’t deliver that rich flavor.
- Whisk the Flour: Mix the flour into the milk gradually and whisk like you mean it to avoid lumps. My first few batches had clumps that even the cookies couldn’t hide.
- Toast the Wafers: Lightly toast the vanilla wafers in the oven for 5 minutes at 350°F before layering. It adds a little crunch that holds up better against the pudding—after burning three batches, I finally figured out the timing.
Essential Equipment for This Recipe
Mixing Bowls
Start with a set of sturdy mixing bowls in varying sizes—I use stainless steel from Winco for durability. A 2-quart bowl is perfect for the pudding base, while a 4-quart gives room for whipped cream. Their weight helps stabilize when whisking vigorously.
Saucepan Selection
For the custard, a heavy-bottomed saucepan prevents scorching. I swear by my 3-quart All-Clad for even heat distribution. Avoid nonstick here—you want to see the pudding thicken on the bottom to gauge doneness properly.
Whisk and Spatula
A balloon whisk is essential for smooth custard. I keep a 10-inch OXO whisk in my drawer. A silicon spatula helps scrape every bit of pudding from the pan—no waste when it’s this good.
Baking Dish
Use a 2-quart glass baking dish for even layers. My Pyex dish lets me see the beautiful stratification of wafers, bananas, and custard. Plus, it’s easy to grab from local Walmart or any kitchen store. 💛
Plastic Wrap
Press plastic wrap directly onto the pudding surface before chilling. I use Heavy-Duty Reynolds Wrap—it clings better than cheap brands. This step prevents that unappetizing skin from forming on top.
Hand Mixer
For the whipped cream, a hand mixer gives you control. My KitchenAid 5-speed has survived years of heavy use. Start on low to avoid splattering, then increase speed as cream thickens. 🔥
Nutrition Facts

Trained in classic French technique but raised on slow-cooked ribs and spicy rubs, she blends culinary skill with smoke and soul.
- Meat Loaf Recipe With Beef And Pork: Homestyle Blend With Rich Gravy - October 3, 2026
- Hamburger Patty Recipe No Egg: Juicy Bind With Breadcrumbs and Milk - October 3, 2026
- Recipe for Oven Baked Halibut: Buttery White Fish with Zesty Lemon Topping - October 3, 2026