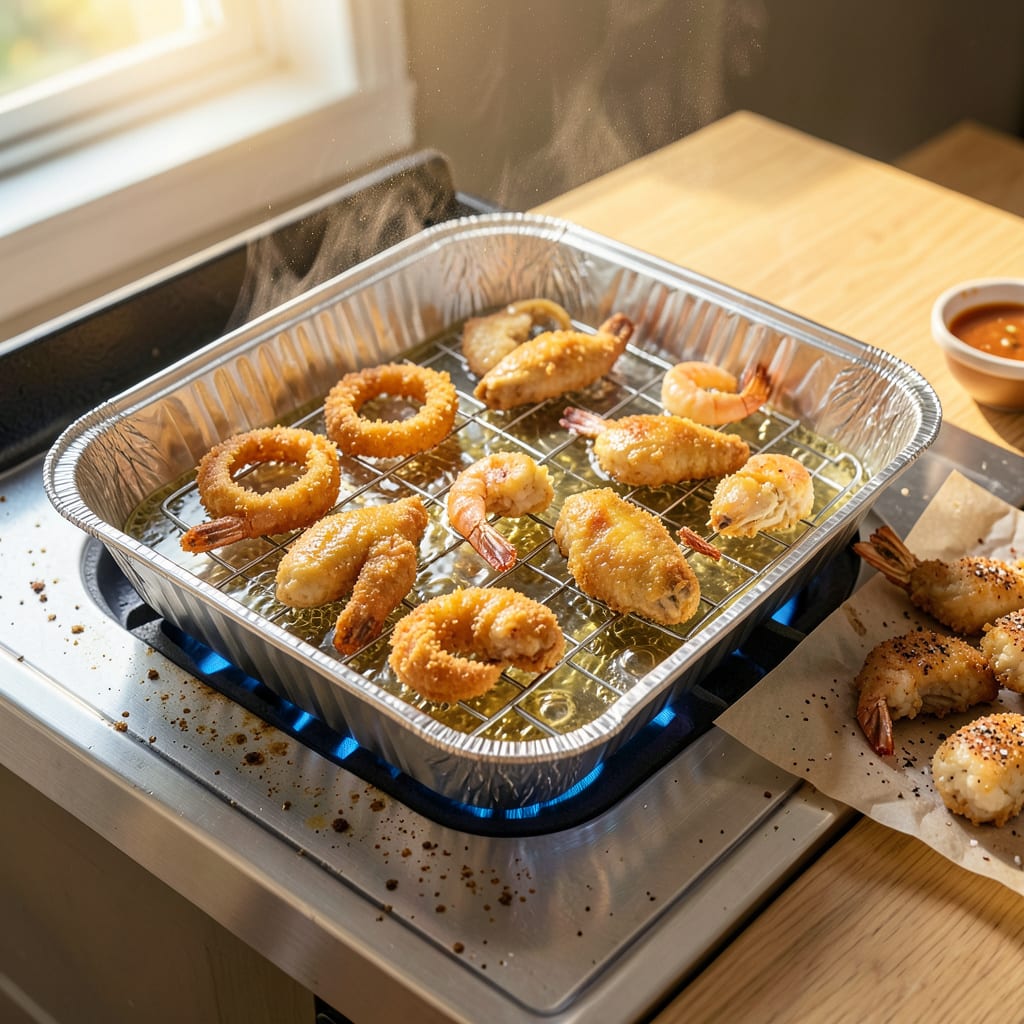
I’ll be real with you: deep frying at home usually means a greasy stovetop and hours of cleanup. But after burning through too many paper towels (and nearly setting off my smoke alarm one too many times), I discovered the game-changer—disposable aluminum pans. No more scrubbing, no more oil splatter wars, just perfect crispy results every time.
Here’s the thing—most folks don’t realize these pans can handle high heat safely if you follow a few key rules. I’ve fried everything from chicken to donuts in them, and the secret is managing oil temperature (we’re talking 350°F–375°F) and choosing the right pan thickness. Thinner pans heat up fast but can warp, so I always go for heavy-duty versions.
What you get is all the golden, crunchy goodness of deep-fried favorites without the usual kitchen disaster. The aluminum distributes heat evenly, so your food cooks uniformly while the pan contains all the mess. I’ve even reused them a few times (carefully!) when I’m feeling less wasteful. Cleanup takes seconds—just let the oil cool and toss.
Whether you’re craving classic fried chicken, tempura veggies, or even vegan tofu bites, this method works. No special equipment, no fancy techniques—just foolproof frying with results that’ll make you wonder why you ever stressed over cleanup before. Let’s get that oil heating!
📚 In This Guide
- What You’ll Need
- Instructions
- Tips and Common Mistakes
What Youll Need
- ● Disposable aluminum pan – 1 half-size (9″ x 13″) or full-size (12″ x 20″) steam table pan, at least 2.5″ deep (heavy-duty preferred 💪).
- ● Cooking oil – 4–6 cups (enough to fill pan 1.5″–2″ deep). Use high-smoke-point oils like: Peanut oil (best for flavor 🥜)
- ● Vegetable or canola oil (budget-friendly)
- ● Sunflower or avocado oil (healthier options 💚)
- ● Candy/deep-fry thermometer – 1 (with a clip to attach to the pan). Critical for safety! 🌡️
- ● Tongs or slotted spoon – 1 (heat-resistant, stainless steel preferred).
- ● Wire cooling rack – 1 (or paper towels for draining).
- ● Aluminum foil – 1 sheet (to line countertops for easy cleanup).
- ● Fire extinguisher – 1 (Class B or multi-purpose, just in case 🚒).
- ● Oven mitts – 1 pair (heat-resistant, preferably silicone-coated).
- ● Splatter screen – 1 (to contain oil pops 🛡️).
- ● Kitchen scale – For precise oil measurements.
- ● Baking sheet – To place under the pan for stability.
- ● Oil disposal container – Like an empty milk jug (for cooling used oil).
Step-by-Step Instructions for Deep Frying in Disposable Aluminum Pans
Let me walk you through the process—it’s simpler than you think with the right approach.
Choose the Right Aluminum Pan and Setup
Select a heavy-duty disposable aluminum pan that’s at least 4 inches deep to prevent oil splatter. I recommend a 9×13-inch size for most home frying needs—it gives you enough room to work without being unwieldy. Place it on a stable, heat-resistant surface like a gas stovetop or outdoor burner.
Before adding oil, check that your pan sits perfectly flat. Any wobbling could cause hot oil to shift dangerously. I always double-check by giving the empty pan a gentle nudge—if it stays put, you’re good to go. This simple precaution prevents accidents before they happen.
Heat the Oil Gradually and Safely
Fill your pan with oil to a depth of 2-3 inches, leaving at least 1 inch of clearance at the top. I use a neutral oil with a high smoke point like vegetable or peanut oil. Heat the oil over medium heat—this gradual approach prevents hot spots and ensures even heating throughout the pan.
Here’s the thing—aluminum conducts heat differently than cast iron. You’ll need to monitor the temperature carefully. Use a deep-fry thermometer and aim for 350-375°F. The oil is ready when it shimmers slightly and a wooden chopstick inserted into the oil produces steady bubbles. Never leave heating oil unattended.
Fry in Small Batches for Best Results
When the oil reaches temperature, carefully lower your food into the pan using tongs or a slotted spoon. I always start with a test piece first—this helps me gauge the cooking time and adjust the heat if needed. Work in small batches to avoid overcrowding, which can cause the oil temperature to drop dramatically.
You’ll notice the food will sink initially, then rise to the surface as it cooks. Maintain the oil temperature between 350-375°F throughout frying. Most foods will take 3-8 minutes to cook through and develop that perfect golden-brown color you’re after. The sizzling should be steady but not violent.
Drain and Cool Properly
Once your food reaches that ideal crispy texture and color, remove it from the oil and transfer to a wire rack or paper towel-lined plate. I prefer a rack because it allows air to circulate on all sides, preventing soggy bottoms. Let the food drain for at least 2 minutes before serving.
Real talk: the oil stays dangerously hot long after you’re done frying. I always let the pan cool completely (at least 2 hours) before attempting to move or dispose of it. When cool, you can simply toss the pan—no scrubbing required. This is where disposable pans really shine in terms of convenience.
Clean Up and Oil Disposal
After the oil has cooled completely, you have a few options. If the oil is still clean and wasn’t used for strongly flavored foods, you can strain it through a fine-mesh sieve and store in a sealed container for reuse. For disposal, pour the cooled oil into a sealable container and throw it in the trash—never down the drain.
The beauty of using disposable pans is that cleanup is minimal. Simply wipe any residual oil from your stovetop with a paper towel, then discard the pan. I keep a dedicated box for used frying pans until trash day. This method keeps my kitchen clean and eliminates the hassle of scrubbing stubborn grease from regular pots.
Tips and Common Mistakes for Deep Frying in Disposable Aluminum Pans
Mastering this method comes down to a few key details that make all the difference in safety and results.
Pan Selection Tip: In Step 1, choosing a 9×13-inch heavy-duty pan is crucial—not all aluminum pans are created equal. Flimsy pans can warp when heated, creating uneven oil depths. I learned this the hard way after a too-thin pan buckled mid-fry, causing oil to pool dangerously on one side. Always press down on the pan’s corners before adding oil to test sturdiness.
Oil Temperature Control: The 350-375°F range in Step 2 isn’t just a suggestion—it’s the sweet spot where foods cook through without absorbing excess oil. Here’s what nobody tells you: aluminum pans heat up faster than cast iron but also cool down more quickly when food is added. I keep my thermometer clipped to the pan’s side and adjust the medium heat setting constantly to maintain that perfect window.
Batch Size Strategy: When following Step 3, remember that adding too much food at once can drop the oil temperature below 350°F, leading to greasy results. I never fill more than one-third of the pan’s surface area at a time. For example, in a 9×13-inch pan, I fry about 6 chicken tenders or 1 cup of fries per batch. This keeps the oil temperature stable and ensures that 3-8 minutes cooking time stays accurate.
Safety Precaution: The 2 hours cooling time mentioned in Step 4 isn’t optional—it’s a safety necessity. I once made the mistake of trying to move a pan after just 30 minutes and ended up with a painful burn when residual heat flared up. Now I set a timer and walk away. To speed up cooling, I place the pan on a wire rack to allow air circulation underneath, but I never rush this step.
Pro Tips for Deep Frying In Disposable Aluminum Pan
- Mastering this method comes down to a few key details that make all the difference in safety and results.
- Pan Selection Tip: In Step 1, choosing a 9×13-inch heavy-duty pan is crucial—not all aluminum pans are created equal….
- Oil Temperature Control: The 350-375°F range in Step 2 isn’t just a suggestion—it’s the sweet spot where foods cook t…
Frequently Asked Questions
Can I reuse a disposable aluminum pan for deep frying?
No, disposable aluminum pans are single-use only for deep frying. High heat weakens the metal, making it prone to warping or leaking. For safety, discard after one use—even if it looks intact. Pro tip: Opt for heavy-duty pans if you need extra durability for a single batch!
How long can I safely deep fry in an aluminum pan?
Limit frying to 20–30 minutes max per batch. Prolonged heat can cause the pan to degrade or scorch food. Monitor oil temperature (325–375°F) with a thermometer, and avoid overheating. For larger batches, switch to a sturdier pot.
What’s the best oil for deep frying in aluminum pans?
Use oils with high smoke points like peanut, canola, or vegetable oil. Avoid olive oil (low smoke point). Fill the pan no more than ½ full to prevent spills. Bonus: These oils also crisp food perfectly!
Why does my food stick to the aluminum pan when frying?
Sticking happens if the oil isn’t hot enough (test with a wooden chopstick—bubbles mean it’s ready!) or if the pan’s coating is damaged. Lightly coat food in flour or cornstarch before frying for a crispier, non-stick finish.
Are there safer alternatives to disposable aluminum pans?
Yes! For frequent frying, use a cast-iron skillet, Dutch oven, or electric deep fryer. These distribute heat evenly and last for years. Save aluminum pans for small batches or camping trips where cleanup is tricky.
Deep frying in disposable aluminum pans is a game-changer for crispy, mess-free cooking—when done right! 🎉 By choosing the right pan, controlling the heat, and following safety tips, you can enjoy golden, crunchy results without the cleanup hassle. Whether you’re whipping up fries, wings, or even donuts, this method keeps things simple and efficient.
Ready to give it a try? Grab a sturdy pan, pick your favorite recipe, and fry with confidence! For even more foolproof tips, check out our guide on reusing aluminum pans safely or explore creative deep-fry recipes next. Happy frying! 🍟✨

Trained in classic French technique but raised on slow-cooked ribs and spicy rubs, she blends culinary skill with smoke and soul.
- Recipe for Boneless Pork Chops in Cast Iron Skillet: Sear and Baste to Juicy Perfection - October 3, 2026
- Recipe for Boneless Cross Rib Roast: Slow-Roasted Beef with Herb Crust - October 3, 2026
- Hamburgers in Sauce Recipe Crock Pot: Slow-Cooked Savory Delight - October 3, 2026