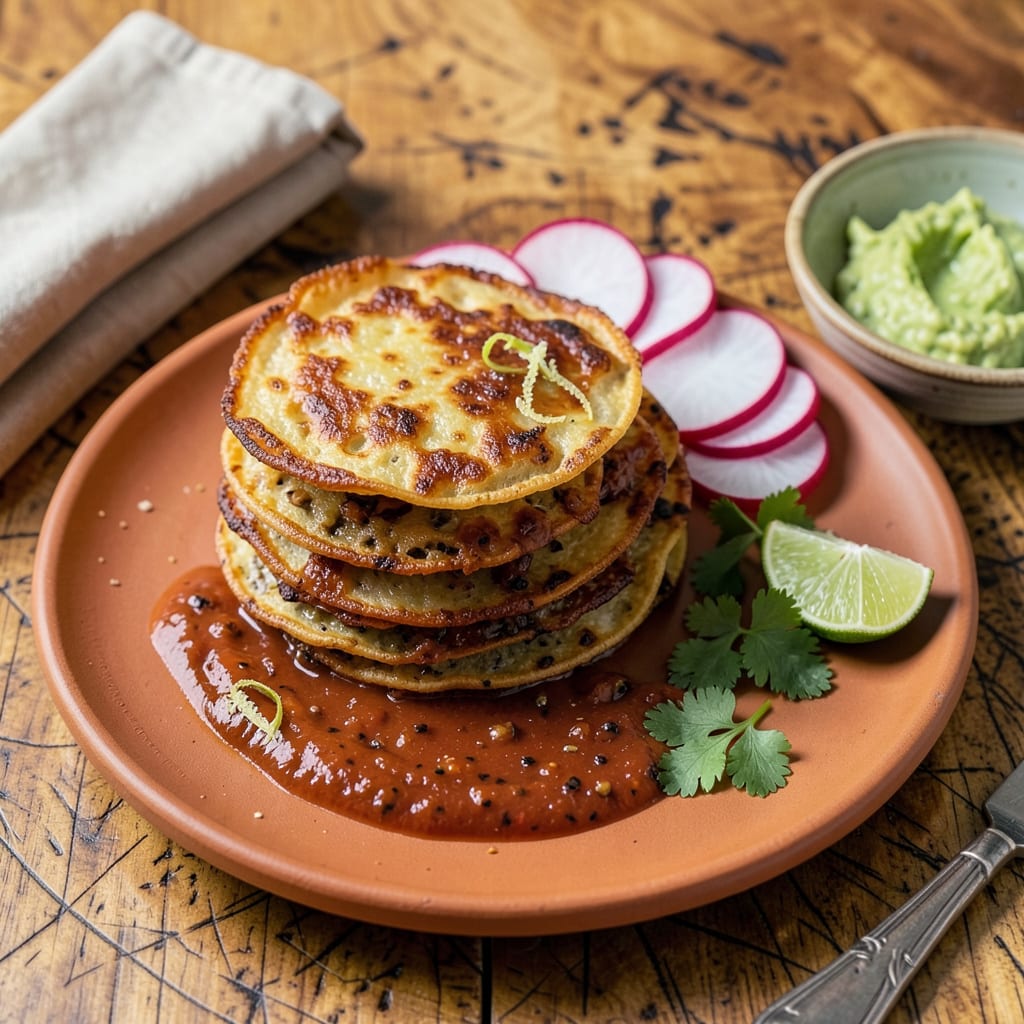
I’ll be real with you—dipping tortillas in sauce before frying changed my crispy game forever. That first sizzle when the sauce-coated tortilla hits hot oil? Pure magic. The sauce caramelizes instantly, creating a shatteringly crispy shell that locks in flavor. I stumbled onto this technique during a particularly chaotic taco night, and now it’s my go-to for enchiladas, taquitos, and even chilaquiles.
Here’s the thing—most people fry tortillas plain, then add sauce later. But that’s missing out on serious texture and flavor. When you dip first, the sauce transforms into a flavorful crust while frying. I use a simple red enchilada sauce (store-bought works fine), but salsa verde or even buffalo sauce can work. The key is getting the oil to that perfect 350°F sweet spot where it crisps without burning.
What you end up with is next-level: tortillas with a crispy, caramelized exterior and a tender center, all infused with sauce flavor. They hold toppings like a dream—melty cheese, cool crema, fresh cilantro. My family now requests these instead of regular tacos, and I don’t blame them. It’s the kind of simple trick that makes you look like a pro.
Fair warning: once you try this method, you’ll never go back. The texture alone is worth it, but that extra layer of flavor? That’s what keeps people coming back for seconds. Now, don’t skip this step (learned that the hard way)—let’s get that oil heating.
📚 In This Guide
- What You’ll Need
- Instructions
- Tips and Common Mistakes
What Youll Need
- ● Corn or flour tortillas – 12 small (6-inch) or 8 medium (8-inch) for a standard batch. Pro tip: Stale tortillas (1-2 days old) crisp up better! 🌽
- ● Enchilada sauce (red or green) – 2 cups (16 oz). Use store-bought for convenience or homemade for extra flavor. 🫑
- ● Neutral frying oil – 2-3 cups (vegetable, canola, or peanut oil). Avoid olive oil—it has a low smoke point. 🛢️
- ● Deep skillet or Dutch oven – 10-12 inches wide with high sides (2+ inches) for safe frying. 🍳
- ● Tongs or slotted spoon – Heat-resistant, for flipping and draining tortillas. 🥄
- ● Paper towels or wire rack – For draining excess oil post-frying. A blank” rel=”noopener”>cooling rack keeps them crispier! 🧻
- ● Shallow dish (for dipping) – Wide enough to fit a tortilla (a pie plate works great!). 🍽️
- ● Thermometer – A blank” rel=”noopener”>candy/deep-fry thermometer to monitor oil temp (ideal: 350–375°F). 🌡️
- ● Kitchen spider – For lifting tortillas with minimal oil splatter. 🕷️
- ● Cheese or toppings – Shredded Oaxaca or Monterey Jack for quick quesadillas post-fry. 🧀
- ● Splash guard – Reduces oil splatter mess (a game-changer!). 🛡️
Step-by-Step Instructions for Dipping Tortillas in Sauce Before Frying
This simple technique transforms ordinary tortillas into something extraordinary—let me show you how it’s done.
Choose and Prep Your Tortillas
Start with fresh, high-quality corn tortillas—they crisp up better than flour tortillas for this method. I recommend using white corn tortillas for their neutral flavor that lets the sauce shine. If your tortillas feel stiff or dry, wrap them in a damp paper towel and microwave for 20-30 seconds to make them pliable.
Lay the tortillas on a clean work surface and let them cool slightly if you’ve just warmed them. You want them flexible enough to dip without cracking, but not so warm that they absorb too much sauce. This balance ensures they’ll fry up perfectly crisp while maintaining their structure during the dipping process.
Prepare Your Sauce for Dipping
Use a wide, shallow bowl for your sauce—this makes dipping easier and more even. I prefer enchilada sauce for its rich, tangy flavor, but you can experiment with other sauces too. The sauce should be at room temperature, not cold from the fridge. If it’s too thick, thin it slightly with water or broth to achieve a consistency similar to heavy cream.
Before dipping, give your sauce a good stir to ensure all the flavors are evenly distributed. You’ll want about ½ inch of sauce in your bowl—enough to fully coat each tortilla but not so much that you’re swimming in it. This depth gives you control over how much sauce adheres to each tortilla.
Dip the Tortillas Properly
Hold a tortilla by its edge and quickly submerge it in the sauce, letting it soak for just 2-3 seconds. You want a thin, even coating—not a soggy tortilla. Lift it out and let any excess sauce drip back into the bowl for a moment. The tortilla should glisten with sauce but not be dripping wet.
Place the dipped tortilla on a wire rack set over a baking sheet. This allows any remaining excess sauce to drip off while you work with the next tortilla. Don’t stack the dipped tortillas—they’ll stick together and the sauce won’t crisp properly during frying. Work quickly but carefully to maintain that perfect balance of sauce absorption.
Fry to Crispy Perfection
Heat about 1 inch of neutral oil (like vegetable or canola) in a heavy skillet over medium-high heat until it reaches 350°F. The oil is ready when a small piece of tortilla sizzles immediately upon contact. Carefully slide one sauced tortilla into the hot oil—it should bubble vigorously around the edges.
Fry for 1-2 minutes per side until the tortilla turns deep golden brown and crispy. The sauce will transform into a delicious, slightly caramelized coating. Use tongs to flip the tortilla gently—it will be more delicate than a plain fried tortilla. Transfer to a paper towel-lined plate to drain briefly before serving.
Serve Immediately for Maximum Crispiness
These sauced-and-fried tortillas are best enjoyed right away while they’re still hot and crisp. The contrast between the crunchy exterior and the slightly chewy interior is what makes them special. If you need to keep them warm for a few minutes, place them on a wire rack in a 200°F oven—this prevents them from getting soggy.
Serve them as a base for toppings, as a side with dips, or even as a unique taco shell. The sauce-infused crispiness adds incredible flavor to every bite. If you’re making a batch, fry them in small groups to maintain the oil temperature and ensure each one gets that perfect crisp texture you’re after.
Tips and Common Mistakes
Mastering this technique is all about balance—here’s what I’ve learned from making these crispy delights countless times.
Dipping Technique: In Step 3, those 2-3 seconds in the sauce are everything. I count “one-thousand-one, one-thousand-two” to get it right. Any longer and you’ll end up with soggy tortillas that won’t crisp properly in the oil. The tortilla should glisten with sauce but not feel heavy or wet to the touch. If you’re working with multiple tortillas, keep the sauce stirred between dips to maintain even consistency.
Oil Temperature Control: Maintaining that 350°F oil temperature in Step 4 is crucial for perfect crispiness. I use a candy thermometer clipped to the side of my skillet for accuracy. If the oil smokes, it’s too hot—reduce the heat slightly. If the tortillas absorb oil instead of sizzling immediately, your oil isn’t hot enough. Remember that adding cold tortillas will temporarily lower the oil temperature, so work in small batches to keep it steady.
Post-Fry Handling: When transferring fried tortillas to the paper towel-lined plate, place them in a single layer without overlapping. I learned the hard way that stacking them fresh out of the oil creates steam that makes them soggy. For extra crispiness, you can even place them on a clean wire rack instead of paper towels—this allows air to circulate on both sides, preventing any potential softening from trapped steam.
Sauce Consistency: The ½ inch of sauce depth mentioned in Step 2 makes all the difference. Too shallow and you won’t get even coverage; too deep and you’ll oversaturate the tortillas. If your sauce thickens as you work, just add a teaspoon of water at a time to maintain that heavy cream consistency. I also like to warm my sauce slightly if it’s been sitting—cold sauce clings differently than room temperature sauce.
Pro Tips for Dip Tortillas In Sauce Before Frying
- Mastering this technique is all about balance—here’s what I’ve learned from making these crispy delights countless ti…
- Dipping Technique: In Step 3, those 2-3 seconds in the sauce are everything. I count “one-thousand-one, one-thousand-…
- Oil Temperature Control: Maintaining that 350°F oil temperature in Step 4 is crucial for perfect crispiness. I use a …
Frequently Asked Questions
Do I need to dry the tortillas after dipping them in sauce before frying?
Nope! Skip the drying step—excess sauce helps create that crispy, flavorful crust. Just let any large drips fall off (about 5-10 seconds) to avoid oil splatter. The residual moisture actually steams the tortilla slightly, making it extra tender inside while frying to a perfect crunch.
How long should I dip the tortillas in the sauce?
Quick is key! Dip each side for 2-3 seconds max. Over-soaking makes them soggy and prone to falling apart. Use tongs for even coating—just enough to cling, not drench. For thick sauces (like mole), a light brush may work better than dipping. Either works! Store-bought (like enchilada sauce or salsa) saves time—just warm it first for better adhesion. Homemade sauces (thinner consistency) often crisp up nicer. Pro tip: Strain chunky sauces to avoid burnt bits in the oil. Three common culprits:
Neutral, high-smoke-point oils rule! Try:
Can I use store-bought sauce, or does it have to be homemade?
Why do my tortillas fall apart when I fry them after dipping?
Pat dry very soggy spots if needed.
What’s the best oil for frying sauced tortillas?
Reuse oil 2–3 times (strain and store in a cool place).
Dipping tortillas in sauce before frying isn’t just a shortcut—it’s a game-changer for flavor-packed, crispy perfection every time. 🌮✨ Whether you’re whipping up enchiladas, taquitos, or crispy taco shells, this simple trick locks in moisture, boosts taste, and delivers that irresistible crunch. Now that you’ve got the know-how, why not put it to the test?
Grab your favorite sauce, heat up that oil, and get frying! For your next culinary adventure, try experimenting with different sauces—like smoky chipotle or tangy verde—to customize your dish. Your taste buds will thank you!

Trained in classic French technique but raised on slow-cooked ribs and spicy rubs, she blends culinary skill with smoke and soul.
- Recipe for Boneless Pork Chops in Cast Iron Skillet: Sear and Baste to Juicy Perfection - October 3, 2026
- Recipe for Boneless Cross Rib Roast: Slow-Roasted Beef with Herb Crust - October 3, 2026
- Hamburgers in Sauce Recipe Crock Pot: Slow-Cooked Savory Delight - October 3, 2026