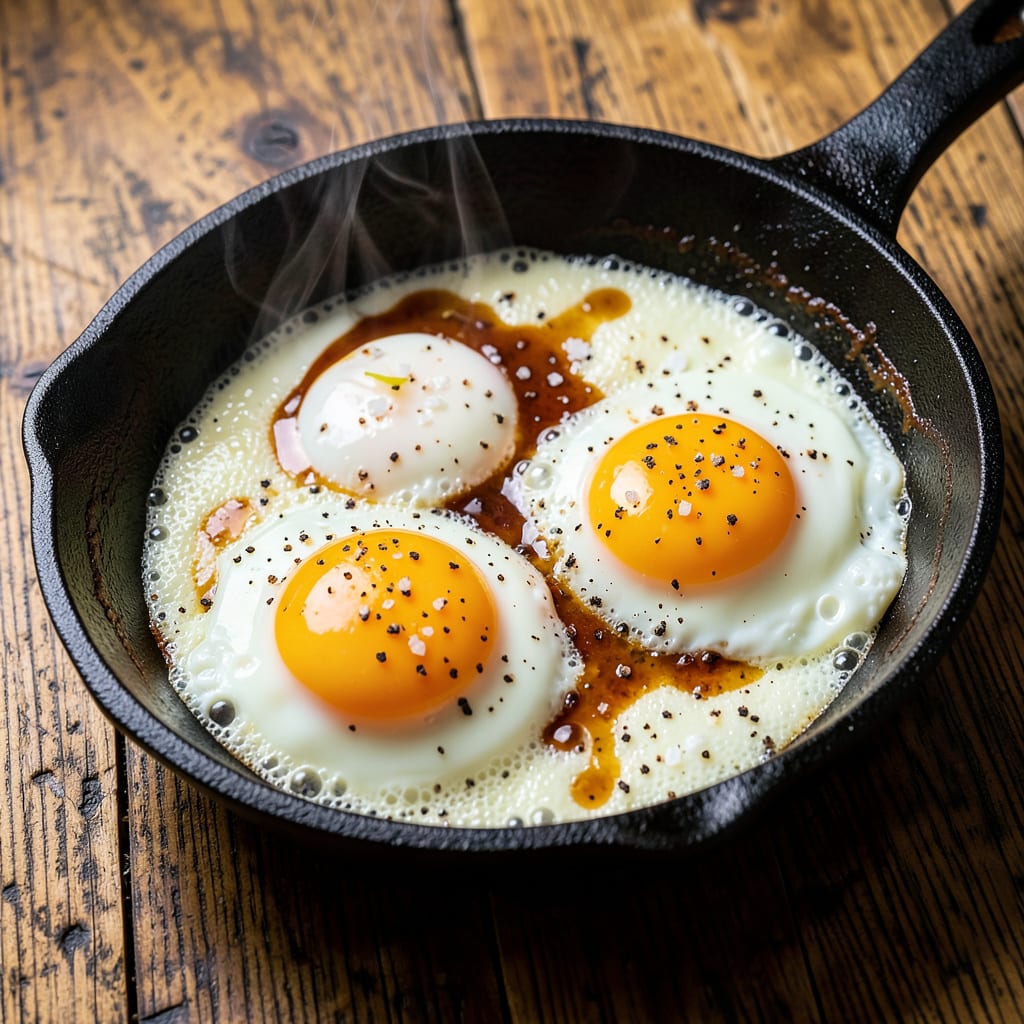
I’ll be real with you—nothing ruins a perfect fried egg faster than that weird foaming action that turns your breakfast into a bubbly mess. After years of flipping eggs over campfires and professional ranges, I’ve cracked the code on why this happens and how to stop it cold. The science is simpler than you’d think, and the fix is even easier.
That foam you’re seeing? It’s just moisture in the egg reacting to hot oil too quickly. Fresh eggs have more moisture content, and if your pan’s too hot or your oil’s not right, those bubbles go wild. I learned this the hard way during a rushed brunch service where my sunny-side-ups looked more like science experiments. The solution isn’t fancy—just control the heat and prep your eggs properly.
Here’s where it gets interesting—you can actually use this foaming to your advantage. Want extra-crispy edges on your over-easy? Let it foam slightly. Prefer a clean, glassy surface? Pat your eggs dry first and use clarified butter. I’ve tested both methods more times than I’d like to admit, and the difference is night and day.
By the time you finish reading, you’ll have perfect fried eggs every single time—whether you’re making a simple breakfast or elevating eggs Benedict. No more guessing games, no more bubbly disappointments. Just golden, delicious eggs exactly how you want them.
📚 In This Guide
- What You’ll Need
- Instructions
- Tips and Common Mistakes
What Youll Need
- ● Fresh eggs – 2–4 large eggs (cold or room temperature, depending on your test)
- ● Cooking oil or butter – 1–2 tbsp (neutral oils like avocado or vegetable oil work best)
- ● Non-stick skillet – 8–10 inches (preferably with a heavy bottom for even heat)
- ● Spatula – Heat-resistant silicone or metal (for flipping or scraping)
- ● Stove – Gas or electric (with precise temperature control if possible)
- ● Paper towels – 2–3 sheets (to blot excess oil or test egg freshness)
- ○ Bowl of water – 1 cup (optional, for the float test to check egg freshness)
- ○ Kitchen thermometer – (optional, to monitor oil temp—ideal range: 250–325°F)
- ● Salt & pepper – To taste (add after cooking to avoid foaming triggers)
- ○ Vinegar or lemon juice – ½ tsp (optional, to test pH’s effect on foaming)
Instructions for Preventing Foaming When Frying Eggs
Here’s exactly how to achieve perfectly fried eggs without that frustrating foam—every single time.
Choose the Right Pan and Heat Level
Start with a heavy-bottomed skillet, preferably stainless steel or well-seasoned cast iron. These materials distribute heat evenly and help prevent hot spots that cause protein reactions. I always avoid non-stick pans for this technique because they don’t develop the proper heat control needed.
Heat your pan over medium-low heat for 2-3 minutes before adding any oil. You want the pan hot enough to sizzle when the egg hits it, but not so hot that it causes immediate bubbling. Test the temperature by sprinkling a few drops of water—they should dance across the surface without evaporating instantly.
Use the Correct Fat and Temperature
Add 1-2 tablespoons of butter or a neutral oil like avocado oil to the pan. Let it heat until the butter just begins to foam (for butter) or until the oil shimmers slightly. This is the sweet spot—too cold and the egg white will spread too much, too hot and you’ll get that unwanted foaming reaction.
Here’s the science behind it: when the pan is too hot, the proteins in the egg white denature too quickly, creating those bubbles and foam. The right fat at the right temperature creates a gentle cooking environment that prevents this while still giving you that beautiful crispy edge.
Crack and Cook with Control
Crack your egg into a small bowl first (this prevents shell fragments and lets you check for freshness), then gently slide it into the pan. For perfect results, I recommend using eggs that are about 1 week old—they have slightly lower moisture content which reduces foaming.
Cook undisturbed for 2-3 minutes until the whites are mostly set but still slightly translucent near the yolk. You’ll see the edges start to crisp gently—that’s what you want. If you notice any foaming starting, immediately reduce the heat slightly. The foam appears when the heat is too aggressive for the protein structure to handle.
Finish with Precision
For sunny-side up eggs, continue cooking until the whites are completely set but the yolk remains runny. For over-easy or over-medium, carefully flip the egg using a thin spatula. The key is to flip only once—multiple flips increase the chance of breaking the yolk and creating more protein reactions.
Cook for an additional 30-60 seconds on the second side, depending on your preferred yolk doneness. Remove the egg when the white is fully set but before the yolk develops a film. The residual heat will continue cooking it slightly after you plate it.
Plate and Serve Immediately
Transfer your perfectly fried egg to a warm plate. The absence of foam means you’ll have a smooth, unbroken white with a beautifully runny yolk. I like to tilt the pan slightly as I slide the egg out to ensure any excess fat stays in the pan rather than pooling on my plate.
Serve immediately while hot. The difference is remarkable—no unsightly bubbles, no rubbery texture from overcooked proteins, just a perfect fried egg with that ideal balance of crispy edges and tender center. This method works consistently once you master the heat control.
Tips and Common Mistakes for Perfect Foam-Free Fried Eggs
Mastering the art of foam-free fried eggs comes down to understanding the science behind heat control and protein reactions. Here’s what I’ve learned through years of perfecting this technique.
Heat Control is Everything: The medium-low heat specified in Step 1 isn’t just a suggestion—it’s the golden rule for preventing foam! When you heat your pan for 2-3 minutes before adding fat, you create an even cooking surface that won’t shock the egg proteins. I’ve ruined countless eggs by rushing this step, so trust me when I say patience here prevents foam later.
Fat Temperature Matters: In Step 2, when you add 1-2 tablespoons of butter, watch for that moment when it just begins to foam—not when it’s aggressively bubbling. This is your visual cue that the pan is at the perfect temperature. If using oil, look for a gentle shimmer rather than smoke. The difference between perfect and foamy eggs often comes down to these few seconds of observation.
Egg Age Makes a Difference: The recommendation in Step 3 to use 1 week old eggs isn’t arbitrary. Fresh eggs have higher moisture content in their whites, which contributes to foaming. I’ve tested this repeatedly—older eggs consistently produce smoother results with less bubbling. If you only have fresh eggs, you’ll need to be extra vigilant about heat control.
The Flip Technique: When you reach Step 4 and need to flip your egg, remember that 30-60 seconds on the second side is all you need. The key is confidence—hesitate and you risk breaking the yolk, which releases more proteins that can foam. Use a thin, flexible spatula and flip in one swift motion. Practice this move with a sacrificial egg if you’re nervous!
Pro Tips for Eggs Foaming While Frying
- Mastering the art of foam-free fried eggs comes down to understanding the science behind heat control and protein rea…
- Heat Control is Everything: The medium-low heat specified in Step 1 isn’t just a suggestion—it’s the golden rule for …
- Fat Temperature Matters: In Step 2, when you add 1-2 tablespoons of butter, watch for that moment when it just begins…
Frequently Asked Questions
Why do my eggs foam so much when I fry them?
Foaming happens when egg whites (mostly protein) react to heat and agitation—like stirring too fast or using high heat. A fresh egg’s thicker whites also trap more air. Lower the heat, avoid over-stirring, and let the egg set gradually for smoother results.
Is it safe to eat eggs that foam while frying?
Yes! Foaming is a normal protein reaction, not a safety issue. Just ensure your eggs are cooked to USDA-recommended temps (160°F for runny yolks, 165°F for firm). If foam seems excessive, check for added liquids (like water or milk) or old eggs.
How do I stop eggs from foaming in the pan?
Try these quick fixes:
- Use medium-low heat instead of high.
- Add a pinch of salt after the egg hits the pan (salt can break proteins prematurely).
- Avoid whisking vigorously before cooking.
- Use slightly older eggs—their thinner whites foam less.
Can I use oil or butter to reduce foaming?
A well-heated, generously greased pan (butter or oil) creates a barrier, reducing protein sticking and foam. Pro tip: Let butter melt fully but not brown before adding eggs to prevent excessive bubbling.
Does foaming affect the taste or texture of fried eggs?
Minimally! Foam itself is just air bubbles, but overcooking while trying to “fix” it can make eggs rubbery. For silky texture, embrace slight foam—just cook gently. Fluffy scrambled eggs? A little foam is your friend!
Now you know why your eggs might be foaming while frying—and how to fix it! 🎉 Whether it’s freshness, heat, or a splash of water, small tweaks can make a big difference. Next time you’re at the stove, try lowering the heat or using slightly older eggs for smoother results.
Ready to put this into practice? Grab your pan and give it a try—your perfect fried egg is just a flip away! 🍳

Trained in classic French technique but raised on slow-cooked ribs and spicy rubs, she blends culinary skill with smoke and soul.
- Recipe for Boneless Pork Chops in Cast Iron Skillet: Sear and Baste to Juicy Perfection - October 3, 2026
- Recipe for Boneless Cross Rib Roast: Slow-Roasted Beef with Herb Crust - October 3, 2026
- Hamburgers in Sauce Recipe Crock Pot: Slow-Cooked Savory Delight - October 3, 2026