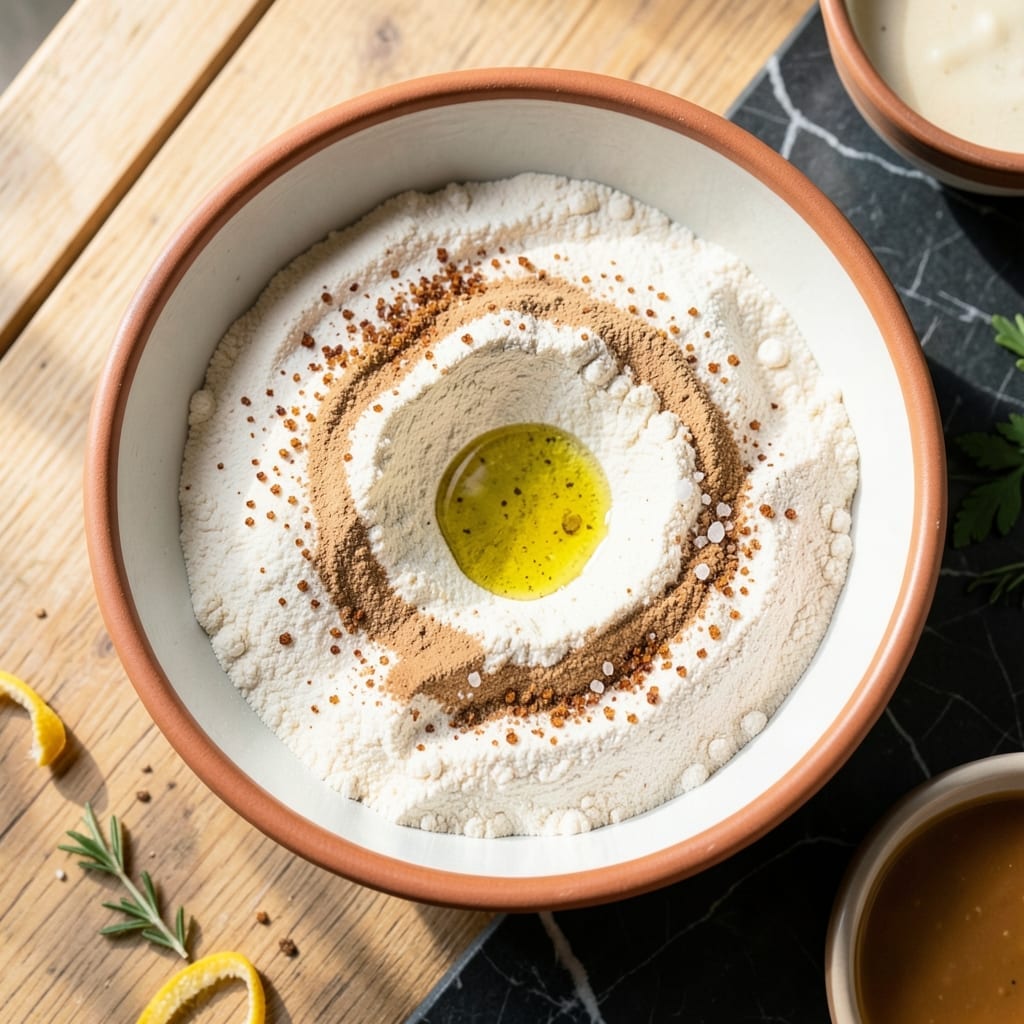
Homemade waffles don’t require last-minute grocery runs with this pantry-friendly dry mix ready in your cupboard. I developed this blend for mornings when time is tight but quality matters.
The mix combines basic dry ingredients that store for months, so you’re always minutes away from golden, crisp waffles. Just add water, stir, and cook—no eggs or milk to worry about.
This method delivers consistent results with minimal effort. The waffles come out light inside with a crisp exterior, perfect for topping with syrup or fresh fruit.
Ideal for busy households or weekend prep. The mix keeps well, so you can make waffles anytime the craving strikes.
Ingredients for Dry Waffle Mix Recipe Just Add Water
Pantry staples make this mix. Just add water when you’re ready.
| Ingredient | Amount | Notes |
|---|---|---|
| All-Purpose Flour 🌾 | 2 cups | Sifted for lighter texture |
| Granulated Sugar 🍚 | 2 tbsp | Fine white sugar preferred |
| Baking Powder 🧂 | 2 tbsp | Ensures rise and fluffiness |
| Table Salt 🧂 | ½ tsp | Balances sweetness and flavors |
| Ground Cinnamon 🌿 | 1 tsp | Adds warm spice note |
| Vegetable Oil 🫒 | ¼ cup | Or melted coconut oil |
| Water 💧 | 1 ½ cups | Added when ready to cook |
[recipe_ingredient_scaler]
The flour is the foundation here. King Arthur or Gold Medal all-purpose work perfectly—no need for bread flour or anything fancy. I always buy baking powder in smaller cans (the aluminum ones) to keep it fresh, since it loses potency over time. The cinnamon adds that cozy flavor, but skip it if you prefer plain waffles. A fine-mesh sieve helps aerate the flour for lighter results.
No baking powder? 1 tsp baking soda plus 2 tsp cream of tartar works in a pinch. Swap the sugar for coconut sugar if you want a deeper flavor (or skip it entirely). The oil can be any neutral kind—vegetable, canola, or melted coconut. If using coconut oil, measure it melted then let it cool slightly before mixing.
This dry mix stays fresh for 3-6 months in an airtight container. Store it in a cool, dry place (like your pantry, not the fridge). Once you add water, cook the batter immediately—it doesn’t keep well mixed.
Why You’ll Love This Recipe
- Just Add Water: I keep a jar of this mix in my pantry—breakfast in 5 minutes flat, no measuring spoons or messy counters.
- Cinnamon Warmth: That hint of cinnamon with the sugar makes the house smell like a cozy weekend morning, even on a rushed Tuesday.
- Feeds the Crowd: One batch makes 8 waffles, so it’s my go-to for sleepovers, lazy Sundays, or freezing extras for busy mornings.
- Pantry Staples Only: Flour, sugar, baking powder—things I always have. No last-minute grocery runs, ever.
Step-by-Step Instructions for Dry Waffle Mix Just Add Water
Here’s the method that turns your pantry staples into light, fluffy waffles in record time.
Step 1: Combine Dry Ingredients for Perfect Rise
In a large mixing bowl, whisk together the 2 cups All-Purpose Flour, 2 tbsp Baking Powder, 2 tbsp Granulated Sugar, 0.5 tsp Table Salt, and 1 tsp Ground Cinnamon. I always sift the flour first—this breaks up any lumps and aerates the mixture for a lighter texture.
The baking powder is your leavening agent here, so make sure it’s fresh (check the expiration date). You’ll notice the mixture takes on a slightly pinkish hue from the cinnamon—that’s how you know it’s evenly distributed.
Step 2: Incorporate the Wet Ingredients Smoothly
Create a well in the center of your dry ingredients and pour in the 0.25 cup Vegetable Oil and 1.5 cups Water. Using a wire whisk, gently stir the mixture just until the dry ingredients are moistened. You’ll see small lumps—that’s perfectly fine.
Overmixing at this stage develops gluten, which makes waffles tough rather than tender. The batter should be slightly thick but pourable—if it’s too stiff, add a splash more water. Real talk: the batter will look a bit lumpy, but that’s exactly what you want for airy results.
Step 3: Preheat Your Waffle Iron Properly
While the batter rests for 5 minutes, preheat your waffle iron to medium-high heat. This step is non-negotiable—pouring batter into a cold iron creates dense, soggy waffles. Most irons have an indicator light that turns off when it’s ready.
I like to test the temperature by sprinkling a few drops of water on the iron. If they sizzle and evaporate immediately, it’s ready. Lightly grease the plates with a paper towel dipped in vegetable oil to prevent sticking, even if your iron is non-stick.
Step 4: Cook to Golden Perfection
Pour about ½ cup of batter onto the center of the preheated waffle iron, spreading it slightly toward the edges. Close the lid and cook for 3-5 minutes until the waffle is golden brown and crisp.
Every iron is different, so watch for steam to stop escaping from the sides—that’s your cue to check. The waffle should release easily when it’s done. If it sticks, don’t force it—give it another 30-60 seconds to crisp up.
Transfer to a wire rack to cool slightly. This prevents the steam from making the bottoms soggy. Repeat with the remaining batter, greasing the iron between batches if needed.
Pro Tips For Making Dry Waffle Mix Recipe Just Add Water
- Preheat the Iron: I learned this the hard way—crank your waffle iron to medium-high and let it heat for at least 5 minutes before pouring batter. Cold irons make soggy, undercooked centers.
- Whisk Vigorous: After adding water, whisk the batter for a full 30 seconds to activate the baking powder evenly. I used to rush this and ended up with dense, flat waffles.
- Skip Overmixing: Stop as soon as the dry streaks disappear—small lumps are fine. Overmixing develops gluten, and your waffles will turn tough instead of tender.
- Add Melted Butter: Sounds weird, but it works: replace the water with an equal amount of melted butter for richer flavor and crispier edges. I was skeptical until I tried it.
Make-Ahead Tips for This dry waffle mix recipe just add water
Batch Prep Method
I always make 4-5 batches at once using a large mixing bowl and a whisk. This saves time and ensures you have mix ready for weeks. Store in airtight containers like mason jars or zip-top bags. 💡
Portion Control
For single servings, divide the dry mix into 1-cup portions before storing. Each portion makes about 2 waffles. Label containers with the date so you can track freshness.
Long-Term Storage
Keep your mix in a cool, dark place like a pantry. It stays fresh for 3-6 months. Avoid humidity—any moisture will cause clumping or spoilage.
Quick Morning Assembly
When ready to cook, just add 1.5 cups water and ¼ cup oil per batch. Stir until combined—no need to overmix. The batter comes together in 30 seconds.
Freezer-Friendly Waffles
Cook a big batch and freeze extras. Cool completely on a wire rack, then store in a freezer bag with parchment between layers. Reheat in a toaster for 2-3 minutes. ❄️
Pro Tip for Crispiness
For extra-crisp waffles, place frozen ones directly in the toaster without thawing. This prevents sogginess. I also reheat at the highest setting for best results.
Nutrition Facts
Frequently Asked Questions
How long does the dry mix stay fresh?
Stored in an airtight container in a cool, dry place, the mix keeps for 3-6 months. Check for clumping or off smells before use.
Can I use milk instead of water?
Yes, but it changes the texture. Milk adds richness and slight density compared to water. For best results, stick to water for the intended light, crisp consistency.
Why are my waffles dense instead of fluffy?
Overmixing the batter develops gluten, which makes waffles tough. Stir just until dry ingredients are moistened. Also, ensure your baking powder is fresh and active.
Can I make this mix gluten-free?
Substitute the all-purpose flour with a 1:1 gluten-free baking blend. Add ½ tsp xanthan gum per cup of flour to improve texture. Results may vary slightly.

Trained in classic French technique but raised on slow-cooked ribs and spicy rubs, she blends culinary skill with smoke and soul.
- Recipe for Boneless Pork Chops in Cast Iron Skillet: Sear and Baste to Juicy Perfection - October 3, 2026
- Recipe for Boneless Cross Rib Roast: Slow-Roasted Beef with Herb Crust - October 3, 2026
- Hamburgers in Sauce Recipe Crock Pot: Slow-Cooked Savory Delight - October 3, 2026