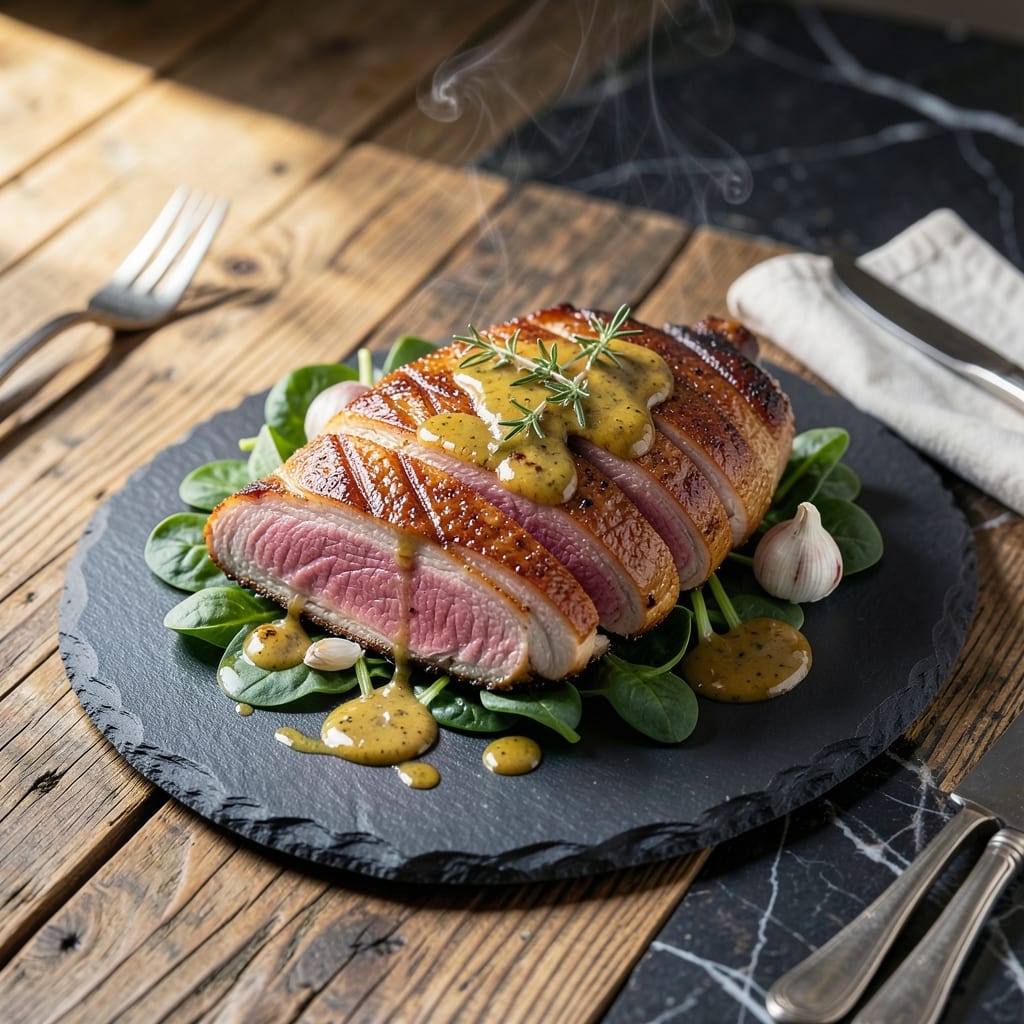
Achieving crispy duck skin with a perfect medium-rare center is simpler than you think. This method delivers restaurant-quality results with minimal effort and maximum flavor.
I developed this technique after years of experimenting with temperatures and timing. The key is starting with a cold pan and rendering the fat slowly for that coveted golden crust.
You’ll end up with duck that’s tender and juicy inside, with skin so crispy it shatters at the touch. The rich flavor pairs beautifully with fruit-based sauces.
Serve with roasted potatoes or a fresh salad for a complete meal. This dish will impress even the most discerning dinner guests.
Ingredients for Duck Breast Recipe Pan Fried
Duck breast, salt, pepper, and a few extras for that restaurant-quality finish.
| Ingredient | Amount | Notes |
|---|---|---|
| Duck Breast 🦆 | 4 whole | Skin-on, about 6-8 oz each |
| Kosher Salt 🧂 | 1 tsp | Diamond Crystal preferred |
| Freshly Ground Black Pepper 🌶️ | ½ tsp | Coarse grind for texture |
| Fresh Thyme Sprigs 🌿 | 4 whole | Optional for aromatics |
| Garlic Cloves 🧄 | 2 cloves | Lightly crushed |
| Dijon Mustard 🟡 | 2 tbsp | For glaze or serving |
| Honey 🍯 | 1 tbsp | For balancing richness |
| Extra-Virgin Olive Oil 🫒 | 1 tbsp | For finishing if needed |
| Fresh Rosemary Sprigs 🌿 | 2 whole | Optional for garnish |
| Red Wine Vinegar 🍷 | 1 tbsp | For pan sauce option |
| Chicken Stock 🥣 | ½ cup | Low-sodium preferred |
| Unsalted Butter 🧈 | 2 tbsp | For basting and sauce |
[recipe_ingredient_scaler]
The duck breast is the star here—look for skin-on, evenly thick cuts (about 6-8 oz each) at Whole Foods or a specialty butcher. The skin should be smooth and unblemished, with a good fat layer underneath. Magret duck breast (from Moulard ducks) is the gold standard for rendering fat and crisping up. If buying frozen, thaw overnight in the fridge. Pat the skin dry before cooking—this is non-negotiable for crispiness.
No fresh thyme? Dried thyme at one-third the amount works, but fresh adds a brightness. Swap honey for maple syrup if you prefer, or skip it entirely for a savory-only dish. The Dijon can be whole-grain mustard for texture. If avoiding alcohol, deglaze with chicken stock plus a splash of apple cider vinegar. For extra crunch, score the skin in a crosshatch pattern before cooking.
Duck breast keeps 3-4 days in the fridge—store it uncovered on a rack so air circulates around the skin. Cooked leftovers? Slice and reheat gently in a pan or serve cold. For the best results, use within 1 day of purchase, as the fat can turn rancid. Freezing isn’t ideal, but if you must, wrap tightly and use within 2 months.
Why You’ll Love This Recipe
- One Pan Wonder: I love that it only needs a skillet and five ingredients—no fancy equipment or extra dishes to wash.
- Crispy & Rich: The combo of salty skin, thyme, and garlic gives that melt-in-your-mouth richness every time.
- Fancy Without Fuss: It feels restaurant-worthy but honestly takes less effort than roasting a chicken.
- Next-Day Luxury: Cold slices taste even better the next day—toss them into salads or sandwiches for a quick upgrade.
Step-by-Step Instructions for Duck Breast Pan Fried
Here’s the method. Straightforward, tested, works every time.
Step 1: Score and Season the Duck Breast
Pat the duck breast completely dry with paper towels. Place each one skin-side up on a cutting board and score the skin in a crosshatch pattern, cutting through the fat but not into the meat. This helps render the fat and creates crispy skin.
Season both sides aggressively with the kosher salt and freshly ground black pepper. I like to press the seasoning into the meat so it adheres well. Place the seasoned duck breast on a wire rack set over a plate and refrigerate uncovered for at least 1 hour or up to 24 hours to dry the skin thoroughly.
Step 2: Render the Fat and Sear the Skin
Place the duck breast skin-side down in a cold skillet. Turn heat to medium and cook for 8-10 minutes, allowing the fat to render slowly and the skin to turn deep golden brown. Don’t move the duck during this time—let it develop that crispy crust.
Pour off excess fat occasionally during cooking (save it for roasting potatoes later). You’ll know it’s ready to flip when the skin is uniformly browned and crisp. Add the garlic cloves, fresh thyme sprigs, and fresh rosemary sprigs to the pan during the last 2 minutes of this side to infuse the fat with aroma.
Step 3: Finish Cooking and Baste
Flip the duck breast and cook for 3-4 minutes on the flesh side for medium-rare. Add the unsalted butter to the pan and tilt it slightly. Spoon the foaming butter over the duck repeatedly to baste it, focusing on the meat side.
For extra flavor, I like to add the chicken stock to the pan during the last 2 minutes of cooking. Tilt the pan and spoon the liquid over the duck to create a light pan sauce as it cooks.
Step 4: Rest and Serve
Transfer the duck breast to a cutting board, skin-side up. Let it rest for 10 minutes before slicing—this allows the juices to redistribute for maximum tenderness. The internal temperature should reach 130-135°F for perfect medium-rare.
Slice the duck breast diagonally into ½-inch thick pieces. Arrange on a serving platter and drizzle with any pan juices. For a sweet and tangy finish, whisk together the Dijon mustard and honey, then drizzle lightly over the sliced duck before serving.
Pro Tips For Making Duck Breast Recipe Pan Fried
- Score the Fat: Cut a crosshatch pattern into the duck fat—about 1/4-inch apart—so it renders evenly and the skin crisps up perfectly. I learned this the hard way after ending up with chewy, unrendered fat on my first few attempts.
- Start Cold, Finish Hot: Place the duck breast fat-side down in a cold pan, then turn the heat to medium. This slowly renders the fat without burning the skin, and you can crank it up to high for the last 2 minutes for that deep golden crust.
- Rest Before Slicing: Give the duck a solid 5-10 minutes to rest under foil before slicing—yes, even if you’re starving. This keeps all those juices from pooling on the cutting board instead of in the meat.
- Use the Rendered Fat: After removing the duck, pour off all but 1 tablespoon of the rendered fat and toss in the thyme and garlic. It infuses in seconds and makes a killer pan sauce with zero extra effort.
Common Mistakes When Making Great duck breast recipe pan fried
Skipping the Skin Drying
Never skip drying the duck skin thoroughly before cooking. Even a little moisture prevents the fat from rendering properly and ruins that crispy texture we’re after. I pat mine dry, then let it air-dry in the fridge for 1 hour minimum. 💡
Moving the Duck Too Soon
Resist the urge to peek or move the duck during the first 8-10 minutes of cooking. This is when the fat renders and the skin crisps. If you move it, you’ll disrupt the process and end up with uneven browning.
Overcrowding the Pan
Duck releases a lot of fat, so give each breast plenty of space in the pan. If cooking multiple, use separate pans or cook in batches. Crowding steams the skin instead of crisping it, and that’s a disaster for texture.
Overcooking the Meat
Duck breast is best at medium-rare—that’s 130-135°F internal temperature. Overcooking makes it tough. I use a meat thermometer and pull it off the heat just before it reaches temp, as it carries over while resting.
Wasting the Fat
That rendered duck fat is liquid gold. Pour it into a jar and use it for roasting potatoes or cooking eggs. It adds incredible flavor. Just
Skipping the Rest
Always let your duck rest for at least 10 minutes before slicing. This lets the juices redistribute, so every bite stays tender and juicy. Slicing too soon sends those flavors straight to your cutting board.
Nutrition Facts
Frequently Asked Questions
Should I score the skin before cooking?
Yes, scoring the skin in a crosshatch pattern helps render the fat and creates crispy texture. Cut through the fat but not into the meat.
What internal temperature should I aim for?
Pull the duck at 130-135°F for perfect medium-rare. Use a meat thermometer and remember it rises 5°F while resting.
Can I use the rendered fat for anything?
Save the rendered duck fat in a jar. It’s perfect for roasting potatoes or cooking eggs. Adds incredible rich flavor.
Why does my skin sometimes turn out rubbery?
Rubbery skin usually means the fat didn’t render properly. Start with a cold pan and cook on medium heat for 8-10 minutes without moving.

Trained in classic French technique but raised on slow-cooked ribs and spicy rubs, she blends culinary skill with smoke and soul.
- Recipe for Boneless Pork Chops in Cast Iron Skillet: Sear and Baste to Juicy Perfection - October 3, 2026
- Recipe for Boneless Cross Rib Roast: Slow-Roasted Beef with Herb Crust - October 3, 2026
- Hamburgers in Sauce Recipe Crock Pot: Slow-Cooked Savory Delight - October 3, 2026