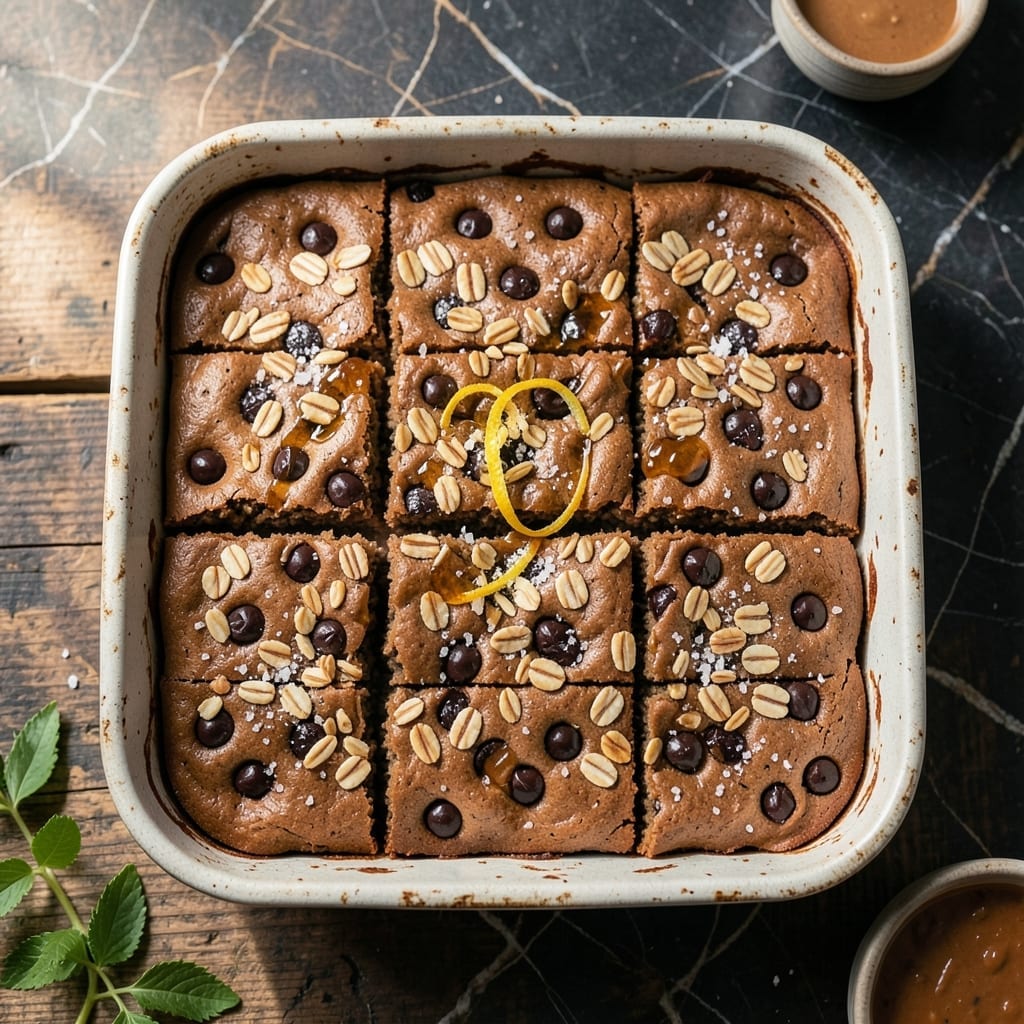
Some recipes earn their name through simplicity, and this one proves that the best desserts often require the least effort. No oven, no mixing bowls, just layers of rich chocolate and peanut butter coming together in perfect harmony.
I developed this method for those moments when you need something sweet without the fuss. The beauty lies in the layering—each component builds upon the last, creating a texture that’s both creamy and crunchy in every bite.
What you get is a dessert that’s as impressive as it is easy. The peanut butter base sets firm, the chocolate layer stays velvety, and the combination is pure indulgence. No baking skills required—just patience while it chills.
Perfect for potlucks, parties, or a late-night treat. This is dessert at its most effortless.
Ingredients for Dump Bars
Layers of peanut butter, chocolate, and crunch come together effortlessly for this no-bake treat.
| Ingredient | Amount | Notes |
|---|---|---|
| Creamy Peanut Butter 🥜 | 1 ½ cups | Natural or commercial variety |
| Old-Fashioned Rolled Oats 🌾 | 2 cups | Quick oats work too |
| Honey 🍯 | ½ cup | Or maple syrup for vegan |
| Unsalted Butter 🧈 | ½ cup | Melted for binding |
| Vanilla Extract 🌿 | 1 tsp | Pure extract preferred |
| Semi-Sweet Chocolate Chips 🍫 | 2 cups | High-quality for melting |
| Heavy Cream 🥛 | ½ cup | Or full-fat coconut milk |
| Powdered Sugar 🧂 | ½ cup | Sifted for smoothness |
| Sea Salt 🧂 | ¼ tsp | Flaky for garnish |
| Chopped Peanuts 🥜 | ½ cup | For crunchy topping |
[recipe_ingredient_scaler]
The peanut butter base needs something that will hold its shape—Jif or Skippy work perfectly, but natural peanut butter needs a good stir first (the oil separation can mess with the texture). Quaker oats are my go-to for the base—consistent size, great binding. For the chocolate layer, Ghirardelli or Guittard chips melt beautifully and set with that perfect snap. Always check your chocolate chips aren’t old—stale chocolate seizes up when melted.
No honey? Maple syrup or agave sub in at a 1:1 ratio. Dairy-free? Coconut oil instead of butter and full-fat coconut milk for the cream. Want more crunch? Swap in crushed pretzels or Rice Krispies in the base. The salt on top is non-negotiable though—it cuts through the sweetness and makes all the flavors pop (the good flaky stuff, not table salt).
Keeps in the fridge for up to 10 days (if they last that long). Freeze for 3 months—slice first, then wrap individually. Let sit at room temp for 10 minutes before serving for the perfect texture (worth the wait).
Why You’ll Love This Recipe
- No Fuss Mixing: I just dump everything in one bowl—peanut butter, oats, honey—and stir. No fancy steps, no mess.
- Ridiculously Good: That warm honey-peanut butter combo with a buttery crunch? I’ve caught myself sneaking seconds.
- Weeknight Hero: I pack these for lunchboxes or serve after soccer practice. They’re my secret for looking like I’ve got it together.
- Pocket Change Friendly: Oats and peanut butter stretch so far. I make a big batch for pennies and still get rave reviews.
Step-by-Step Instructions for No-Bake Chocolate Peanut Butter Layers
Here’s the method. Simple, foolproof, and absolutely delicious with zero oven time.
Step 1: Prepare the Peanut Butter Base Layer
In a large bowl, combine the 1.5 cups creamy peanut butter, 0.5 cup honey, and 0.5 cup unsalted butter that’s been melted. Stir vigorously until the mixture becomes smooth and fully integrated—this should take about 2 minutes of consistent mixing.
Add the 2 cups old-fashioned rolled oats, 0.5 cup powdered sugar, 1 tsp vanilla extract, and 0.25 tsp sea salt. Fold everything together until the oats are completely coated. The texture should resemble wet sand that holds together when pressed. Press this mixture evenly into the bottom of a parchment-lined 9×13-inch pan using the back of a spoon or your fingers.
Step 2: Create the Chocolate Ganache Middle Layer
In a microwave-safe bowl, heat the 2 cups semi-sweet chocolate chips and 0.5 cup heavy cream in 30-second intervals, stirring between each, until completely smooth. This usually takes 1.5-2 minutes total. Watch closely—chocolate burns easily.
Once melted, let the ganache cool for 2-3 minutes at room temperature until it thickens slightly but remains pourable. Then pour it evenly over the peanut butter base layer, spreading with a spatula to cover completely. The ganache should form a glossy, even layer that doesn’t seep into the base.
Step 3: Add the Final Crunch Topping
Immediately sprinkle the 0.5 cup chopped peanuts evenly over the chocolate layer. Press down lightly with your palm to ensure they adhere as the chocolate sets. For extra flair, finish with an additional pinch of sea salt—this enhances the peanut butter and chocolate flavors beautifully.
Refrigerate the pan uncovered for at least 2 hours, or until the layers are completely set. You’ll know it’s ready when the chocolate layer is firm to the touch and doesn’t stick to your finger when pressed lightly.
Step 4: Slice and Serve
Remove the pan from the refrigerator and let it sit at room temperature for 5-10 minutes to make slicing easier. Lift the entire creation out of the pan using the parchment paper and place it on a cutting board.
Using a sharp knife dipped in hot water and wiped clean between cuts, slice into 16-20 bars. The heat from the knife ensures clean edges. Serve immediately or store in an airtight container in the refrigerator for up to 5 days. Each bite delivers creamy, crunchy, chocolatey perfection!
Pro Tips For Making Dump Bars
- Press the Mixture: Pack the oat and peanut butter mixture into the pan firmly with a spatula or your hands—I learned this the hard way after my first batch crumbled apart when cutting.
- Warm the Honey: Microwave the honey for 10-15 seconds before mixing, or it’ll be a sticky mess and won’t incorporate evenly with the peanut butter.
- Use Fresh Oats: Skip the quick oats; old-fashioned rolled oats give the right chewy texture, and stale oats taste like cardboard no matter what you do.
- Chill Before Cutting: Let the bars set in the fridge for at least an hour, or you’ll end up with a gooey, uncuttable pan of delicious frustration.
Pro Cooking Tips for Great dump bars
Perfect Layer Pressing
Press the peanut butter base firmly into your 9×13-inch pan using the bottom of a measuring cup for an even layer. I learned this trick at a local BBQ competition—gives you that professional, uniform thickness every time. 💪
Ganache Temperature Control
Let your chocolate ganache cool for exactly 3 minutes before pouring. Too hot and it’ll melt the base, too cool and it won’t spread smoothly. I use a kitchen timer for precision.
Peanut Adhesion Hack
Sprinkle your 0.5 cup chopped peanuts immediately after pouring the ganache. Press them in lightly with your palm so they stick as the chocolate sets. This ensures every bar has that perfect crunch.
Chilling Time
Don’t rush the 2-hour chill—this is when the magic happens. The layers set completely, making clean cuts possible. I often prep these before my coastal rides, so they’re ready when I return.
Clean Cutting Technique
Dip your knife in hot water and wipe clean between every cut. This gives you those sharp, Instagram-worthy edges. A 10-inch chef’s knife works best for long, even slices.
Storage Pro Tip
Store in an airtight container with parchment between layers. They’ll keep for 5 days in the fridge or 3 months in the freezer. Perfect for when I’m foraging wild herbs and want a sweet treat waiting at home. ✨
Nutrition Facts
Frequently Asked Questions
Can I use crunchy peanut butter?
Crunchy peanut butter adds extra texture to the base layer. Just ensure it’s well-stirred to distribute the peanut pieces evenly. The result will be even more satisfying!
How do I know when they’re set?
Gently press the center with your finger. If it springs back and doesn’t stick, they’re ready. This usually takes 2 hours in the fridge.
Can I add other toppings?
Yes! Try sprinkling crushed pretzels, mini marshmallows, or coconut flakes before chilling. Just add them right after the chocolate layer so they stick.
Why did my layers separate?
This happens if the ganache is too hot when poured. Always let it cool for 2-3 minutes first. Pressing the peanut butter base firmly also helps.

Trained in classic French technique but raised on slow-cooked ribs and spicy rubs, she blends culinary skill with smoke and soul.
- Recipe for Crock Pot Lasagna Using Ravioli: No-Boil Cheese Layers - October 3, 2026
- Recipe for Cut Up Chicken: One-Pan Crispy Bites - October 3, 2026
- Recipe For Oven Baked Haddock: Buttery Crumbs With Zesty Lemon Topping - October 3, 2026