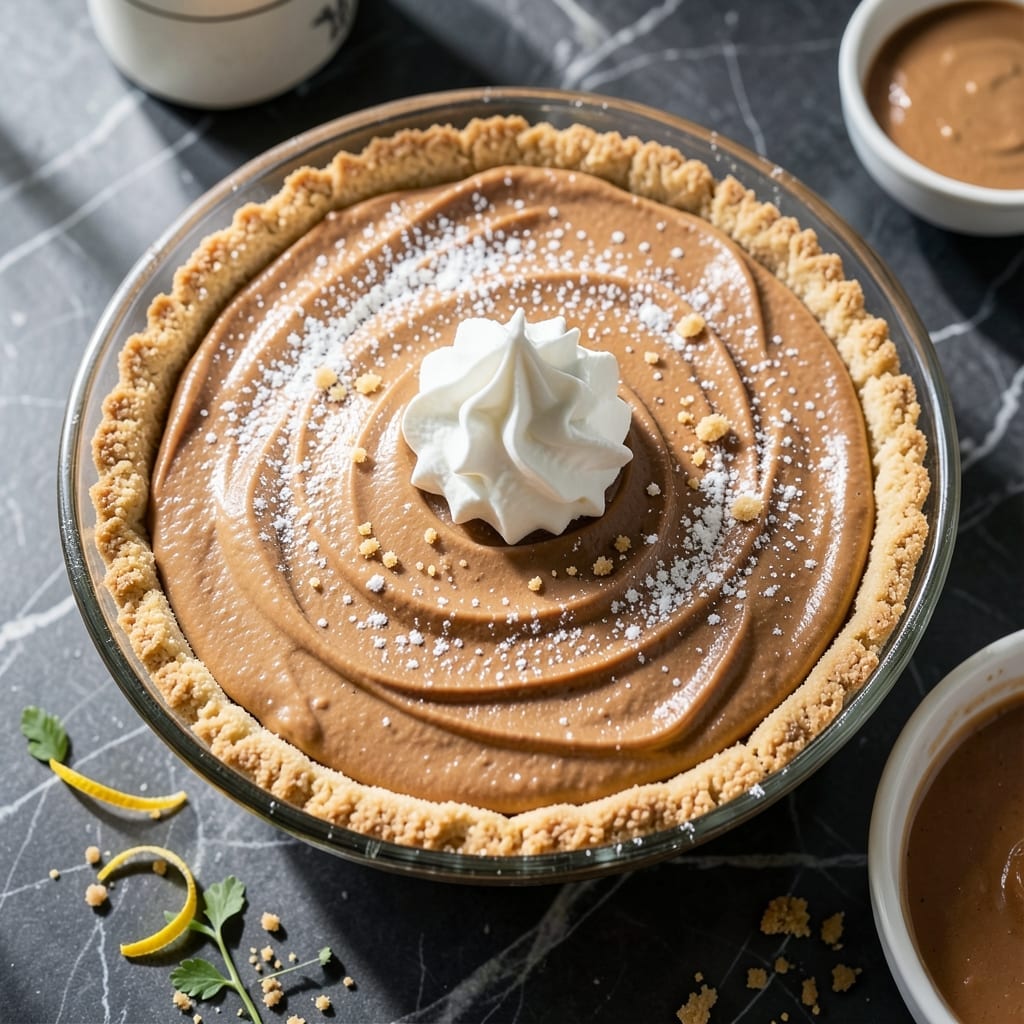
This no-bake pie delivers a creamy texture that’s impossible to resist. The Eagle Brand sweetened condensed milk creates a silky base that blends perfectly with peanut butter for a rich, velvety filling.
No oven required—just mix, chill, and serve. The crust stays crisp while the filling sets into a smooth, sliceable consistency. It’s the ideal dessert for hot days or when you need a quick, impressive treat.
Every bite offers the perfect balance of sweet and salty, with a satisfying peanut butter flavor that lingers. Top with whipped cream or chocolate shavings for an extra touch of indulgence.
Ready in under 15 minutes of prep, this pie proves that the best desserts don’t need heat to shine.
Ingredients for Eagle Brand Peanut Butter Pie
A handful of pantry staples and 15 minutes stand between you and this dreamy dessert.
| Ingredient | Amount | Notes |
|---|---|---|
| Creamy Peanut Butter 🥜 | 1 ½ cups | Smooth, not natural style |
| Eagle Brand Sweetened Condensed Milk 🥛 | 1 can | 14 oz can, full-fat |
| Cool Whip Frozen Whipped Topping ☁️ | 1 container | 8 oz, thawed (or homemade whipped cream) |
| Graham Cracker Crust 🍪 | 1 whole | 9-inch pre-made, store-bought |
| Unsalted Butter 🧈 | 2 tbsp | Melted, for crust if homemade |
| Powdered Sugar 🍚 | ½ cup | For dusting or sweetening |
| Vanilla Extract 🌿 | 1 tsp | Pure extract preferred |
| Salt 🧂 | ¼ tsp | Balances sweetness |
| Whipped Cream ☁️ | 1 cup | For topping (optional) |
| Chocolate Shavings 🍫 | ¼ cup | For garnish (optional) |
| Chopped Peanuts 🥜 | ¼ cup | For garnish (optional) |
[recipe_ingredient_scaler]
The peanut butter is non-negotiable—Jif or Skippy creamy gives that perfect smooth texture (natural styles can separate). Eagle Brand is the only sweetened condensed milk I trust here—consistency is key. For the crust, Keebler or Mi-Del graham cracker crusts are solid, but homemade with extra butter takes it up a notch. Look for Cool Whip in the freezer aisle—thaw it completely before mixing.
No Cool Whip? Homemade whipped cream (1 cup heavy cream + 2 tbsp sugar) works in a pinch. Swap graham cracker crust for Oreo crust if you want a chocolate twist. Out of powdered sugar? Granulated sugar pulsed in a blender gets the job done. The vanilla extract can be skipped, but it adds depth—imitation vanilla is fine in this case.
The pie sets up in 4 hours but overnight is ideal. Store covered in the fridge for up to 5 days—if it lasts that long. Freeze for up to 2 months (thaw in fridge overnight before serving).
Why You’ll Love This Recipe
- No-Bake Magic: I just mix peanut butter, Eagle Brand milk, and Cool Whip, then chill—no oven, no stress.
- Rich & Creamy: That peanut butter and condensed milk combo? So smooth it’s almost sinful.
- Crowd Pleaser: Potlucks, picnics, or just a Tuesday night—this pie disappears fast.
- Budget Friendly: Five ingredients, one graham crust, and it feeds eight without breaking the bank.
Step-by-Step Instructions for Peanut Butter Pie
This no-bake method delivers a silky, rich pie with minimal effort and maximum flavor.
Step 1: Mix the Peanut Butter Base
In a large bowl, combine the 1.5 cups Creamy Peanut Butter with the 1 can Eagle Brand Sweetened Condensed Milk. I use a wooden spoon for this—it gives me better control to scrape every last bit from the bowl.
Stir until the mixture is completely smooth and free of streaks. This should take about 2-3 minutes of steady mixing. You’ll notice the color lighten slightly as the ingredients fully incorporate. Add the 1 tsp Vanilla Extract and 0.25 tsp Salt, then mix for another 30 seconds.
Here’s the thing—if the mixture looks too thick, don’t add liquid. The texture will loosen perfectly once you fold in the next ingredient.
Step 2: Fold in the Cool Whip
Gently fold the 1 container Cool Whip Frozen Whipped Topping into the peanut butter mixture using a spatula. I like to add it in 3 parts, folding just until each addition disappears. This prevents deflating the whipped topping while ensuring even distribution.
You’ll end up with a light, fluffy filling that holds its shape when spooned. The color should be a pale, creamy tan. If you see streaks of white, keep folding gently—you want it uniform throughout.
Real talk: don’t use a whisk or electric mixer here. You’ll turn your airy filling into a dense, flat mess.
Step 3: Fill the Crust and Chill
Spoon the filling into the 1 whole Graham Cracker Crust, spreading it evenly with the back of a spoon. I always run a spatula around the edge to create a slight dome in the center—it looks more professional when sliced.
Tap the pie gently on the counter 2-3 times to remove any air pockets. This ensures a smooth texture when you serve it. Cover loosely with plastic wrap and refrigerate for at least 4 hours, but overnight is even better.
The chilling time is non-negotiable. If you slice it too soon, you’ll have a runny disaster instead of clean, creamy slices.
Step 4: Garnish and Serve
Just before serving, top the pie with the 0.25 cup Chocolate Shavings and 0.25 cup Chopped Peanuts. I like to press them lightly into the surface so they stick with each slice.
For extra flair, add a dollop of 1 cup Whipped Cream to each serving. If you want to get fancy, dust the plate with 0.5 cup Powdered Sugar using a fine-mesh sieve for a restaurant-worthy presentation.
Slice with a sharp knife dipped in hot water for clean cuts. The pie should hold its shape perfectly, with a velvety texture that melts in your mouth.
Pro Tips For Making Eagle Brand Peanut Butter Pie
- Soften the Peanut Butter: Microwave the creamy peanut butter for 20-30 seconds before mixing—it blends smoother with the Eagle Brand milk and prevents those stubborn lumps I used to fight with a spoon.
- Chill the Crust First: Pop that graham cracker crust in the fridge for 15 minutes before filling it. I learned this the hard way after watching my pie soak through the bottom one too many times.
- Fold, Don’t Stir: When adding the Cool Whip, use a spatula and fold gently to keep the filling light. Stirring like batter knocks out the air and leaves you with a dense, sad pie.
- Skip the Freezer: Let it set in the fridge for at least 4 hours—freezing makes the texture icy and hard to slice. My grandmother swore by overnight chilling, and she was right.
Serving Suggestions for This Recipe
Plating Like a Pro
Slice the pie into 8 even wedges using a hot knife for clean edges. I run my chef’s knife under hot water between cuts—makes all the difference. Arrange each slice on a chilled dessert plate for that restaurant-quality look. 💫
Garnish Creatively
Drizzle with melted chocolate in a zigzag pattern over the top. A dusting of powdered sugar through a stencil adds elegance. For texture, sprinkle crushed graham crackers around the plate’s edge.
Serving Temperature
Serve the pie straight from the fridge—it should be cold but not frozen. The filling holds its shape best at about 40°F. If you’re serving outdoors, keep it on ice until ready to plate.
Pairing with Drinks
A cold glass of chocolate milk complements the peanut butter perfectly. For adults, try a vanilla porter beer or bourbon on the rocks. The sweetness of the pie balances the boldness of these drinks beautifully. 🍺
Portion Control
This is rich, so smaller slices go further. I often serve ½ slices at gatherings with other desserts. The flavors are so concentrated that guests feel satisfied with less.
Make It Interactive
Set up a toppings bar with chocolate chips, mini marshmallows, and caramel sauce. Let guests customize their slices—especially fun for kids. Honestly, it’s my favorite way to serve this at parties.
Nutrition Facts
Frequently Asked Questions
Can I use natural peanut butter instead of creamy?
Stick with creamy peanut butter like Jif or Skippy. Natural styles can separate and create an oily texture in your pie.
How long does it need to chill before serving?
Refrigerate for at least 4 hours, but overnight is ideal. This ensures clean slices and the perfect creamy texture.
What can I use instead of Cool Whip?
Substitute with 1 cup homemade whipped cream (heavy cream + 2 tbsp sugar). Fold it in gently just like the original.
Can I freeze this pie for later?
Yes! It freezes well for up to 2 months. Thaw in the fridge overnight before serving.

Trained in classic French technique but raised on slow-cooked ribs and spicy rubs, she blends culinary skill with smoke and soul.
- Recipe for Boneless Pork Chops in Cast Iron Skillet: Sear and Baste to Juicy Perfection - October 3, 2026
- Recipe for Boneless Cross Rib Roast: Slow-Roasted Beef with Herb Crust - October 3, 2026
- Hamburgers in Sauce Recipe Crock Pot: Slow-Cooked Savory Delight - October 3, 2026