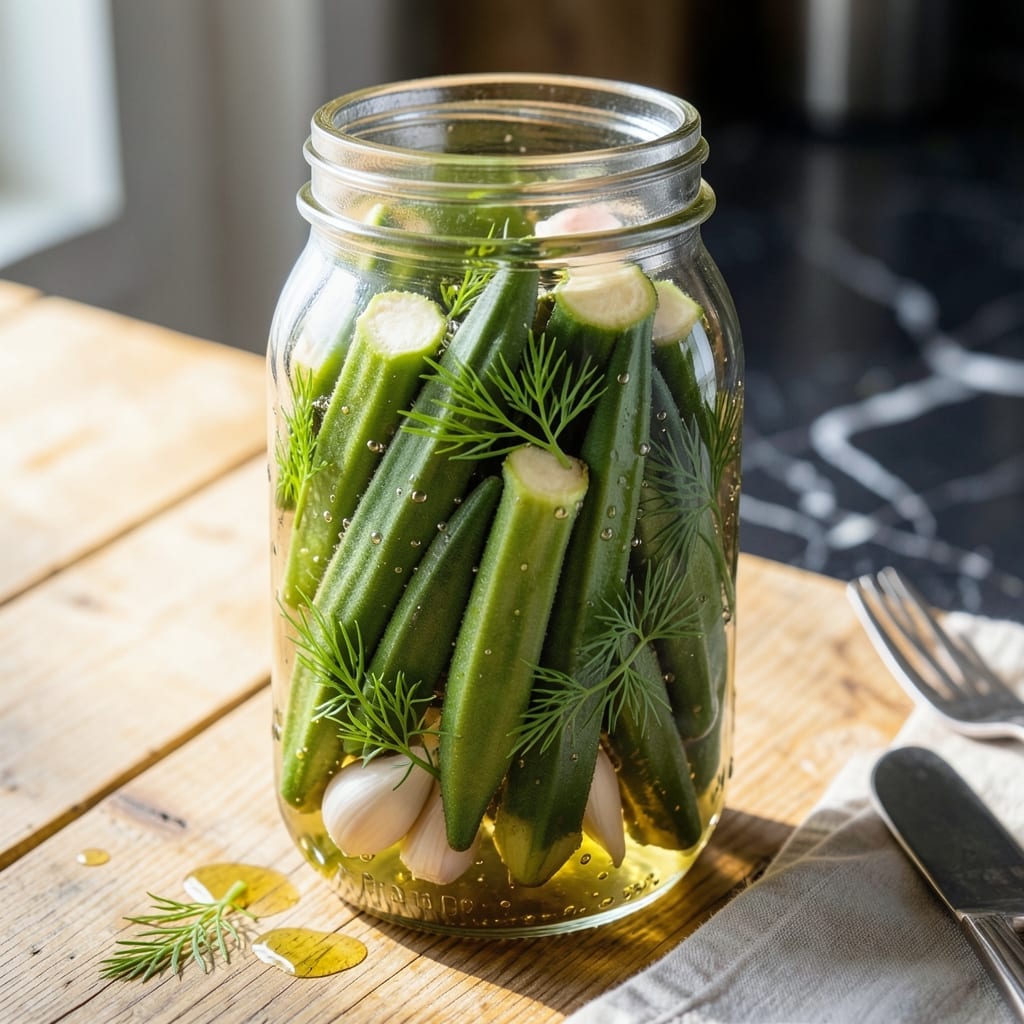
There is a unique satisfaction in preserving summer’s bounty through pickling, and okra responds beautifully to this method. The process transforms the humble pod into something tangy, crisp, and packed with flavor.
This recipe relies on a simple brine of vinegar, water, and salt, enhanced with garlic and dill for depth. Proper sterilization ensures your pickled okra stays fresh and safe for months in the pantry.
You will achieve bright green pods with a satisfying crunch, infused with aromatic garlic and fresh dill. The balance of tangy and savory makes these ideal for snacking or garnishing.
The result is a crunchy, flavorful addition to charcuterie boards, sandwiches, or Bloody Marys. The longer they sit, the better they taste.
Ingredients for Pickled Okra
Fresh okra, tangy brine, and aromatic spices create this crisp, flavorful dish.
| Ingredient | Amount | Notes |
|---|---|---|
| Fresh Okra Pods 🌿 | 1 lb | Small to medium, unblemished |
| White Vinegar 💧 | 2 cups | 5% acidity preferred |
| Water 💧 | 2 cups | Filtered for best results |
| Pickling Salt 🧂 | 2 tbsp | Non-iodized, fine grain |
| Garlic Cloves 🧄 | 6 cloves | Peeled, smashed lightly |
| Fresh Dill Sprigs 🌿 | 4 pieces | Or 2 tbsp dill seeds |
| Black Peppercorns 🌶️ | 1 tsp | Whole, for brine |
| Mustard Seeds 🌿 | 1 tsp | Yellow or brown variety |
| Red Pepper Flakes 🔥 | ½ tsp | Adjust for heat preference |
| Bay Leaves 🍃 | 2 pieces | Dried, whole leaves |
| Coriander Seeds 🌿 | ½ tsp | Lightly crushed |
[recipe_ingredient_scaler]
Okra quality is key here. Choose small, firm pods (3-4 inches long) with vibrant green color—avoid any with brown spots or soft texture. Farmers markets often have the best selection in summer, but most grocery stores carry it fresh or frozen. If using frozen, thaw completely and pat dry. For the vinegar, Heinz or Ball brand white vinegar works perfectly.
No pickling salt? Kosher salt at the same amount works, but avoid iodized table salt—it can make the brine cloudy. Fresh dill not available? Dried dill weed at one-third the amount gets you close. Want to experiment? Add a grape leaf or two to each jar for extra crispness. If you prefer sweeter pickles, swap 1 cup of water for 1 cup of apple cider vinegar.
Properly canned pickled okra keeps for 12-18 months in a cool, dark pantry. Once opened, refrigerate and use within 1 month. The flavor improves over time—wait at least 48 hours before tasting (if you can resist). Always use clean utensils when removing okra to prevent contamination.
Why You’ll Love This Recipe
- No-Fuss Brine: I just dump vinegar, water, salt, and garlic in a pot—no fancy steps, just heat and pour.
- Tangy Garlic Bite: The vinegar sharpness with garlic’s warmth makes every crisp okra pod irresistibly bold.
- Snack or Side: I toss these in salads, serve with sandwiches, or eat straight from the jar for a quick, zesty bite.
- Fridge Staple: One batch lasts weeks in the fridge, ready to pull out whenever I need a tangy crunch.
Step-by-Step Instructions for Pickled Okra
Here is the method that guarantees crisp, flavorful pickles with consistent results.
Step 1: Prepare the Okra for Brining
Begin by thoroughly washing the 1 lb Fresh Okra Pods under cold water to remove any dirt or debris. Pat them completely dry with clean kitchen towels—excess moisture will dilute the brine and affect the final texture.
Trim the stems, leaving about ¼ inch intact to prevent the pods from splitting during brining. Avoid cutting into the seed cavity, as this can cause the okra to become mushy. Set the prepared pods aside while you make the brine.
Step 2: Create the Pickling Brine
In a medium saucepan, combine the 2 cups White Vinegar, 2 cups Water, and 2 tbsp Pickling Salt. Bring the mixture to a gentle boil over medium-high heat, stirring until the salt fully dissolves.
Once boiling, remove the pan from heat. Add the 6 cloves Garlic Cloves, 4 pieces Fresh Dill Sprigs, 1 tsp Black Peppercorns, 1 tsp Mustard Seeds, 0.5 tsp Red Pepper Flakes, 2 pieces Bay Leaves, and 0.5 tsp Coriander Seeds. Stir to combine and let the brine steep for 5 minutes to infuse the flavors.
Step 3: Pack the Jars and Add Brine
Sterilize two clean pint-sized glass jars with lids by submerging them in boiling water for 5 minutes. Remove and let them air-dry. Pack the prepared okra pods vertically into the jars, leaving about ½ inch of headspace at the top.
Distribute the garlic, dill, and whole spices evenly between the jars for balanced flavor in every bite. Carefully ladle the hot brine over the okra, ensuring all pods are fully submerged. Tap the jars gently on the counter to remove any air bubbles.
Step 4: Seal and Store for Optimal Flavor
Wipe the rims of the jars with a clean, damp cloth to ensure a proper seal. Secure the lids tightly and let the jars cool to room temperature. Once cooled, transfer the jars to the refrigerator.
Allow the okra to pickle for at least 48 hours before tasting. For the best flavor and texture, wait 1-2 weeks. The okra will turn a vibrant green and develop a delightful tang with a subtle spicy kick. Store in the refrigerator for up to 6 months.
Pro Tips For Making Pickled Okra
- Prick the Pods: Use a fork to poke each okra pod 2-3 times before packing—this lets the brine penetrate faster and keeps them crisp.
- Boil the Vinegar: Heat your vinegar-water brine to a boil before pouring it over the jars, which helps kill bacteria and starts the pickling process immediately.
- Skip the Iodized: Only use pickling salt or kosher salt—iodized salt can turn your brine cloudy and affect the flavor.
- Add a Grape Leaf: I learned this the hard way—tossing a grape leaf or two in each jar keeps the okra extra crunchy by inhibiting enzyme activity.
Perfect Pairings for pickled okra
Cheese Board Stars
These tangy pods shine on charcuterie boards alongside sharp cheddar or creamy goat cheese. I love pairing them with smoked gouda from my local butcher—its nutty depth complements the dill perfectly. Add crackers and cured meats for a Southern-inspired spread. 🌟
Bloody Mary Garnish
Upgrade your brunch game by using pickled okra as a garnish for Bloody Marys. The briny tang enhances the spicy tomato base. I add 1-2 pods per glass along with celery and olives. The garlic notes in the okra work beautifully with the drink’s savory profile.
Sandwich Crunch
Slice pickled okra lengthwise and layer into sandwiches for extra crunch. It’s incredible with fried chicken or pulled pork on a brioche bun. I also love it in a grilled cheese with pepper jack—the heat from the cheese brings out the okra’s tang. 🔥
Salad Topper
Chop pickled okra and sprinkle over green salads for a zesty punch. It pairs especially well with spinach, feta, and walnuts. The acidity cuts through rich dressings like ranch or blue cheese. I always keep a jar in my fridge for this exact purpose.
Nutrition Facts
Frequently Asked Questions
How long should I let the okra pickle before eating?
Wait at least 48 hours for basic flavor, but 1-2 weeks yields the best tangy crunch. The longer it sits, the more the flavors develop.
Can I reuse the pickling brine?
Yes, but only once for safety. Reheat it to a boil, then use within 24 hours for another batch. Discard if cloudy or odd-smelling.
Why did my okra turn mushy?
Overcooking or cutting into the seed cavity causes mushiness. Use firm, small pods and trim stems carefully to avoid this.
Do I need special jars for pickling?
Pint-sized canning jars with airtight lids work best. Sterilize them in boiling water for 5 minutes before use. Mason jars are ideal.

Trained in classic French technique but raised on slow-cooked ribs and spicy rubs, she blends culinary skill with smoke and soul.
- Recipe for Boneless Pork Chops in Cast Iron Skillet: Sear and Baste to Juicy Perfection - October 3, 2026
- Recipe for Boneless Cross Rib Roast: Slow-Roasted Beef with Herb Crust - October 3, 2026
- Hamburgers in Sauce Recipe Crock Pot: Slow-Cooked Savory Delight - October 3, 2026