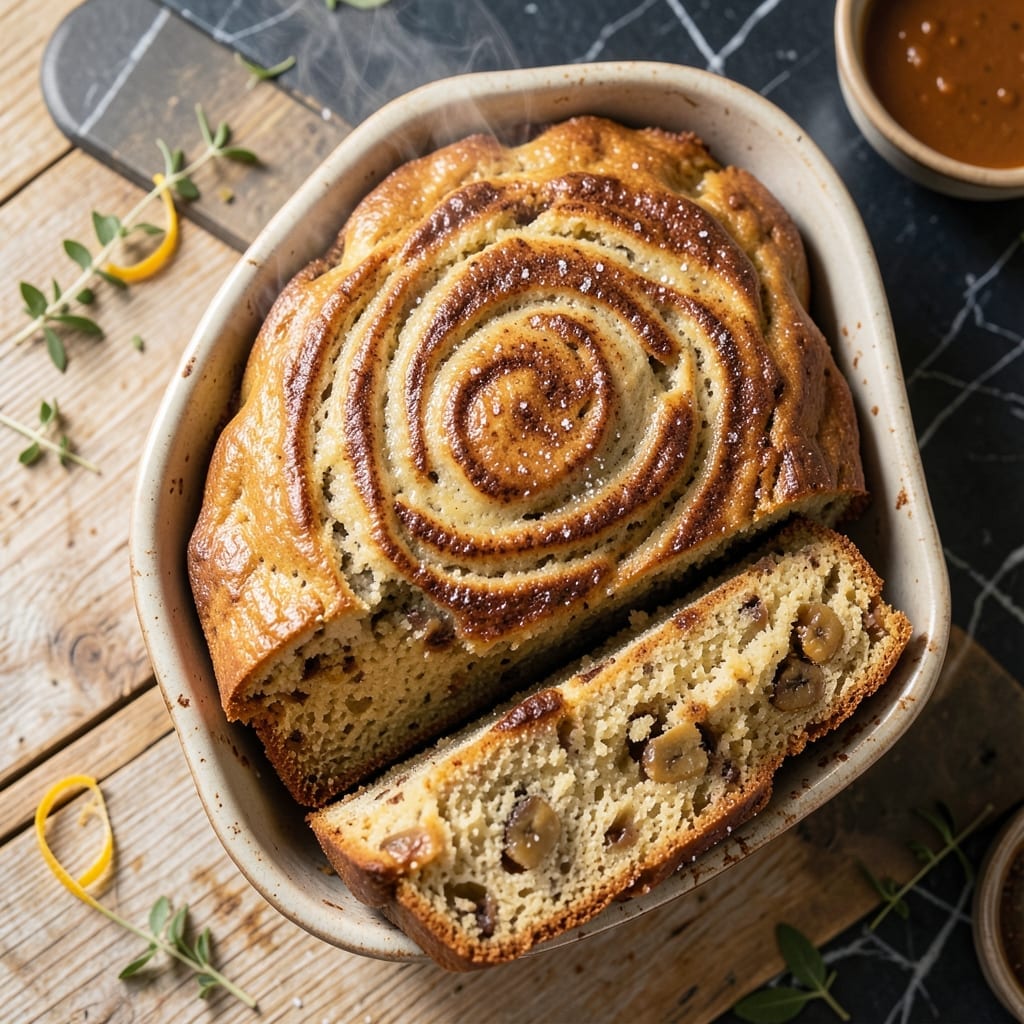
This one-bowl banana bread delivers on two essential promises: easy preparation and moist texture throughout. The cinnamon adds warm spice that elevates the natural sweetness of ripe bananas.
I developed this recipe to solve the age-old problem of dry banana bread. The secret lies in the right balance of wet ingredients and a precise baking time that locks in moisture without creating a dense loaf.
You’ll love how the cinnamon swirls through each slice, creating pockets of spiced warmth that complement the banana flavor. The one-bowl method means less cleanup and more time enjoying your creation.
Bake this in a standard loaf pan for about an hour, and you’ll have a tender, fragrant bread that’s perfect for breakfast or an afternoon treat.
Ingredients for Easy Moist Banana Bread Recipe with Cinnamon
Ripe bananas, warm cinnamon, and a handful of pantry staples come together beautifully here.
| Ingredient | Amount | Notes |
|---|---|---|
| Ripe Bananas 🍌 | 3 whole | Very ripe, heavily speckled |
| All-Purpose Flour 🌾 | 1 ½ cups | Spoon and level method |
| Granulated Sugar 🍚 | ¾ cup | White or brown works |
| Large Eggs 🥚 | 2 whole | Room temperature preferred |
| Vegetable Oil 🫒 | ½ cup | Or melted butter for richness |
| Ground Cinnamon 🌿 | 1 ½ tsp | Fresh for best flavor |
| Baking Soda 🧂 | 1 tsp | For rise and tenderness |
| Salt 🧂 | ½ tsp | Balances sweetness |
| Vanilla Extract 💧 | 1 tsp | Pure extract recommended |
| Plain Greek Yogurt 🥛 | ½ cup | For extra moisture |
| Chopped Walnuts 🥜 | ½ cup | Optional, for crunch |
[recipe_ingredient_scaler]
The bananas are the soul of this bread. Use the spottiest ones you can find—the blacker the peel, the sweeter the bread. I grab mine from Trader Joe’s or the reduced rack at the grocery store (they’re perfect for baking). The flour doesn’t need to be fancy—all-purpose from any brand works, but do spoon it into your measuring cup and level it off for accuracy.
No Greek yogurt? Sour cream or applesauce at the same amount keeps it moist. Swap the oil for melted coconut oil if you prefer. The cinnamon can be increased to 2 teaspoons if you love that spiced warmth (I do). For nut-free, skip the walnuts or swap in chocolate chips—equally delicious.
This bread stays moist for 3-4 days wrapped at room temperature. Slice before freezing for easy portions—good for 3 months. The flavor actually deepens overnight, so try to resist slicing until it’s completely cool.
Why You’ll Love This Recipe
- One Bowl Wonder: I just dump everything in, mix, and pour—no fancy tools, no fuss.
- Warm Cinnamon Hug: The cinnamon makes the sweet banana flavor pop in the best way.
- Breakfast or Dessert: Honestly, I serve it for both—toast a slice in the morning or enjoy it plain with tea.
- Stays Fresh for Days: It stays moist for nearly a week, so I can bake once and snack all week long.
Step-by-Step Instructions for Banana Bread With Cinnamon
This one-bowl method keeps things simple while ensuring a tender, flavorful loaf.
Step 1: Mash Bananas and Mix Wet Ingredients
In a large bowl, mash the 3 whole Ripe Bananas with a fork until mostly smooth with a few small lumps remaining. I like to leave some texture—it adds character to the final loaf. The bananas should be very ripe with plenty of brown speckles for maximum sweetness and moisture.
Add the 0.5 cup Vegetable Oil, 0.75 cup Granulated Sugar, 2 whole Large Eggs, and 1 tsp Vanilla Extract. Whisk everything together until the sugar dissolves and the mixture looks uniform. This step builds the base flavor and ensures even distribution of sweetness throughout.
Step 2: Incorporate Dry Ingredients and Yogurt
Sprinkle the 1.5 cups All-Purpose Flour, 1 tsp Baking Soda, 0.5 tsp Salt, and 1.5 tsp Ground Cinnamon over the wet mixture. Gently fold everything together with a spatula until just combined—don’t overmix. A few flour streaks are fine at this point.
Now fold in the 0.5 cup Plain Greek Yogurt. This is the secret to that promised moist texture. The yogurt adds richness and keeps the bread tender for days. The batter will be thick but pourable, with a glossy sheen from the oil and sugar.
Step 3: Fold in Walnuts and Prepare the Pan
Gently stir in the 0.5 cup Chopped Walnuts until evenly distributed. If you prefer a nut-free version, you can omit them, but I love the extra crunch and earthy flavor they provide. Real talk: toast the walnuts lightly in a dry pan first for even more depth.
Preheat your oven to 350°F and grease a 9×5-inch loaf pan thoroughly with butter or nonstick spray. For easy removal, I also like to line the pan with parchment paper, leaving an overhang on the sides. This prevents sticking and makes cleanup a breeze.
Step 4: Bake Until Golden and Aromatic
Pour the batter into the prepared pan and smooth the top with your spatula. Bake for 50-60 minutes, or until the bread is golden brown and a toothpick inserted into the center comes out clean with just a few moist crumbs attached.
About halfway through baking, check for doneness—if the top is browning too quickly, tent the pan loosely with aluminum foil. You’ll know it’s ready when the loaf pulls slightly away from the sides of the pan and the entire kitchen smells like warm cinnamon and banana.
Step 5: Cool and Slice for Best Texture
Let the bread cool in the pan for 10 minutes, then transfer it to a wire rack to cool completely. I know it’s tempting to slice right away, but waiting ensures the loaf sets properly and won’t crumble apart.
Once cooled, slice into thick pieces and serve. The bread will stay moist for up to 3 days stored at room temperature in an airtight container. For longer storage, wrap slices individually and freeze for up to 3 months. Each bite should be tender, lightly spiced, and packed with banana flavor.
Pro Tips For Making Easy Moist Banana Bread Recipe With Cinnamon
- Test with a Toothpick: Start checking for doneness at 50 minutes—insert a toothpick in the center and if it comes out with a few moist crumbs (not wet batter), it’s ready. I learned this the hard way after pulling out a gooey loaf that looked done on the outside.
- Mash Bananas Well: Use a fork to mash the ripe bananas until they’re nearly smooth, with just a few small lumps. Sounds tedious, but it gives the bread a consistent moisture and texture that chunky banana pieces can’t.
- Skip Overmixing: Once you add the flour, stir just until the streaks disappear—overmixing makes the bread dense. My first few loaves were tough as hockey pucks before I figured this out.
- Add Cinnamon Last: Fold the cinnamon in with the final flour addition to keep it evenly distributed. I was skeptical until I tried it, but now every bite has that warm spice without clumps.
Essential Equipment for This Dish
Loaf Pan Selection
Use a standard 9×5-inch loaf pan for even baking and the classic shape. I prefer light-colored metal pans as they prevent over-browning of the crust while ensuring the center bakes through properly. Dark pans can cause the edges to cook too quickly. 💡
Mixing Bowl
A large mixing bowl (at least 3-quart capacity) gives you enough room to combine all ingredients without spills. I reach for my Pyrex glass bowl—it’s sturdy, easy to clean, and lets me see when everything is fully incorporated.
Whisk and Spatula
A balloon whisk is perfect for blending the wet ingredients smoothly. For folding in dry ingredients, switch to a silicone spatula to gently combine without overmixing. This prevents a dense, tough loaf.
Measuring Tools
Accurate measurements are key for consistent results. I use a set of nested dry measuring cups for the flour and sugar, and measuring spoons for smaller quantities like cinnamon and baking soda. The spoon-and-level method ensures the right amount of flour every time.
Cooling Rack
After baking, transfer your bread to a wire cooling rack to prevent the bottom from becoming soggy. This allows air to circulate around the entire loaf, ensuring it cools evenly and maintains that perfect moist texture. ❄️
Optional Add-Ons
For easy removal, line your pan with parchment paper—it’s a game-changer for cleanup. A toothpick or cake tester helps check doneness without over-baking. These small tools make the process smoother and more enjoyable.
Nutrition Facts
Frequently Asked Questions
Can I use frozen bananas instead?
Yes! Thaw 3 whole frozen bananas completely and drain excess liquid before mashing. They work just as well and often have even more intense flavor.
Why is my bread dense in the middle?
Overmixing the batter or using underripe bananas can cause this. Mix just until combined and use bananas with plenty of brown spots. Also, check your oven temperature with an oven thermometer.
How can I make this gluten-free?
Swap the 1.5 cups all-purpose flour for a 1:1 gluten-free baking flour. Add 1/2 tsp xanthan gum if your blend doesn’t include it. The texture will be slightly different but still moist.
Can I bake this in a different pan?
A 8×8-inch square pan works—bake for 35-40 minutes. For muffins, fill liners 2/3 full and bake for 20-25 minutes. Adjust time based on your pan size.

Trained in classic French technique but raised on slow-cooked ribs and spicy rubs, she blends culinary skill with smoke and soul.
- Recipe for Boneless Pork Chops in Cast Iron Skillet: Sear and Baste to Juicy Perfection - October 3, 2026
- Recipe for Boneless Cross Rib Roast: Slow-Roasted Beef with Herb Crust - October 3, 2026
- Hamburgers in Sauce Recipe Crock Pot: Slow-Cooked Savory Delight - October 3, 2026