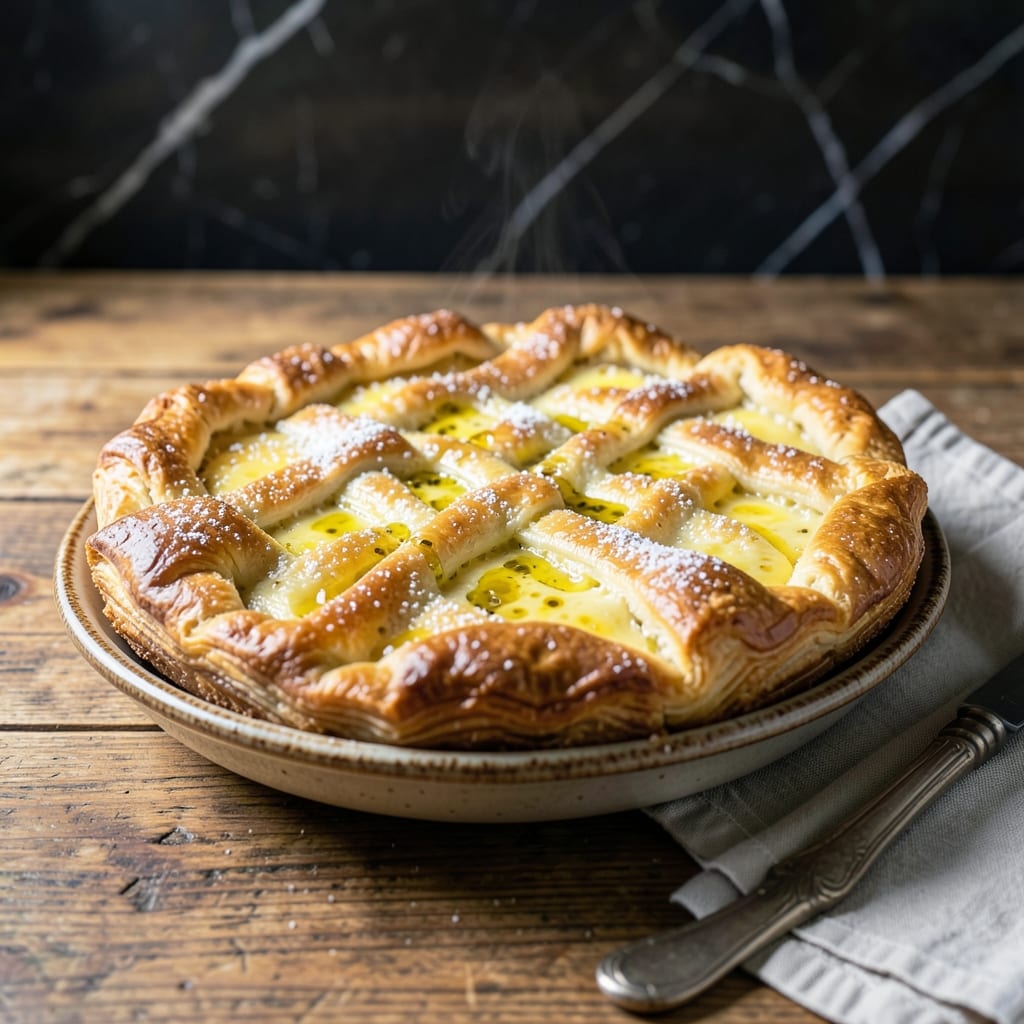
This Filipino-inspired custard pie delivers a silky texture in a flaky, buttery crust that’s impossible to resist. I developed this recipe after tasting versions in Manila and wanted to recreate that perfect balance of sweetness and richness at home.
The secret lies in the custard filling—a simple blend of eggs, milk, and sugar that bakes into a smooth, jiggly center. The pastry is equally important, requiring a tender, golden crust that holds its shape without becoming soggy.
What results is a dessert that’s both humble and extraordinary. The contrast between the crisp pastry and velvety custard makes every bite satisfying, while the subtle sweetness ensures it never feels heavy.
Serve it warm or chilled for a treat that works any time of day.
Ingredients for Egg Pie Recipe Panlasang Pinoy
Flaky crust meets velvety custard with simple pantry staples and a few special touches.
| Ingredient | Amount | Notes |
|---|---|---|
| All-Purpose Flour 🌾 | 2 cups | Plus extra for dusting |
| Granulated Sugar 🍚 | ¾ cup | Divided for crust and filling |
| Salt 🧂 | ½ tsp | Fine sea salt preferred |
| Unsalted Butter 🧈 | 1 cup | Cold, cubed for crust |
| Ice Water 💧 | 6 tbsp | For pie crust binding |
| Large Eggs 🥚 | 4 whole | Room temperature for filling |
| Whole Milk 🥛 | 2 cups | Full-fat for creaminess |
| Vanilla Extract 🌿 | 1 tsp | Pure vanilla for best flavor |
| Condensed Milk 🥛 | ½ cup | Sweetened, for richness |
| Egg Yolks 🥚 | 2 whole | Extra for custard depth |
| Lemon Zest 🍋 | ½ tsp | Optional, for brightness |
| Yellow Food Coloring 🎨 | 2 drops | Optional, for color |
[recipe_ingredient_scaler]
The crust demands cold butter and minimal handling—this creates those coveted flaky layers. I source my butter from Plugrá or Kerrygold for that rich, European-style flavor. The flour should be all-purpose; avoid cake flour as it lacks the structure needed. For the custard, full-fat dairy is non-negotiable for that Manila-style richness we’re aiming for.
No condensed milk? Evaporated milk plus 2 tbsp sugar works in a pinch, though the texture won’t be identical. Whole milk can be swapped for half-and-half at a 1:1 ratio for extra decadence. If you’re avoiding food coloring, a pinch of turmeric adds a subtle golden hue. The vanilla extract can be vanilla bean paste for visible specks, but pure extract is perfectly fine.
The pie crust can be made 2 days ahead and refrigerated, or frozen for 1 month. Baked pies keep at room temperature for 2 days or refrigerated for 4 days. Always bring to room temperature before serving for the best texture.
Why You’ll Love This Recipe
- One-Bowl Wonder: I love that I can mix the flour, sugar, and butter right in the bowl—no fancy tools, just my hands and a fork.
- Buttery Crisp: That flaky crust made with cold butter and ice water? It melts in your mouth every single time.
- Weekend Brunch Star: Great for potlucks or lazy Sunday mornings when I want to impress without the stress.
- Stretches Far: One batch makes a big pie that feeds my whole family, and leftovers taste just as good the next day.
Step-by-Step Instructions for Egg Pie
This method ensures a perfectly flaky crust and silky-smooth custard filling every time.
Step 1: Prepare the Pie Crust
Cut the 1 cup Unsalted Butter into small cubes and place it in a food processor with the 2 cups All-Purpose Flour, 0.5 tsp Salt, and 0.25 cup Granulated Sugar. Pulse until the mixture resembles coarse crumbs with pea-sized butter pieces visible.
Gradually add the 6 tbsp Ice Water, one tablespoon at a time, pulsing just until the dough begins to come together. The dough should hold when pressed but not be sticky. Overworking it develops gluten, which makes the crust tough instead of flaky.
Turn the dough onto a lightly floured surface, divide into two equal portions, and shape each into a disk. Wrap in plastic and refrigerate for 1 hour to firm up before rolling.
Step 2: Roll and Blind-Bake the Crust
On a floured surface, roll one dough disk into a 12-inch circle and transfer it to a 9-inch pie dish. Press it gently into the bottom and sides, trim the edges to leave a ½-inch overhang, then crimp decoratively. Prick the bottom all over with a fork to prevent air bubbles.
Preheat the oven to 375°F. Line the crust with parchment paper, fill with pie weights or dried beans, and bake for 15 minutes until the edges are just beginning to turn light golden brown. Remove the weights and parchment, then bake for another 5-7 minutes until the bottom is dry and lightly golden.
Step 3: Prepare the Custard Filling
In a large bowl, whisk together the 4 whole Large Eggs, 2 whole Egg Yolks, and 0.5 cup Granulated Sugar until pale and slightly thickened. Slowly pour in the 2 cups Whole Milk, 0.5 cup Condensed Milk, 1 tsp Vanilla Extract, and 0.5 tsp Lemon Zest while whisking constantly.
For a brighter color, add the 2 drops Yellow Food Coloring and mix well. Strain the custard mixture through a fine-mesh sieve into a pitcher or bowl with a spout—this removes any lumps and ensures a silky-smooth texture in the finished pie.
Step 4: Pour and Bake the Custard
Pour the custard filling into the pre-baked crust, which should still be warm. Gently tap the pie dish on the counter to remove any air bubbles. Bake at 375°F for 45-50 minutes until the center is just set with a slight wobble—it will firm up as it cools.
If the edges of the crust begin to brown too quickly, cover them with a pie shield or strips of aluminum foil. The pie is done when the top is golden brown and a knife inserted near the center comes out clean with no liquid custard clinging to it.
Step 5: Cool and Serve
Remove the pie from the oven and let it cool completely on a wire rack, about 2 hours. This cooling time is crucial—it allows the custard to set fully and develop its characteristic creamy texture. Slicing too soon will result in a runny filling.
Once cooled, chill the pie in the refrigerator for at least 4 hours or overnight before serving. This final chilling step enhances the flavor and makes the custard firmer, making it easier to slice cleanly. Serve chilled, dusted with a bit of powdered sugar if desired.
Pro Tips For Making Egg Pie Recipe Panlasang Pinoy
- Chill the Dough: I learned this the hard way—rest your pie crust for at least 30 minutes in the fridge before rolling. It keeps the butter from melting too fast and gives you that perfect flaky base for your egg pie.
- Use Ice-Cold Water: Sounds weird, but it works: only use ice water for the dough. I used to rush with tap water and ended up with a tough crust every time.
- Blind Bake First: Pre-bake your crust for 8-10 minutes before adding the filling. After my first soggy-bottomed egg pie, I never skip this step again.
- Sift the Flour: My grandmother swore by this, and she was right: always sift your all-purpose flour before mixing. It makes the crust lighter and prevents those pesky flour lumps.
Storing and Reheating egg pie recipe panlasang pinoy
Room Temperature Storage
Once completely cooled, this creation keeps beautifully at room temperature for up to 2 days. I cover mine with a cake dome or inverted bowl to protect it from dust. The crust stays crisp, and the custard maintains its creamy texture. 💡
Refrigerator Storage
For longer storage, refrigerate in an airtight container for up to 4 days. David swears the flavors deepen after a day in the fridge. Just ensure it’s properly sealed to prevent absorbing other odors.
Freezing for Later
You can freeze the entire pie for up to 1 month. Wrap it tightly in plastic wrap followed by aluminum foil to prevent freezer burn. I always label with the date to keep track.
Thawing Method
Transfer from freezer to refrigerator and let thaw overnight, about 8-10 hours. This gradual thawing prevents condensation from making the crust soggy. Never thaw at room temperature for food safety.
Reheating Options
For best results, warm individual slices in a 300°F oven for 10-12 minutes until just heated through. The microwave works in 20-second bursts, but the crust may soften.
Serving Temperature
I prefer serving this chilled, straight from the fridge. The custard is firmer and slices more cleanly. If you warm it, let it rest for 5 minutes after reheating for the best texture. ✨
Nutrition Facts
Frequently Asked Questions
Can I use store-bought pie crust?
Yes, but homemade gives better flavor and texture. If using store-bought, opt for all-butter and blind-bake as directed for 15 minutes to prevent sogginess.
Why does my custard crack on top?
Overbaking is the usual culprit. Pull it from the oven when the center has a slight wobble—it sets as it cools. Cover edges with foil if they brown too fast.
Can I make this ahead of time?
Bake and cool completely, then refrigerate for up to 4 days or freeze for 1 month. Thaw overnight in the fridge before serving.
What can I substitute for condensed milk?
Use evaporated milk plus 2 tbsp sugar per ½ cup. The texture will be slightly less rich but still delicious.

Trained in classic French technique but raised on slow-cooked ribs and spicy rubs, she blends culinary skill with smoke and soul.
- Recipe for Boneless Pork Chops in Cast Iron Skillet: Sear and Baste to Juicy Perfection - October 3, 2026
- Recipe for Boneless Cross Rib Roast: Slow-Roasted Beef with Herb Crust - October 3, 2026
- Hamburgers in Sauce Recipe Crock Pot: Slow-Cooked Savory Delight - October 3, 2026