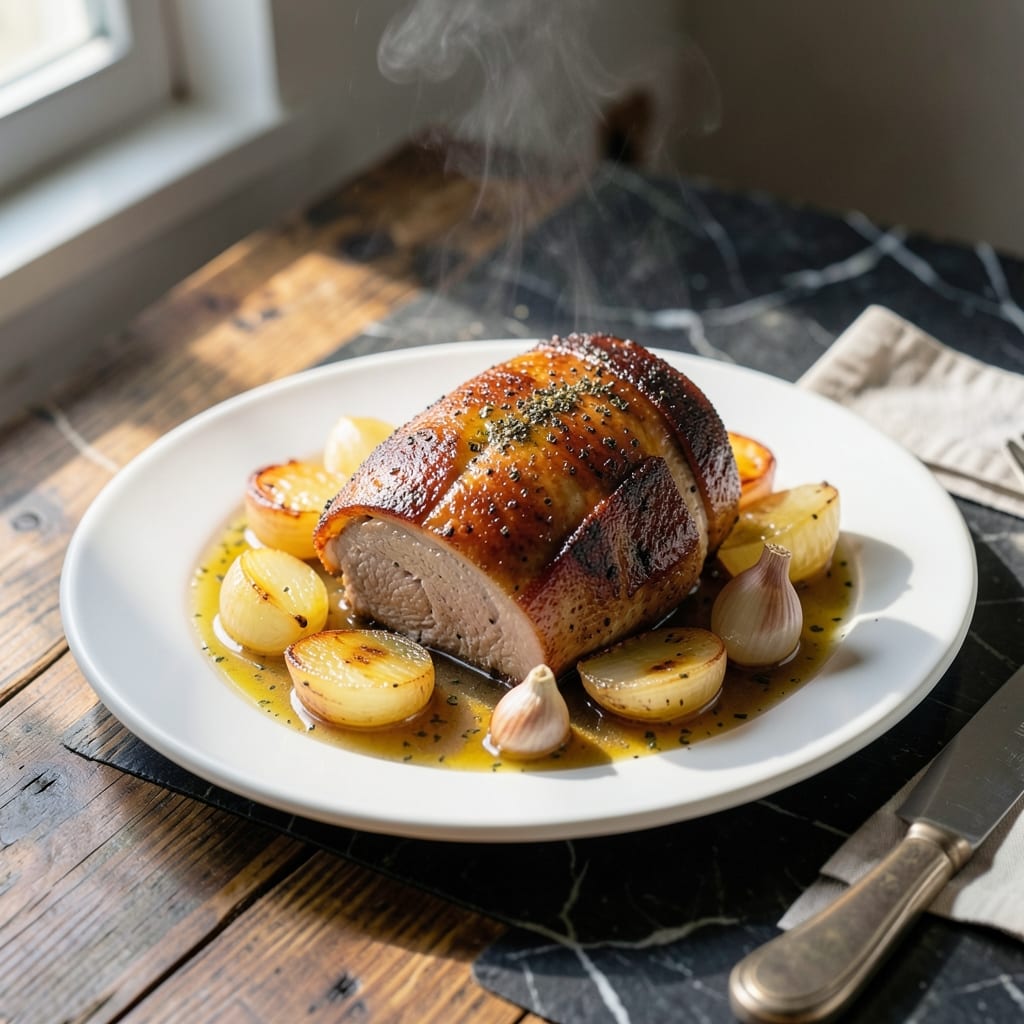
This method delivers fall-off-the-bone pork without the all-day commitment. My grandmother would have loved this modern approach to her time-honored technique.
The electric pressure cooker locks in moisture while breaking down tough fibers. No more dry, stringy roasts—just consistent tender results every time.
With minimal prep and hands-off cooking, you’ll achieve what used to take hours in the oven. The meat practically melts at the touch of your fork.
Perfect for weeknight dinners when you want restaurant-quality results with home kitchen reality. Here’s how to make it.
Ingredients for Electric Pressure Cooker Recipe for Pork Roast
Few ingredients, maximum flavor. Your pressure cooker does all the heavy lifting here.
| Ingredient | Amount | Notes |
|---|---|---|
| Pork Shoulder Roast 🥩 | 3 lb | Bone-in for best flavor |
| Kosher Salt 🧂 | 2 tsp | Diamond Crystal preferred |
| Black Pepper 🌶️ | 1 tsp | Freshly ground for best results |
| Garlic Cloves 🧄 | 6 cloves | Peeled and smashed |
| Yellow Onion 🧅 | 1 whole | Medium-sized, quartered |
| Chicken Broth 🍲 | 1 ½ cups | Low-sodium preferred |
| Apple Cider Vinegar 🍏 | 2 tbsp | For brightness and balance |
| Dried Thyme 🌿 | 1 tsp | Crushed between fingers |
| Dried Rosemary 🌿 | 1 tsp | Crushed between fingers |
| Bay Leaves 🍃 | 2 whole | For aromatic depth |
| Olive Oil 🫒 | 2 tbsp | Extra-virgin for richness |
| Dijon Mustard 🟡 | 1 tbsp | For tangy finish |
[recipe_ingredient_scaler]
The pork is the star here. Pork shoulder (also called Boston butt) gives you that fall-apart texture—avoid lean cuts like tenderloin. Look for good marbling at the store. Costco has great pre-portioned roasts, but any supermarket with a decent meat counter will work. Ask for bone-in if you can—it adds depth to the broth.
No chicken broth? Water with a bouillon cube gets you close. Fresh garlic is ideal, but jarred minced at half the amount works in a pinch. Dried herbs losing their punch? Double the quantity to compensate. The apple cider vinegar is subtle but important—white vinegar or lemon juice can substitute. Don’t skip the Dijon mustard at the end (trust me on this one).
Leftovers keep beautifully. Shred the pork and store in its juices—good for 4-5 days in the fridge. Freezes perfectly for 3 months (portion into meal-sized containers). The flavor actually deepens overnight, so make extra.
Why You’ll Love This Recipe
- Set It & Forget: I toss the pork shoulder, garlic, and onion in the pressure cooker, set the timer, and walk away—no babysitting required.
- Garlic-Infused Bite: The pork soaks up the garlic and onion while cooking, so every bite is packed with rich, savory depth.
- Feeds My Crew: One pork shoulder makes enough for tacos tonight, sandwiches tomorrow, and a freezer meal for next week.
- Budget Hero: Pork shoulder is cheap, and this method turns it into melt-in-your-mouth perfection without fancy ingredients.
Step-by-Step Instructions for Pork Roast in an Electric Pressure Cooker
This hands-off method delivers incredibly tender results with minimal effort on your part.
Step 1: Season and Sear the Pork Shoulder
Pat the 3 lb Pork Shoulder Roast dry with paper towels, then season all sides generously with the 2 tsp Kosher Salt and 1 tsp Black Pepper. I always use freshly ground pepper for the boldest flavor.
Set your electric pressure cooker to sauté mode and add the 2 tbsp Olive Oil. When the oil shimmers, sear the pork shoulder on all sides until deep golden brown, about 3-4 minutes per side. This step builds a flavorful crust that enhances the final dish.
Step 2: Build the Aromatic Base
After removing the pork, add the quartered 1 whole Yellow Onion and 6 cloves Garlic Cloves to the pot. Sauté for 2-3 minutes until the onions soften and the garlic becomes fragrant. Be careful not to let the garlic burn—it should just turn light golden.
Add the 1 tsp Dried Thyme, 1 tsp Dried Rosemary, and 2 whole Bay Leaves, stirring to coat the onions and garlic in the herbs. This creates a fragrant foundation that will infuse the entire dish.
Step 3: Deglaze and Pressure Cook
Pour in the 2 tbsp Apple Cider Vinegar and scrape the bottom of the pot to release any browned bits. This deglazing step is crucial—it prevents burning and incorporates all those delicious caramelized flavors into the sauce.
Add the 1.5 cups Chicken Broth and stir to combine. Return the pork shoulder to the pot, ensuring it’s mostly submerged in the liquid. Secure the lid, set the valve to sealing, and cook on high pressure for 60 minutes. This timing ensures fall-off-the-bone tenderness.
Step 4: Finish with Dijon and Rest
Once the cooking time is complete, allow the pressure to release naturally for 15 minutes, then quick-release any remaining pressure. Open the lid carefully, as there will be hot steam.
Stir in the 1 tbsp Dijon Mustard to add a tangy brightness that balances the richness of the pork. Let the roast rest in the liquid for 10 minutes before serving—this allows the juices to redistribute, ensuring every bite is moist and flavorful.
Pro Tips For Making Electric Pressure Cooker Recipe For Pork Roast
- Sear First: Always brown the pork shoulder in the pressure cooker before sealing—it builds a deep, caramelized base that infuses the whole dish. I learned this the hard way when my first few roasts tasted flat.
- Cut Even Chunks: Trim the pork into uniform 2-3 inch pieces so they cook evenly under pressure. Sounds tedious, but it prevents dry spots and ensures every bite is tender.
- Deglaze Thoroughly: After searing, pour in a splash of broth or water and scrape the bottom hard to lift all those browned bits. Skip this and you’ll end up with a burnt warning on your cooker.
- Use Fresh Garlic: Smash the garlic cloves lightly with the flat of your knife rather than mincing—it releases more flavor without turning bitter during the long cook. Pre-minced jarred garlic just doesn’t deliver the same punch.
Pro Cooking Tips for Perfect Results
Perfect Searing Technique
Pat the 3 lb Pork Shoulder Roast completely dry before seasoning—this ensures a proper sear. I use paper towels and press firmly to remove all moisture. The sauté function on your pressure cooker should be hot enough to make the olive oil shimmer before adding the meat. 🔥
Deglazing Matters
After searing, those browned bits stuck to the bottom are pure flavor. The 2 tbsp Apple Cider Vinegar helps lift them while adding subtle brightness. Scrape thoroughly with a wooden spoon—don’t rush this step, as it prevents the dreaded “burn” notice on your cooker.
Herb Layering
Crush the dried thyme and rosemary between your fingers before adding—they release more aroma this way. I learned this from my grandmother’s vague recipe notes: “rub the herbs to wake them up.” The bay leaves add depth but
Natural Release Key
Let the pressure release naturally for the full 15 minutes. This allows the meat to reabsorb juices. I’ve ruined roasts by rushing this step—patience makes the difference between good and extraordinary. The pork continues cooking internally during this time.
Resting in Liquid
After adding the 1 tbsp Dijon Mustard, let the roast rest in its juices for 10 minutes. This is non-negotiable for maximum tenderness. The mustard’s tang cuts through the richness beautifully, just like my grandmother’s secret finish. 💡
Nutrition Facts
Frequently Asked Questions
Do I need to brown the pork first?
Yes, searing creates a flavorful crust. Use sauté mode with 2 tbsp Olive Oil for 3-4 minutes per side until deep golden. This step is worth the extra few minutes!
Can I use a different cut of pork?
Avoid lean cuts like tenderloin—they dry out. Stick with pork shoulder or Boston butt for best results. The fat and connective tissue break down beautifully under pressure.
What if my cooker gives a burn notice?
Add 1/2 cup more broth and scrape the bottom thoroughly. Ensure the pork isn’t sticking. Always deglaze with 2 tbsp Apple Cider Vinegar after searing.
How do I know when it’s done?
The pork should shred easily with a fork after 60 minutes on high pressure plus 15 minutes natural release. Internal temp should reach 195°F for fall-apart tenderness.

Trained in classic French technique but raised on slow-cooked ribs and spicy rubs, she blends culinary skill with smoke and soul.
- Recipe for Boneless Pork Chops in Cast Iron Skillet: Sear and Baste to Juicy Perfection - October 3, 2026
- Recipe for Boneless Cross Rib Roast: Slow-Roasted Beef with Herb Crust - October 3, 2026
- Hamburgers in Sauce Recipe Crock Pot: Slow-Cooked Savory Delight - October 3, 2026