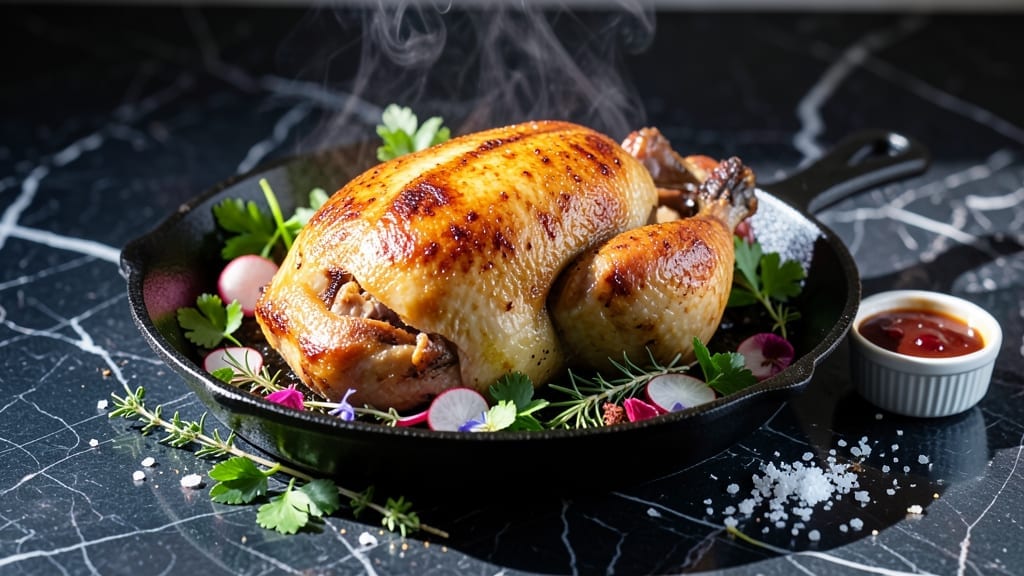
Mastering an electric smoker smoked turkey recipe transforms Thanksgiving from a stressful rush into a showstopping centerpiece that delivers juicy dark meat and crispy skin every time.
The key lies in precise temperature control and a brining process that ensures moisture retention—something I perfected after years of backyard cookouts where the turkey either dried out or stayed unpleasantly pale.
This method preserves all the natural flavors while letting the smoker work its magic, creating a bird that’s impossible to resist.
The secret starts with a dry brine—letting the turkey sit uncovered in the fridge for 12 hours before smoking. This step eliminates the need for constant basting while developing that signature smoky depth.
For the electric smoker, maintain a steady 225°F with hickory or applewood chips to balance sweetness and richness. The low-and-slow approach breaks down collagen for tender dark meat while allowing the skin to render into crispy perfection—no basting required once you’ve locked in that initial moisture.
By the time you hit 165°F in the thickest part of the thigh, your turkey will be resting with golden-brown skin that shatters at the touch and meat so tender it falls off the bone.
The aroma alone will have guests gathering before the first slice is served, and the juices will flow freely when you carve—proof that electric smokers can deliver restaurant-quality results at home. This isn’t just another holiday turkey; it’s a masterclass in slow-cooked excellence.
Pair it with pan drippings reduced into a glossy gravy or simple roasted vegetables to complete the meal. The beauty of this method is its adaptability—whether you’re feeding a crowd or treating yourself to a smaller bird, the principles remain the same. Let’s get smoking.
Ingredients for electric smoker smoked turkey
A few key ingredients transform a standard turkey into a smoky masterpiece with perfect crispy skin and juicy dark meat.
| Ingredient | Amount | Notes |
|---|---|---|
| Fresh Whole Turkey 🦃 | 14 lb | 12-14 lb, bone-in, skin-on |
| Kosher Salt 🧂 | ½ cup | Diamond Crystal preferred |
| Fresh Black Peppercorns 🌶️ | 2 tbsp | Coarsely ground |
| Hickory Wood Chips 🌳 | 2 cups | Unsoaked, for smoker |
| Applewood Wood Chips 🍎 | 1 cup | Complements hickory |
| Unsalted Butter 🧈 | ½ cup | Cold, cubed for skin |
| Fresh Rosemary 🌿 | ¼ cup | Chopped, stems removed |
| Fresh Thyme 🌿 | ¼ cup | Leaves only, chopped |
| Garlic Cloves 🧄 | 8 cloves | Smashed, for cavity |
| Fresh Lemon 🍋 | 1 whole | Halved, for cavity |
| Turkey Pan Drippings 🍲 | 2 cups | Reserved for gravy |
| All-Purpose Flour 🌾 | ¼ cup | For gravy thickening |
| Chicken or Turkey Stock 🍲 | 1 cup | For gravy enrichment |
[recipe_ingredient_scaler]
The turkey is non-negotiable—look for a 12-14 lb bird with good marbling and bright pink skin. Costco or local butchers often have excellent quality, but avoid anything with grayish skin or excessive fat. The wood chips are critical: hickory for bold smoke, applewood for sweetness. Grab them from Traeger or Traeger-style brands for consistent quality. Fresh herbs matter here—rosemary and thyme from the grocery store’s produce section should smell vibrant, not wilted. For the dry brine, use Diamond Crystal kosher salt—it dissolves better than table salt.
No hickory chips? Oak or pecan work too, though the flavor profile shifts slightly. Running short on time? Skip the dry brine, but wet-brine for 4 hours instead—just don’t exceed 24 hours total. The butter under the skin is what creates that legendary crisp—use full-fat, unsalted. For the cavity, garlic and lemon add brightness without overpowering. If you’re serving a crowd, double the wood chips and reserve extra drippings for gravy. The flour for gravy? All-purpose works fine, but if you’ve got arrowroot powder, it’ll give you a glossier finish.
Turkey keeps best in the fridge for 3 days after cooking, but the skin loses crispiness after day 2. For leftovers, reheat in a 300°F oven for 20 minutes with a splash of water to restore moisture. Gravy freezes beautifully—portion into ice cube trays for single servings. The wood chips? Store in an airtight container for up to 6 months. If you’ve got extra turkey, shred for sandwiches or chop for tacos—both are winners.
Why You’ll Love This Recipe
- No-Fuss Feast: I’ll be real—this isn’t one of those dishes where you spend hours prepping. Just pat that turkey dry, slather it with salt and peppercorns, and let the smoker do the heavy lifting. The dry brine happens overnight while you sleep, and the rest is hands-off smoking. Even my least patient roommate could handle this.
- Smoky, Herb-Infused Magic: The combo of hickory and applewood chips gives you that deep, woodsy flavor without going full campfire. Then there’s the herb butter—rosemary and thyme melting into the skin while it cooks? That crispy edge with the creamy center? Chef’s kiss. Every bite is a balance of smoky, savory, and bright from the lemon and garlic in the cavity.
- Crowd-Pleaser for Any Moment: This isn’t just Thanksgiving. Serve it for a summer BBQ, a family game night, or even a weeknight dinner when you’re craving something special. The gravy made with pan drippings and stock turns leftovers into a totally different meal—just reheat and enjoy. My kids fight over the dark meat, and my picky partner always asks for seconds.
- Leftovers That Actually Work: I hate when people say leftovers are a waste, but this one’s different. The turkey keeps well for 3 days (though the skin gets softer after day two), and reheating it in the oven with a splash of water brings back that juicy perfection. Plus, using turkey pan drippings and stock for gravy means you’re not throwing anything away—just more flavor.
Step-by-step instructions for electric smoker smoked turkey
Here’s how to transform your turkey into a masterpiece of crispy skin and juicy perfection.
Prepare and Season the Turkey for Optimal Smoke Penetration
Begin by removing the turkey from the refrigerator and letting it sit at room temperature for 30 minutes. This ensures even cooking throughout. Pat the turkey completely dry with paper towels—this is critical for crispy skin. I can’t stress enough how important this step is; any moisture left on the skin will steam rather than crisp.
Next, create a dry brine by rubbing the turkey generously with ½ cup kosher salt and 2 tablespoons coarsely ground fresh black peppercorns. Focus on the skin, pressing the salt crystals into the surface to help break down proteins and render fat. Work the seasoning into the cavity as well, including the 8 smashed garlic cloves and the juice from ½ of the fresh lemon. The acidity from the lemon will tenderize the meat while adding brightness.
Place the seasoned turkey on a wire rack set over a baking sheet and refrigerate uncovered for 12-24 hours. This dry-brining process is what delivers that legendary crispy skin and ensures the turkey stays juicy all the way through. Don’t skip this step—it’s the foundation of your success.
Set Up the Electric Smoker for Low-and-Slow Cooking
Combine 2 cups hickory wood chips and 1 cup applewood wood chips in the smoker’s wood chip tray. These woods complement each other perfectly—hickory for bold smoke flavor and applewood for subtle sweetness. Preheat your electric smoker to 225°F and allow it to smoke for 15-20 minutes before adding the turkey. This ensures you have a steady stream of clean, blue smoke without thick white vapor.
Position the turkey on the smoker grate, breast-side up. The rack should be in the middle position to allow even heat circulation around the bird. Insert a meat thermometer into the thickest part of the thigh, avoiding the bone. This is where you’ll monitor the internal temperature throughout the cook.
Here’s the thing—resist the urge to open the smoker door during the first 4 hours of cooking. Every time you peek, you lose heat and moisture, potentially extending your cook time by 30 minutes or more. Trust your thermometer and the process; the turkey will tell you when it’s ready.
Smoke the Turkey Until Probe-Tender with Perfect Bark
Smoke the turkey for 12-14 hours, or until the internal temperature of the thickest part of the thigh reaches 165°F. You’ll notice the skin developing a deep mahogany color and forming a beautiful bark—this is what we’re after. The bark should be crispy to the touch but not burnt, with a slight give when pressed gently.
About 2 hours before the turkey reaches 165°F, it will hit “the stall”—a point where the internal temperature stops rising despite the heat. This is normal and happens as moisture evaporates from the meat. To power through this phase, I recommend wrapping the turkey loosely in butcher paper (not aluminum foil). This technique, known as the “Texas crutch,” helps maintain moisture while preserving that crispy bark.
Once the turkey reaches 165°F, remove it from the smoker and transfer it to a cutting board. Tent loosely with foil and let it rest for 30-45 minutes before carving. This resting period allows the juices to redistribute throughout the meat, ensuring every slice is moist and flavorful. The turkey will continue cooking slightly during this time due to residual heat.
Render Butter for Skin and Prepare Herb Butter Baste
While the turkey rests, prepare the herb butter baste. In a small saucepan, melt ½ cup unsalted butter over low heat. Add ¼ cup chopped fresh rosemary and ¼ cup chopped fresh thyme, stirring gently to combine. Remove from heat and let the mixture steep for 5 minutes to infuse the flavors. This herb butter will not only add richness but also help create that golden, crispy skin.
Use a pastry brush to generously coat the skin of the turkey with the melted herb butter. Focus on the breast and any exposed areas of the thighs. The butter will help render the skin to crispy perfection while adding layers of herbaceous flavor. If you have any leftover herb butter, save it for basting the turkey during the final 30 minutes of resting.
Here’s a pro tip: If you notice the skin starting to dry out during the resting period, brush on another thin layer of the herb butter. This ensures the skin remains crispy and adds an extra layer of flavor to your turkey.
Carve and Serve with Homemade Gravy
Using a sharp carving knife, slice the turkey against the grain for the dark meat and with the grain for the breast meat. This technique ensures each bite is tender and easy to chew. Serve the turkey immediately, as the skin will continue to crisp up slightly as it sits.
To make the gravy, place the 2 cups turkey pan drippings in a saucepan over medium heat. Whisk in ¼ cup all-purpose flour and cook for 1-2 minutes until the mixture thickens slightly. Slowly pour in 1 cup chicken or turkey stock, whisking constantly to prevent lumps. Simmer for 5-7 minutes until the gravy reaches your desired consistency—it should coat the back of a spoon but still be pourable. Season with additional kosher salt and freshly ground black pepper to taste.
Ladle the gravy over the sliced turkey and serve family-style. The combination of crispy skin, juicy meat, and rich herb-infused gravy is what makes this turkey recipe truly exceptional. Enjoy the fruits of your labor—every bite should be a testament to your patience and skill.
Pro Tips For Making Electric Smoker Smoked Turkey
- Preheat Wood First: DESCRIPTION: Let those 2 cups hickory and 1 cup applewood chips smoke for 15-20 minutes before adding the turkey—this ensures clean, flavorful blue smoke instead of that acrid white vapor that ruins everything. I learned this the hard way after my first batch tasted like a campfire mishap.
- Salt Skin Aggressively: DESCRIPTION: Press that ½ cup kosher salt into the skin hard—don’t just sprinkle. The crystals need to embed to break down proteins and render fat properly. I used to skimp, and my skin always came out soggy. (Yes, even if you’re impatient like me.)
- Wrap at the Stall: DESCRIPTION: When the turkey hits that frustrating stall (around 2 hours before 165°F), loosely wrap it in butcher paper—not foil. This keeps moisture in while letting the bark stay crisp. Foil traps steam, and your skin turns sad. Trust the process; your future self will thank you.
- Rest Before Carving: DESCRIPTION: That 30-45 minute rest isn’t optional—it’s when the juices redistribute. Cutting early means dry meat and a sad Thanksgiving. Tent it loosely with foil, and let the turkey sit while you finish gravy. (Pro move: Use the time to steep the ½ lemon in stock for extra brightness.)
Wine and beer pairings for these flavors
Bold Red Wine Pairings
The rich, smoky depth of your electric smoker turkey calls for a red wine with enough body to stand up to the bold flavors. I always reach for a Cabernet Sauvignon from Napa Valley—its dark fruit notes and tannic structure complement the smoky, herby profile perfectly.
Look for a 2019 or newer vintage with 14% alcohol for that perfect balance. The oak aging in these wines adds complexity that mirrors the turkey’s crispy skin and juicy meat. 🍷
Crisp White Wine Options
Not a fan of red? A Chardonnay with oak influence, like a Sonoma Coast variety, works surprisingly well. The buttery texture and vanilla undertones from barrel fermentation pair beautifully with the herb butter and smoky notes.
For something lighter, try a Viognier—its floral aroma and peach sweetness cut through the richness without overpowering.
Smoky Beer Complements
For beer lovers, a Belgian-style dark ale like Duvel Moortgat’s Moortgat Special brings out the turkey’s smoky essence. The caramel and dark fruit flavors harmonize with the hickory and applewood smoke.
If you prefer something crisp, a German Pilsner with hoppy bitterness provides a refreshing contrast to the rich meat. Both styles cleanse the palate between bites. 🍺
Unexpected Craft Pairings
Here’s a pro move: Pair your turkey with a smoked porter like Founders Kentucky Breakfast Stout. The roasted malt and coffee notes echo the turkey’s smoky depth while the smooth tannins complement the crispy skin.
For a fun twist, try a mead with honey and thyme—the herbal notes mirror the fresh thyme in your herb butter, creating an unexpected but delicious balance.
Sparkling Wine for Contrast
End the meal with a dry sparkling wine like Crémant d’Alsace. The bright acidity and citrus finish cut through the richness of the turkey and gravy, leaving your palate refreshed. This pairing feels luxurious and unexpected, turning a simple meal into a memorable experience. ✨
Nutrition facts
Frequently asked questions
Why does the dry brine step take so long?
The 12-24 hour dry brine is what gives your turkey that legendary crispy skin and juicy texture. This process allows the salt to penetrate deeply, breaking down proteins and rendering fat for maximum flavor and moisture retention. It’s a slow process, but it’s absolutely worth the wait—it’s the secret to avoiding dry turkey while achieving that perfect bark.
Can I skip the Texas crutch (butcher paper wrap) during the stall?
While you can skip it, I don’t recommend it unless you’re okay with potentially drier meat. The Texas crutch helps maintain moisture during the stall phase without sacrificing the crispy skin. If you skip it, you might need to baste the turkey more frequently or accept slightly less juicy meat. The paper wrap is a game-changer for even the most challenging stalls.
How do I know when the turkey is done if I don’t have a meat thermometer?
If you’re without a thermometer, look for these visual cues: The skin should be a deep mahogany color with a crispy bark, and the juices should run clear when you pierce the thickest part of the thigh. Also, the meat should pull away easily from the bone. However, I strongly recommend using a thermometer for accuracy—165°F in the thigh is your safest bet.
What’s the best way to reheat leftovers without drying out the meat?
Reheat in a 300°F oven for 20 minutes with a splash of water in the pan to restore moisture. Cover loosely with foil to keep the skin crispy. Avoid microwaving, as it can make the meat dry and rubbery. The oven method preserves texture and flavor beautifully.

Trained in classic French technique but raised on slow-cooked ribs and spicy rubs, she blends culinary skill with smoke and soul.
- Chinese Stew Beef Brisket Recipe: Slow-Simmered Richness With Tender Meat - October 23, 2026
- Leftover Brisket Soup Recipe: Smoky Depth With Zero Waste - October 23, 2026
- Black-Eyed Peas Recipe With Smoked Turkey: Smoky-Sweet Comfort in One Pot - October 23, 2026