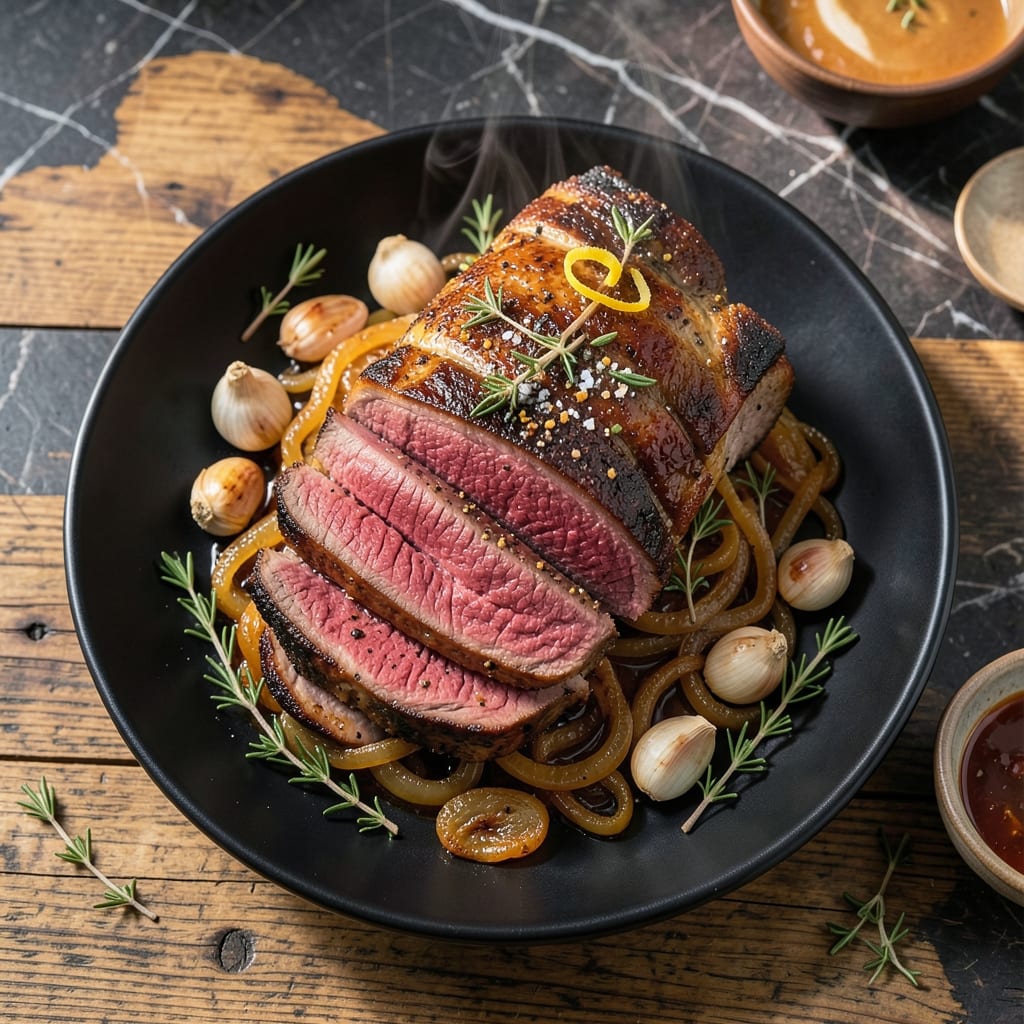
This reverse sear method transforms tough eye round into perfectly even roast beef with a crusty exterior and juicy interior. No more dry edges or undercooked centers.
Starting with low oven heat ensures gentle cooking throughout, while a final high-temperature sear develops that coveted caramelized crust. The process requires patience but delivers restaurant-quality results every time.
You’ll achieve consistent doneness from edge to edge, with the deep flavor only high-heat searing can provide. This technique works especially well for lean cuts like eye round.
Serve sliced thin for sandwiches or as a centerpiece for Sunday dinner. The results speak for themselves.
Ingredients for Eye Round Roast Beef Recipe High Temperature
A few high-quality ingredients transform this lean cut into restaurant-worthy roast beef with ease.
| Ingredient | Amount | Notes |
|---|---|---|
| Eye of Round Roast 🥩 | 3 lb | Lean, evenly shaped for even cooking |
| Kosher Salt 🧂 | 2 tbsp | Diamond Crystal preferred for consistency |
| Coarse Black Pepper 🌶️ | 2 tsp | Freshly cracked for bold flavor |
| Garlic Powder 🧄 | 2 tsp | Not garlic salt for pure flavor |
| Onion Powder 🧅 | 1 tsp | Enhances savory depth |
| Dried Thyme 🍃 | 1 tsp | Crushed to release aromatic oils |
| Dried Rosemary 🌿 | 1 tsp | Crushed to release aromatic oils |
| Avocado Oil 🫒 | 2 tbsp | High smoke point for searing |
| Unsalted Butter 🧈 | 2 tbsp | For basting during sear |
| Fresh Garlic Cloves 🧄 | 4 cloves | Smashed for basting aroma |
| Fresh Rosemary Sprigs 🌿 | 2 sprigs | For basting during sear |
| Yellow Mustard 🟡 | 1 tbsp | For crust formation (optional) |
[recipe_ingredient_scaler]
The eye of round is the foundation here. Select a well-marbled, evenly shaped roast from a reputable butcher or Whole Foods for optimal results. Look for cuts with minimal connective tissue—this ensures tenderness after the low-and-slow cooking process. Costco offers excellent pre-trimmed options at a good value if you’re serving a crowd. Always bring the meat to room temperature before starting for even cooking.
No fresh rosemary? Dried rosemary at half the amount works in a pinch, but fresh delivers better aroma during basting. For the searing oil, grapeseed or refined coconut oil can substitute avocado oil—both have high smoke points. If you’re avoiding dairy, olive oil replaces butter for basting, though the flavor profile will differ slightly. The mustard is optional but adds a tangy depth to the crust.
Store uncooked roast in the fridge for up to 3 days or freeze for 6-12 months. Leftovers keep 4-5 days refrigerated or freeze for 3 months. Slice against the grain for maximum tenderness, and let the meat rest before carving to retain juices.
Why You’ll Love This Recipe
- 5-Minute Prep: I just rub the eye of round with salt, pepper, garlic, and onion powder—no marinating, no fuss.
- Crispy Outside, Tender Inside: High heat gives it that deep brown crust while keeping the middle juicy and flavorful.
- Feeds the Week: One roast means sandwiches today, tacos tomorrow, and stew the next day.
- Budget Hero: Eye of round is lean and affordable, but this method makes it taste like a splurge.
Step-by-Step Instructions for Reverse Sear Eye Round Roast
This method guarantees even doneness from edge to edge with a perfect crust.
Step 1: Season the Roast Thoroughly
Pat the 3 lb Eye of Round Roast completely dry with paper towels—this ensures the seasoning adheres and creates a better sear. In a small bowl, mix the 2 tbsp Kosher Salt, 2 tsp Coarse Black Pepper, 2 tsp Garlic Powder, 1 tsp Onion Powder, 1 tsp Dried Thyme, and 1 tsp Dried Rosemary until evenly combined.
Rub the mixture all over the roast, pressing firmly to create a uniform crust. For extra flavor and color, spread the 1 tbsp Yellow Mustard over the surface before applying the dry rub. Place the roast on a wire rack set over a plate and refrigerate uncovered for 12-24 hours for optimal flavor penetration.
Step 2: Begin with Low-Temperature Oven Cook
Preheat your oven to 250°F. This low and slow start is the key to the reverse sear method. Place the roast on a wire rack in a roasting pan, fat-side up. Insert a meat thermometer into the thickest part of the roast, avoiding the fat cap.
Roast until the internal temperature reaches 110-115°F for medium-rare. This typically takes 1.5-2 hours for a 3 lb Eye of Round Roast, but rely on the thermometer, not time. The meat should be uniformly warm but not yet cooked through—this ensures even doneness in the final sear.
Step 3: Sear for a Perfect Crust
Heat the 2 tbsp Avocado Oil in a large cast-iron skillet over high heat until it begins to shimmer. Carefully transfer the roast to the skillet and sear for 2-3 minutes per side until deeply browned. Add the 2 tbsp Unsalted Butter, 4 cloves Fresh Garlic Cloves, and 2 sprigs Fresh Rosemary Sprigs to the pan.
Tilt the skillet slightly and baste the roast continuously with the melted butter, garlic, and rosemary for an additional 1-2 minutes. The internal temperature should rise to 125-130°F for medium-rare. Remove the roast from the skillet once it reaches your desired temperature.
Step 4: Rest and Slice for Serving
Transfer the roast to a cutting board and tent loosely with foil. Let it rest for 15-20 minutes to allow the juices to redistribute. This step is non-negotiable—skipping it will result in dry, uneven slices.
Slice the roast against the grain into ½-inch thick portions. The reverse sear method ensures each slice is evenly cooked from edge to edge, with a beautifully browned exterior and a juicy, tender interior. Serve immediately for the best texture and flavor.
Pro Tips For Making Eye Round Roast Beef Recipe High Temperature
- Blast the Oven: Crank it to 450°F for the first 15 minutes to sear the outside, then drop to 325°F to finish—I learned this the hard way after my first few roasts came out gray and sad.
- Dry the Meat First: Pat the eye round completely dry with paper towels before seasoning, or the salt and pepper won’t stick and you’ll steam the crust instead of browning it.
- Don’t Overcrowd the Pan: Use a roasting rack or bed of chopped onions to elevate the beef, so hot air circulates underneath and you avoid a soggy bottom.
- Rest Before Slicing: Tent it with foil and let it sit 15-20 minutes after pulling it out, or all the juices will end up on your cutting board instead of in the meat.
Storing and Reheating Leftovers
Refrigerator Storage
Let your roast cool completely before storing—this prevents condensation that can make the meat soggy. Wrap slices tightly in plastic wrap or place in airtight containers and refrigerate at 40°F or below for up to 4-5 days. 🥩
Freezer Storage
For longer storage, wrap slices in freezer paper or vacuum-seal them. They’ll keep in the freezer at 0°F for up to 3 months without losing quality. I prefer vacuum sealing—it prevents freezer burn better than any other method.
Stovetop Reheating
My go-to method for reheating slices: warm them in a dry skillet over medium-low heat for 2-3 minutes per side. Add a splash of beef broth to keep them moist. This brings back that fresh-cooked texture.
Oven Reheating
Preheat your oven to 300°F. Wrap slices in foil with a drizzle of broth or water, then heat for 10-15 minutes until warmed through. This works great when reheating larger portions for sandwiches. 🔥
Microwave Reheating
For quick meals, place slices on a microwave-safe plate with a damp paper towel. Heat on 50% power for 30-second intervals, flipping between each, until reaching 165°F. This prevents rubbery texture.
Cold Serving
Honestly, this roast is delicious cold on sandwiches the next day. The flavors intensify overnight. Just slice thin against the grain and layer with your favorite toppings. Perfect for picnic lunches!
Nutrition Facts
Frequently Asked Questions
Why start with low oven temperature?
The 250°F beginning ensures even cooking throughout before searing. This prevents dry edges while the center catches up.
How do I know when it’s done?
Use a meat thermometer: remove at 125-130°F for medium-rare after searing. The temp will rise 5°F while resting.
Can I use a different oil for searing?
Yes! Grapeseed or refined coconut oil work well due to their high smoke points. Avoid olive oil as it can burn.
What if my roast isn’t browning?
Increase heat slightly and sear longer, 3-4 minutes per side. Ensure the skillet is fully preheated before adding the meat.

Trained in classic French technique but raised on slow-cooked ribs and spicy rubs, she blends culinary skill with smoke and soul.
- Energy Ball Recipe Peanut Butter: No-Bake Protein-Packed Bites - September 24, 2026
- Jerk Chicken Recipe Crock Pot: Slow-Cooked Caribbean Heat - September 24, 2026
- Japanese Curry Recipe Kenji: Chef-Tested Rich and Velvety Sauce - September 24, 2026