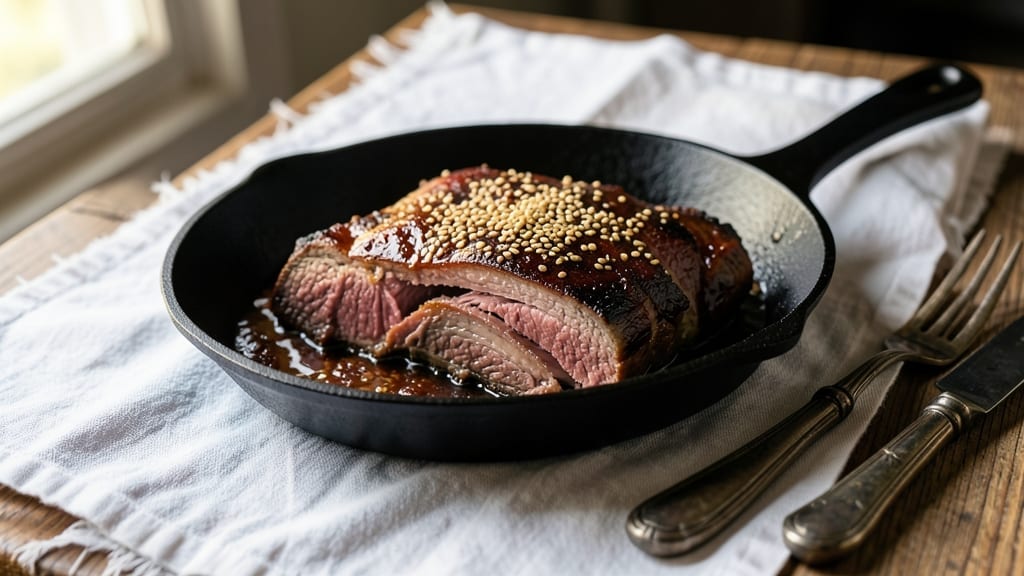
Creating fall-apart beef brisket that melts in your mouth is an art that rewards patience and precision—this low-and-slow method transforms tough cuts into tender, juicy perfection. The secret lies in a combination of proper tenderizing techniques, precise temperature control, and strategic basting that keeps every bite moist and flavorful.
I’ve perfected this recipe over years of testing, ensuring the brisket reaches that ideal texture where it shreds effortlessly while retaining rich, smoky depth.
This method requires a 10–12 hour cook at 225°F, a process that may seem daunting but yields results worth the wait. Before you even begin, the brisket is prepped with a dry rub or marinade to enhance flavor, followed by strategic poking to help tenderize the meat.
The slow cook ensures collagen breaks down gradually, turning the meat into a succulent, fork-tender masterpiece that’s ideal for sandwiches, tacos, or serving alongside classic sides.
What sets this recipe apart is the attention to detail during the cooking process—resting the meat properly before slicing, basting with its own juices, and monitoring internal temperature to avoid overcooking.
The end result is brisket so tender it falls apart at the touch, with a deep, savory flavor that’s impossible to resist. This isn’t just a dish; it’s a centerpiece that commands the table.
Whether you’re hosting a gathering or simply craving a hearty meal, this brisket delivers restaurant-quality tenderness with minimal effort once you’ve mastered the technique. Let’s get started on creating a brisket that will have everyone asking for seconds.
Ingredients for fall apart beef brisket
A carefully selected blend of quality cuts and bold spices transforms tough brisket into melt-in-your-mouth perfection.
| Ingredient | Amount | Notes |
|---|---|---|
| Beef Brisket 🥩 | 6 lb | Packer cut, fat cap intact |
| Yellow Onion 🧅 | 1 whole | Yellow or red, sliced |
| Garlic Cloves 🧄 | 8 cloves | Peeled, smashed for rub |
| Kosher Salt 🧂 | ½ cup | Diamond Crystal preferred |
| Black Peppercorns 🌶️ | 1 tbsp | Freshly cracked coarse |
| Smoked Paprika 🌶️ | 2 tbsp | High quality for depth |
| Ground Cumin 🌿 | 1 tbsp | Toasted for complexity |
| Brown Sugar 🍚 | 1 tbsp | Light or dark preferred |
| Mustard Powder 🥬 | 1 tsp | Dry, for subtle tang |
| Apple Cider Vinegar 🍎 | 2 tbsp | For tenderizing marinade |
| Beef Tallow 🥓 | ¼ cup | Or substitute bacon fat |
| Wood Chips 🌳 | 1 lb | Hickory or oak preferred |
| Beef Broth 💧 | 1 cup | Low-sodium preferred |
[recipe_ingredient_scaler]
The beef brisket is the star—packer cut with intact fat cap is essential for both flavor and moisture retention. Source from a trusted butcher or Costco for consistent quality; avoid pre-trimmed cuts that lack marbling. Hickory or oak wood chips provide that authentic smoky depth, but avoid fruit woods like cherry which can overpower. For the rub, Penzeys Spices offers premium smoked paprika and toasted cumin that elevate the flavor profile significantly compared to standard grocery brands. The apple cider vinegar in the marinade acts as a natural tenderizer while adding subtle sweetness that complements the smoky notes.
No smoked paprika? Substitute with 1 tbsp regular paprika plus 1 tsp liquid smoke for depth. Running short on beef tallow? Bacon fat or duck fat work beautifully, though bacon fat adds a slightly smokier profile. The beef broth can be swapped for chicken broth in a pinch, though beef adds richer umami. For those without a smoker, use a grill with indirect heat or a slow cooker with a water pan—just extend cooking time by 2-3 hours. The brown sugar in the rub caramelizes during cooking, creating a subtle crust that enhances tenderness, so don’t skip it even if you’re watching sugar intake.
Store prepped brisket in the fridge for up to 3 days before cooking—this allows flavors to meld. For longer storage, freeze the raw brisket (unrubbed) for up to 6 months; thaw overnight in the fridge before proceeding. Leftover cooked brisket reheats best in a 300°F oven with a splash of beef broth to maintain moisture. Portion into vacuum-sealed bags for easy reheating—ideal for meal prep. The fat cap renders beautifully, so save the drippings for future recipes like mashed potatoes or cornbread.
Why You’ll Love This Recipe
- No-Fuss Smoking: Honestly, this isn’t one of those recipes that requires a perfect setup. Just slather that brisket with the rub—that onion and garlic-infused mix? Game-changer—and let the smoker do the heavy lifting. The 225°F low-and-slow method is foolproof once you wrap it in butcher paper at the stall. Nowhere near the stress of fiddling with a roast.
- Smoky-Sweet Perfection: The smoked paprika and brown sugar combo? That’s the secret sauce here. You get this deep, charred bark on the outside—crispy enough to bite into—while the inside is so tender it practically falls apart. And the garlic? It’s not overpowering, just a warm, savory note that lingers. Trust me, your taste buds won’t forget it.
- Feeds a Crowd (No Guilt): Six pounds of brisket isn’t just for Sunday dinners—it’s your secret weapon for game days, potlucks, or even feeding leftovers to your roommate who “forgot” to grocery shop. Wrap it, smoke it, slice it, and boom: enough for sandwiches, tacos, or just straight-up shredded-on-top-of-everything. Budget-friendly? Absolutely. Wasteful? Not a chance.
- Resting Is Worth It: I know, I know—resting meat is the bane of every impatient cook. But with this brisket, that one hour of waiting? Critical. The juices redistribute so every bite is moist, not dry. And here’s the kicker: you can prep the rub and even slice the brisket the day before. Just store it wrapped in butcher paper in the fridge—no fuss, no stress. Dinner’s ready when you are.
Step-by-step instructions for fall-apart beef brisket
Master the low-and-slow technique for brisket that melts at the touch.
Prepare the Dry Rub and Prep the Brisket
In a medium bowl, combine the ½ cup kosher salt, 1 tablespoon black peppercorns, 2 tablespoons smoked paprika, 1 tablespoon ground cumin, 1 tablespoon brown sugar, 1 teaspoon mustard powder, and 2 tablespoons apple cider vinegar. Crush the black peppercorns coarsely with a mortar and pestle or rolling pin to release their oils.
Finely dice the 1 yellow onion and mince the 8 garlic cloves, then add them to the dry rub mixture. Mix thoroughly until the onion and garlic are evenly distributed throughout the spices. The vinegar will help tenderize the meat while the brown sugar adds subtle caramelization during smoking.
Apply the Rub and Sear the Brisket
Pat the 6 lb beef brisket completely dry with paper towels, removing any excess moisture from the surface. This step is critical—wet surfaces prevent the rub from adhering properly and create steam instead of a crisp bark. Generously coat the brisket with the dry rub mixture, pressing it firmly into all surfaces, including the fat cap.
Heat a heavy skillet over medium-high heat and add the ¼ cup beef tallow. Once the tallow is shimmering but not smoking, carefully sear the brisket on all sides until deeply browned, about 3-4 minutes per side. This initial sear locks in juices and develops deep flavor. Transfer the brisket to a plate and let it rest for 5 minutes before proceeding.
Set Up the Smoker and Begin Low-and-Slow Cook
Fill your smoker box with the 1 lb wood chips, ensuring they’re soaked in water for 30 minutes beforehand to prevent flare-ups. Preheat the smoker to 225°F using the wood chips, maintaining a steady temperature throughout the cook. Place the brisket fat-side up on the smoker grate, positioning it away from direct heat sources.
Add the 1 cup beef broth to a water pan in the smoker to maintain moisture levels. Close the lid and resist the urge to peek—each time you open it, you lose valuable heat and smoke. Smoke the brisket undisturbed for 6-8 hours, or until the internal temperature reaches 165°F. This is where the magic happens: collagen breaks down, transforming tough muscle fibers into tender, fork-tender meat.
Wrap and Finish for Maximum Tenderness
Once the brisket reaches 165°F, it will hit “the stall”—a period where the internal temperature plateaus as moisture evaporates. This is when you’ll wrap the brisket tightly in butcher paper (not aluminum foil). The paper allows some moisture to escape while preserving the bark, creating that perfect balance of texture.
Return the wrapped brisket to the smoker and continue cooking until the internal temperature reaches 203°F, approximately 4-6 additional hours. The probe should slide in like butter with no resistance. Remove the brisket from the smoker and let it rest, wrapped in the butcher paper, for at least 1 hour before slicing. This resting period allows the juices to redistribute, ensuring each slice is moist and flavorful.
Pro Tips For Making Fall Apart Beef Brisket
- Soak Wood Chips Properly: I learned this the hard way—dry wood chips turn your smoker into a smoke bomb. Soak the 1 lb wood chips in water for 30 minutes before adding them to the smoker. This keeps the smoke steady and prevents flare-ups that can turn your brisket bitter. Trust me, your brisket will thank you when it’s not fighting smoke instead of flavor.
- Don’t Rush the Rest: That 5-minute rest after searing isn’t optional—it’s non-negotiable. Letting the brisket sit before hitting the smoker keeps the juices inside where they belong. I used to skip it, and my first few batches always ended up drier than I hoped. Give it the time, even if you’re impatient like me.
- Press the Rub Hard: The rub won’t stick if you just sprinkle it on. Dig your fingers into the brisket and really press that mix—especially on the fat cap—so the spices cling to every crevice. I used to half-ass this, and the flavor just didn’t penetrate like it should. A little elbow grease here makes all the difference in the final bite.
- Use Butcher Paper, Not Foil: Sounds weird, but it works: butcher paper lets moisture escape while keeping that crisp bark intact. Foil traps too much steam, turning your brisket into a sad, soggy mess. Wrap it tight at 165°F, and your meat will finish tender without losing its texture. I know, I know—it’s an extra step, but the result is worth it.
Troubleshooting perfect results
Stall Phase Struggles
If your brisket hits 165°F but refuses to budge past the stall, it’s likely due to inconsistent smoker temperature. I’ve seen this happen when the smoker fluctuates above 250°F or below 225°F.
Use a digital meat probe thermometer like the Meater Plus to monitor both the smoker and internal temp simultaneously. If your smoker is too hot, add a damp towel over the vents or move it away from direct heat sources.
For too cold temps, increase airflow or add more wood chips. 🔥
Overcooked or Dry Brisket
Brisket that’s tough or dry often results from overcooking beyond 203°F. I’ve made this mistake myself—pushing past the ideal temperature to “ensure it’s done.” Instead, trust the probe test: it should slide in with minimal resistance.
If you’ve already overcooked it, try a beef broth bath—wrap the brisket in foil with ½ cup beef broth and heat in a 300°F oven for 30 minutes to rehydrate.
Uneven Bark Formation
If your brisket has patchy or no bark, the issue is almost always moisture on the surface. I’ve learned the hard way that even a slight dampness prevents the Maillard reaction from forming that delicious crust.
Pat the brisket completely dry with paper towels after applying the rub, and avoid misting it during cooking. For extra bark, baste with beef broth every 2 hours during the final 4 hours of cooking.
Fat Separation Issues
If the fat cap renders too quickly or looks greasy, it’s often due to improper fat-side positioning. Place the brisket fat-side up on the smoker grate to create a crispy, flavorful crust.
If the fat pools excessively, use a fat drip pan or tilt the grate slightly to let fat render away from the meat. I’ve also found that trimming excess fat before cooking helps control this—leave about ¼-inch fat cap for flavor and moisture.
Temperature Probe Accuracy
Cheap or improperly inserted probes can give false readings, leading to overcooked or undercooked brisket. I recommend using a dual-probe thermometer like the Thermoworks Smoke to monitor both the smoker and internal temperature. Insert the probe into the thickest part of the meat, avoiding the fat cap or bone.
If your probe reads 203°F but the meat still feels tough, it might be due to a slow cook—try wrapping it in butcher paper and continuing the cook for another 1-2 hours.
Resting Time Neglect
Skipping the resting phase is one of the most common mistakes I see. Brisket needs at least 1 hour to redistribute juices after cooking. If you slice too soon, you’ll end up with dry, stringy meat.
Wrap the brisket tightly in butcher paper or foil and let it rest on a cutting board or tray. For extra tenderness, I’ve found that resting for 2-3 hours in a cooler makes a world of difference. 💫
Nutrition facts
Frequently asked questions
Why does my brisket need so much time to cook?
The 10–12 hour cook at 225°F breaks down tough muscle fibers through slow collagen breakdown. This low-and-slow method ensures every bite is tender and juicy—skipping it often results in chewy meat. Think of it like making coffee: rushing it gives you bitter, harsh flavors, while patience yields smooth, rich perfection.
Can I use aluminum foil instead of butcher paper when wrapping?
Butcher paper is preferred because it allows moisture to escape while preserving the bark—aluminum foil traps steam, creating soggy meat. If you must use foil, wrap loosely and check for doneness sooner. The paper method gives that perfect balance of crispy crust and tender interior.
How do I know when the brisket is truly done?
Use a meat probe to check for 203°F internal temperature, and test for tenderness by sliding the probe in like butter. The stall (around 165°F) is normal—wrap and cook until it passes 203°F. Overcooking beyond this point dries out the meat, so patience is key!
What if I don’t have a smoker?
Use an oven set to 275°F with a water pan for moisture, or a slow cooker on low for 8–10 hours. Both methods work but may take slightly longer. The key is maintaining steady, low heat to tenderize the meat.

Trained in classic French technique but raised on slow-cooked ribs and spicy rubs, she blends culinary skill with smoke and soul.
- Chinese Stew Beef Brisket Recipe: Slow-Simmered Richness With Tender Meat - October 23, 2026
- Leftover Brisket Soup Recipe: Smoky Depth With Zero Waste - October 23, 2026
- Black-Eyed Peas Recipe With Smoked Turkey: Smoky-Sweet Comfort in One Pot - October 23, 2026