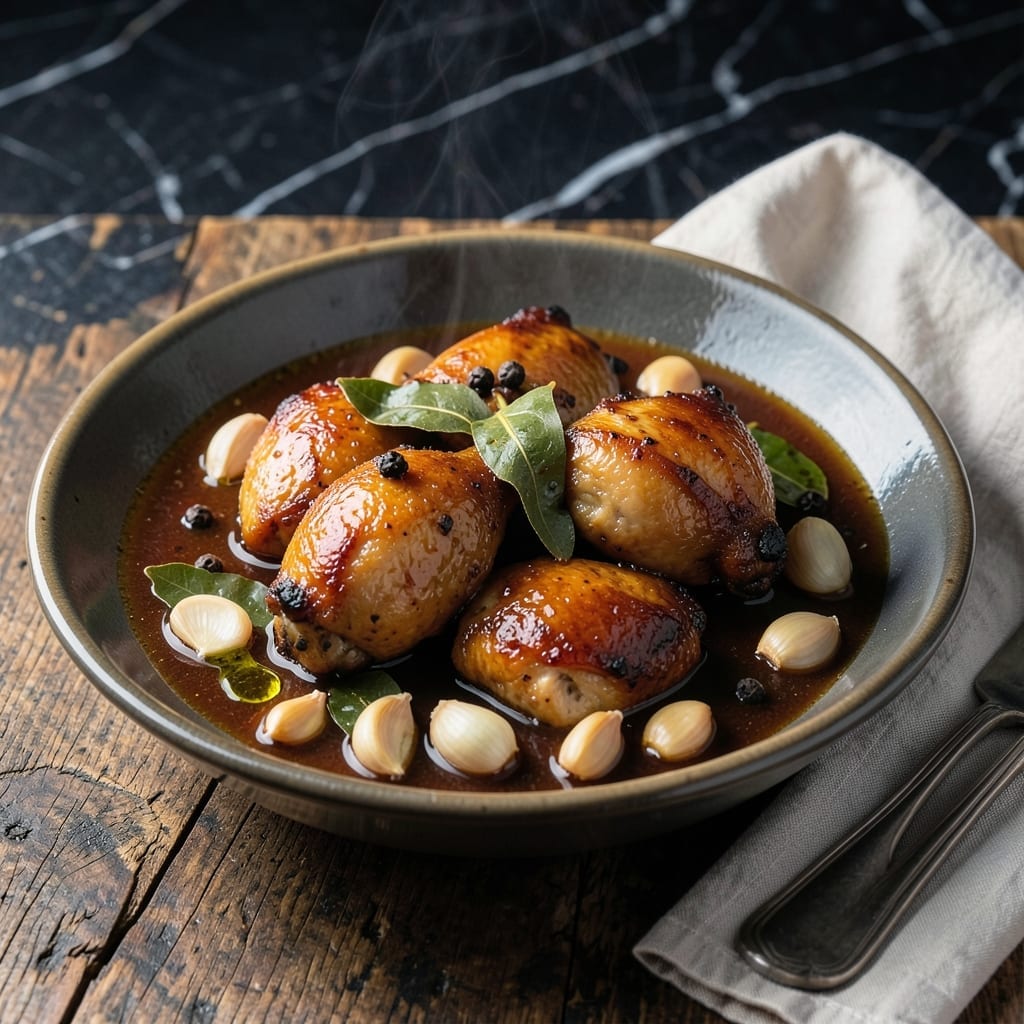
This Filipino chicken adobo recipe brings bold, tangy-savory flavors to your home kitchen. The dish combines vinegar, soy sauce, and garlic for a perfect balance of sweet and sour.
I developed this method after testing countless variations to capture the authentic taste. The chicken becomes incredibly tender while soaking up the rich adobo sauce.
What makes this special is its simplicity. Just a handful of ingredients transform into a deeply flavorful dish that tastes like it simmered all day.
Serve it with steamed rice to soak up every drop of the delicious sauce. This is comfort food at its finest.
Ingredients for Filipino Recipe for Chicken
Simple ingredients create bold adobo flavors in this traditional dish.
| Ingredient | Amount | Notes |
|---|---|---|
| Chicken Thighs 🍗 | 2 lb | Boneless, skin-on preferred |
| White Vinegar 💧 | ¾ cup | Cane or white distilled |
| Soy Sauce 🫒 | ½ cup | Regular or low-sodium |
| Garlic Cloves 🧄 | 8 cloves | Peeled and smashed |
| Bay Leaves 🍃 | 3 whole | Dried, whole leaves |
| Black Peppercorns 🌶️ | 1 tsp | Whole, crushed |
| Brown Sugar 🍚 | 1 tbsp | Light or dark |
| Water 💧 | ½ cup | To thin sauce |
| Vegetable Oil 🫒 | 2 tbsp | For searing chicken |
| Salt 🧂 | ½ tsp | Adjust to taste |
| Green Onions 🧅 | 4 whole | Thinly sliced for garnish |
[recipe_ingredient_scaler]
The chicken is key—thighs stay juicier than breasts during the long simmer. Costco has great bone-in, skin-on options if you’re feeding a crowd, but boneless works too. Look for vibrant color and avoid pieces with a grayish tint. For the vinegar, Datu Puti is the gold standard for Filipino recipes and easy to find at Asian markets.
No white vinegar? Apple cider vinegar at a 1:1 ratio works in a pinch. Short on soy sauce? Tamari or coconut aminos can substitute, though the flavor will shift slightly. The bay leaves are traditional—dried are fine, but fresh adds a brighter note. If you’re missing brown sugar, a splash of pineapple juice adds the right sweetness.
The adobo sauce deepens overnight. Store in the fridge for up to 5 days—it reheats beautifully. Freeze leftovers for 3 months (the sauce may separate but stirs back together). Always serve with steamed rice to soak up every last drop.
Why You’ll Love This Recipe
- One Pan Magic: I just toss the chicken thighs with vinegar, soy sauce, and garlic in a single pan—no fancy prep, no mess.
- Tangy Savory Bite: The vinegar and soy sauce create this addictive sweet-sour depth that’s purely Filipino comfort in every bite.
- Feeds My Crew: Between us, this dish stretches perfectly for family dinners or meal prep—leftovers taste even better the next day.
- Budget Winner: Honestly, chicken thighs are cheap, and the pantry staples do all the work. I save money without sacrificing flavor.
Step-by-Step Instructions for Filipino Chicken Adobo
This traditional method delivers the perfect balance of tangy, savory, and slightly sweet flavors.
Step 1: Sear the Chicken Thighs
Heat the 2 tbsp Vegetable Oil in a large, heavy-bottomed pot or Dutch oven over medium-high heat. Pat the 2 lb Chicken Thighs dry with paper towels and season lightly with the 0.5 tsp Salt.
Working in batches if necessary to avoid crowding, add the chicken thighs skin-side down. Sear for 5-6 minutes until the skin is deep golden brown and crisp. Flip and sear the other side for another 3-4 minutes. Remove the chicken and set aside—this renders fat and builds flavor.
Step 2: Sauté Aromatics and Toast Spices
In the same pot, reduce heat to medium and add the 8 cloves Garlic Cloves. Sauté for 1-2 minutes until fragrant and just beginning to brown. Add the 1 tsp Black Peppercorns and 3 whole Bay Leaves, stirring for 30 seconds to toast the spices.
Be careful not to burn the garlic—it should be golden, not dark brown. The aroma will become intensely fragrant when the spices are properly toasted. This step ensures the dish has depth and complexity.
Step 3: Build the Adobo Sauce
Pour in the 0.5 cup Soy Sauce, 0.75 cup White Vinegar, 1 tbsp Brown Sugar, and 0.5 cup Water. Stir well to combine, scraping up any browned bits from the bottom of the pot. These bits contain concentrated flavor that will enrich the sauce.
Return the chicken to the pot, skin-side up, along with any accumulated juices. The liquid should come about halfway up the chicken. Bring to a gentle simmer—this ensures the chicken cooks evenly without drying out.
Step 4: Braise Until Tender and Sauce Thickens
Reduce heat to low, cover, and let the chicken braise for 30-35 minutes. Check occasionally and turn the chicken thighs halfway through for even cooking. The chicken is done when it reaches an internal temperature of 165°F and the meat pulls away from the bone easily.
Uncover and simmer for an additional 10-15 minutes to reduce the sauce slightly and allow the flavors to meld. The sauce should coat the back of a spoon and have a glossy, slightly thickened consistency.
Step 5: Garnish and Serve
Discard the bay leaves. Taste and adjust seasoning if needed—you may want to add a touch more brown sugar for sweetness or vinegar for tang. Thinly slice the 4 whole Green Onions and sprinkle them over the top just before serving to add a fresh, bright contrast.
Serve the chicken hot with the sauce spooned generously over the top. The meat should be fall-off-the-bone tender, and the sauce should have a perfect balance of salty, tangy, and slightly sweet flavors.
Pro Tips For Making Filipino Recipe For Chicken
- Marinate Longer: Give the chicken at least 30 minutes in the vinegar-soy-garlic mix—I learned this the hard way when my first batch tasted flat because I rushed it.
- Brown the Thighs: Sear the chicken thighs first in a hot pan until golden. Sounds weird, but it works: the caramelized bits add depth to the sauce.
- Skip the Lid: Resist the urge to cover the pan while simmering—the sauce reduces better and the chicken gets that perfect sticky glaze.
- Crush the Garlic: Smash the garlic cloves before adding them—my grandmother swore by this, and she was right: it releases way more flavor into the dish.
Pro Cooking Tips for This Recipe
Perfect Searing Technique
Always pat your chicken thighs completely dry before searing—this ensures a crisp, golden-brown skin. I use paper towels and press firmly to remove all moisture. The drier the surface, the better the Maillard reaction. 🔥
Garlic Control
When sautéing the 8 cloves garlic, keep the heat at medium to prevent burning. Burnt garlic turns bitter and ruins the sauce. I pull the pot off the heat if the garlic starts browning too quickly.
Sauce Balance
Taste your adobo sauce before adding the chicken. The ratio of soy sauce to vinegar should be balanced—not too salty or too sour. I sometimes add an extra ½ tsp brown sugar if the mixture tastes too sharp.
Braising Time
Don’t rush the 30-35 minute braise. Low and slow is key for tender chicken. If the sauce reduces too much, add ¼ cup water to keep the chicken partially submerged.
Sauce Reduction
After braising, uncover and simmer for 10-15 minutes to thicken the sauce. You want it to coat the back of a spoon but still be pourable. Stir occasionally to prevent sticking.
Resting Period
Let the chicken rest in the sauce for 10 minutes off the heat before serving. This lets the flavors meld and the juices redistribute. The meat will be even more tender and flavorful. 💛
Nutrition Facts
Frequently Asked Questions
Can I use chicken breast instead of thighs?
You can, but thighs stay juicier during the 30-35 minute braise. If using breasts, reduce cooking time to 20-25 minutes to prevent dryness.
What if I don’t have white vinegar?
Apple cider vinegar works as a 1:1 substitute. Avoid balsamic or red wine vinegar—their flavors overpower the dish.
How do I fix sauce that’s too sour?
Balance it with 1 tsp brown sugar at a time until mellowed. Taste as you go—you want tang, not sharpness.
Can I make this ahead of time?
The flavors deepen overnight. Store in the fridge for up to 5 days or freeze for 3 months.

Trained in classic French technique but raised on slow-cooked ribs and spicy rubs, she blends culinary skill with smoke and soul.
- Recipe for Boneless Pork Chops in Cast Iron Skillet: Sear and Baste to Juicy Perfection - October 3, 2026
- Recipe for Boneless Cross Rib Roast: Slow-Roasted Beef with Herb Crust - October 3, 2026
- Hamburgers in Sauce Recipe Crock Pot: Slow-Cooked Savory Delight - October 3, 2026