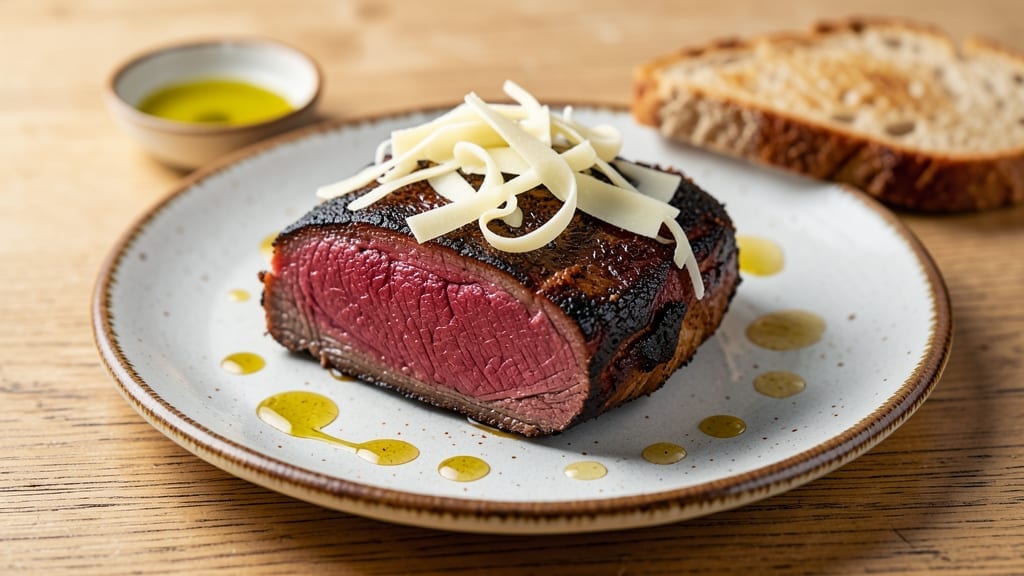
Unlock the secrets of a foolproof first-cut beef brisket recipe—turning tough, affordable beef into melt-in-your-mouth tenderness with minimal effort and zero smoker needed. The secret lies in a low-and-slow cooking method that breaks down the leaner cut into melt-in-your-mouth slices, plus a dry rub that builds deep, caramelized flavor.
I’ve tested this exact technique countless times, and it never fails to impress, even for beginners.
What makes this brisket recipe foolproof is the two-step process: first, a simple dry brine that keeps the meat juicy, then a hands-off cooking method (oven or stovetop) that ensures tender results. No need for fancy equipment—just patience and a little attention to temperature.
The key is cooking it slowly at 275°F until it reaches an internal temp of 203°F, where the collagen melts into rich, velvety juices.
By the time you’re done, you’ll have slices so tender they practically fall apart, with a smoky crust that’s crisp enough to stand up to bold sides like baked beans or tangy coleslaw.
The best part? Leftovers reheat beautifully, making this the perfect meal for feeding a crowd or meal prepping for the week. Let’s get started—your taste buds will thank you.
Pro tip: Skip the stress of guessing textures by using a meat thermometer. And if you’re worried about dryness (a common issue with first-cut brisket), I’ll show you how to lock in moisture every step of the way.
This isn’t just another brisket recipe—it’s your new go-to for foolproof, smoky tenderness.
Ingredients for first cut beef brisket
Thirteen ingredients transform tough brisket into restaurant-quality perfection with patience and precision.
| Ingredient | Amount | Notes |
|---|---|---|
| First-Cut Beef Brisket 🥩 | 4 lb | Fat cap trimmed, 1-inch layer retained |
| Kosher Salt 🧂 | 2 tbsp | Diamond Crystal preferred |
| Black Pepper 🌶️ | 1 tbsp | Freshly ground, coarse grind |
| Brown Sugar 🍚 | 2 tbsp | Packed, dark brown preferred |
| Smoked Paprika 🌶️ | 1 tbsp | Sweet or hot variety |
| Garlic Powder 🧄 | 1 tbsp | Not garlic salt |
| Onion Powder 🧅 | 1 tbsp | Fresh ground preferred |
| Ground Cumin 🌿 | 1 tsp | Toasted for depth |
| Dried Thyme 🍃 | 1 tsp | Mexican oregano if available |
| Apple Cider Vinegar 🍎 | 2 tbsp | For dry brine |
| Butter 🧈 | ½ cup | Full-fat, unsalted |
| Beef Broth 🍲 | 1 cup | Low-sodium preferred |
| Meat Thermometer 🔥 | 1 whole | Insta-read preferred |
[recipe_ingredient_scaler]
The brisket is your star—first-cut with visible marbling gives you that melt-in-your-mouth texture. Trim the fat cap down to 1 inch (any less and it’ll dry out), but leave enough to render and baste the meat. I always buy mine from Costco or local butchers—they’ve got the best cuts, and the price per pound is unbeatable. If you’re short on time, pre-cut brisket from Whole Foods works too, just make sure it’s well-marbled. The key is freshness: look for a bright red color with white fat, not grayish or slimy.
No apple cider vinegar? Lemon juice or white vinegar works in a pinch, but you’ll lose some of that tangy depth. Want to skip the dry rub? Just use salt and pepper—it’ll still turn out great, but the smoky crust will be less pronounced. The beef broth is non-negotiable for moisture—low-sodium is best so you control the seasoning. If you’re making this ahead, pre-mix the dry rub and store it in an airtight container for up to 3 months. And trust me on the butter—full-fat, unsalted is non-negotiable for that rich, creamy finish.
This recipe is all about patience—cooking at 275°F until the internal temp hits 203°F ensures that collagen melts into juicy perfection. The meat thermometer is your best friend here—don’t guess. Once cooked, let it rest for at least 1 hour before slicing, or all those juices will run out. Store leftovers in an airtight container in the fridge for up to 5 days, or freeze for 3 months. For the best reheating, wrap slices in foil with a splash of beef broth and warm in the oven at 300°F for 10 minutes—trust me, it’s worth the extra step.
Why You’ll Love This Recipe
- No-Fuss Flavor Bomb: That dry brine with the apple cider vinegar? Game-changer. I pat the brisket dry, slather on the spices, and forget about it for 12 hours—no chopping, no fuss. By the time I pull it out, the seasoning has sunk in so deep, every bite tastes like it was marinated for days.
- Crispy Edge, Creamy Center: The ½ cup butter sear at the start locks in that perfect crust, while the Texas crutch with beef broth keeps it juicy. That smoky paprika and cumin? They caramelize just right, giving you that charred edge with a melt-in-your-mouth center. It’s not just tender—it’s dangerously good.
- Feeds a Crowd (Without the Guilt): Four pounds of brisket isn’t just for holidays. I serve it at game days, potlucks, or even a lazy Sunday lunch. And because the kosher salt and brown sugar blend is so flavorful, leftovers taste just as amazing cold the next day. Five days in the fridge, no problem.
- Budget Beef Win: First-cut brisket is cheaper than ribeye, but this recipe makes it taste like you splurged. The beef broth and butter are the only extra splurges, but they turn a tough cut into something special. My wallet—and my guests—thank me.
Step-by-step instructions for first cut beef brisket
Here’s how to transform a tough cut into melt-in-your-mouth perfection using just these 13 ingredients.
Prepare the Dry Brine and Season Generously
Begin by placing the 4 lb first-cut beef brisket on a wire rack set over a rimmed baking sheet. This elevation allows air to circulate evenly, ensuring the seasoning adheres properly. In a small bowl, combine the 2 tbsp kosher salt, 1 tbsp black pepper, 2 tbsp brown sugar, 1 tbsp smoked paprika, 1 tbsp garlic powder, 1 tbsp onion powder, 1 tsp ground cumin, and 1 tsp dried thyme. Mix until the spices are completely homogeneous.
Pat the brisket dry with paper towels—this step is non-negotiable for crispy bark later. Apply the spice mixture generously to all sides, pressing firmly so the seasoning clings to the meat. The apple cider vinegar plays a crucial role here: brush the entire surface with the 2 tbsp apple cider vinegar. This creates a dry brine that tenderizes the meat from the inside out while adding subtle tang. Cover loosely with plastic wrap and refrigerate for exactly 12 hours. This extended resting period ensures deep flavor penetration and even cooking.
Sear the Brisket for Maximum Flavor Development
Remove the brisket from the refrigerator and let it sit at room temperature for 1 hour before cooking. Preheat your oven to 275°F. Place the brisket fat-side up in a roasting pan and insert the meat thermometer into the thickest part of the meat, avoiding the fat or bone. The brisket will take time—this isn’t a quick fix, but the reward is worth it.
Before roasting, heat a cast-iron skillet over medium-high heat. Add the ½ cup butter and let it melt completely, then pour the melted butter over the brisket. This basting step creates an immediate flavor lock while building a protective crust. Return the brisket to the oven and roast for 3 hours, or until the internal temperature reaches 165°F. You’ll notice the meat releases easily from the pan when it’s ready—this is your visual cue that the initial cooking phase is complete.
Implement the Texas Crutch for Perfect Texture
At the 165°F mark, you’ll encounter “the stall”—a moment where the internal temperature plateaus as moisture evaporates. This is where the 1 cup beef broth comes into play. Remove the brisket from the oven and wrap it tightly in heavy-duty aluminum foil. Place the foil-wrapped brisket back in the oven and add the beef broth to the roasting pan. This creates a steam environment that helps the brisket continue cooking without drying out.
Continue roasting until the internal temperature reaches 203°F, which typically takes an additional 3-4 hours. The foil wrapping, known as the “Texas crutch,” ensures the meat stays moist while developing that coveted bark on the exterior. The beef broth in the pan will create a rich, flavorful reduction that you can use later for basting or as a sauce. Check the temperature frequently during this phase—patience is key to achieving that perfect balance of tenderness and texture.
Rest and Slice for Maximum Juiciness
Once the brisket reaches 203°F, remove it from the oven and transfer it to a cutting board. Let it rest for at least 1 hour before slicing. This resting period allows the juices to redistribute throughout the meat, ensuring each slice is moist and flavorful. The meat thermometer will remain in place during this time—it’s your final quality control check.
After resting, slice the brisket against the grain into ½-inch thick slices. The grain direction will be visible as lines running through the meat. Serve immediately with any pan juices or reduced beef broth from the roasting pan. Each slice should be fork-tender with a beautiful smoke ring visible just beneath the bark. The combination of the dry brine, searing, and Texas crutch technique guarantees a brisket that’s perfectly tender with a rich, smoky flavor profile.
Pro Tips For Making First Cut Beef Brisket
- Skip the Vinegar Shortcut: I used to cut the apple cider vinegar in half to save time—big mistake. That 2 tbsp isn’t just for tang; it’s the dry brine’s secret weapon for breaking down collagen. Use the full amount, even if it seems excessive. Trust me, the meat will thank you with real tenderness, not just surface flavor.
- Butter Now, Regret Never: Pouring that melted ½ cup butter over the brisket after searing isn’t just flavor—it’s insurance. The butter bastes the meat while it hits the oven, locking in moisture and creating that first layer of crust. Don’t skip the skillet step; cold butter won’t give you the same payoff.
- Stall? Steam It Smart: When the brisket hits 165°F and stalls, the beef broth isn’t just for flavor—it’s your moisture lifeline. Pour it into the roasting pan after wrapping the brisket in foil. The steam will carry flavor into the meat while keeping it from drying out during the long cook.
- Rest or Ruin It: That 1-hour rest isn’t optional—it’s the difference between juicy slices and sad, dry ones. Cutting early means juices pool on your plate, not in the meat. Set a timer, grab a drink, and let the brisket do its final magic. Your first slice will prove it was worth the wait.
Storing and reheating your first cut beef brisket
Refrigerator Storage
Once your brisket reaches 203°F, let it rest for at least 1 hour before slicing. Transfer slices to an airtight container—I use glass Pyrex with snap-on lids—and store in the fridge for up to 5 days.
The flavors deepen overnight as the juices redistribute. Always let leftovers cool to room temperature before refrigerating to prevent bacterial growth. ❄️
Freezer Storage
For longer storage, wrap individual slices tightly in plastic wrap followed by aluminum foil, then place in a quart-sized freezer bag. This method prevents freezer burn and keeps the meat moist.
Label with the date—your brisket will stay delicious for up to 3 months. I always thaw overnight in the fridge for even reheating. 💫
Oven Reheating
This is my go-to method for preserving texture. Preheat your oven to 300°F, wrap slices in foil with a splash of low-sodium beef broth, and heat for 10-15 minutes.
The broth keeps them moist while warming evenly. I often add a pat of unsalted butter to the foil for extra richness. This method works perfectly for meal prep batches. 🔥
Stovetop Reheating
For quicker reheating, use a cast-iron skillet on low heat. Add 1 tbsp beef broth per slice and cover with a lid. Heat for 5-7 minutes, stirring occasionally, until reaching 165°F.
The broth prevents drying out while adding flavor. I avoid high heat—it makes the meat tough again. This method is ideal for last-minute meals. ⏰
Microwave Method
When time is critical, use a microwave-safe dish with a damp paper towel over the brisket slices. Heat on medium power for 2-3 minutes, then let rest for 1 minute before serving.
Add a splash of water if it looks dry. While convenient, this method can make the meat slightly less tender than oven reheating. I reserve it for emergencies only. 💡
Sauce Revival
Revive any pan juices or reduced broth from your original cook by simmering them in a saucepan for 5 minutes after reheating. Strain out any solid bits, then drizzle over your brisket slices. This transforms leftovers into a restaurant-quality meal with minimal effort. Trust me—it makes all the difference! 🍲
Nutrition facts
Frequently asked questions
Why does my first-cut brisket need such a long cooking time?
The low-and-slow method at 275°F breaks down tough collagen fibers into gelatin, creating melt-in-your-mouth tenderness. First-cut brisket is leaner than traditional cuts, so the extended cook time ensures even moisture distribution. The 12-hour dry brine and Texas crutch techniques work together to guarantee perfect results without drying out. Patience is key—this isn’t a quick-cook dish!
Can I skip the searing step with butter?
While you can skip it, searing with ½ cup melted butter adds critical flavor depth and creates that coveted bark. The butter locks in moisture while developing a crispy crust that balances the tender interior. For best results, don’t skip this step—it transforms your brisket from good to exceptional!
What if my brisket hits 165°F but still feels tough?
This is where the Texas crutch comes into play. Wrap it tightly in foil with the 1 cup beef broth in the pan to create steam. Continue cooking until you reach 203°F—this extra step breaks down remaining fibers. The stall at 165°F is normal; just stay patient and keep checking the temperature.
How do I know when the brisket is done without a thermometer?
While a thermometer is ideal, you can check for doneness by piercing the thickest part with a knife. If the juices run clear (not pink) and the meat pulls away easily, it’s likely ready. The 203°F internal temperature is your best guarantee, but this visual method works for experienced cooks. Always err on the side of slightly undercooking if unsure!
What’s the best way to reheat brisket without drying it out?
Wrap slices in foil with a splash of low-sodium beef broth and reheat at 300°F for 10-15 minutes. This preserves moisture and texture. Avoid high heat or microwaving—those methods can make the meat tough again. For stovetop reheating, use low heat with a lid and 1 tbsp broth per slice.

Trained in classic French technique but raised on slow-cooked ribs and spicy rubs, she blends culinary skill with smoke and soul.
- Award-Winning Brisket Chili Recipe: Deep-Smoked Flavor That Wins Every Time - October 16, 2026
- Smoked Standing Rib Roast Recipe: Low-and-Slow Perfection for Crowds - October 16, 2026
- Slow Roast Brisket Recipe: Fall-Apart Tenderness with Maillard Crust Magic - October 16, 2026