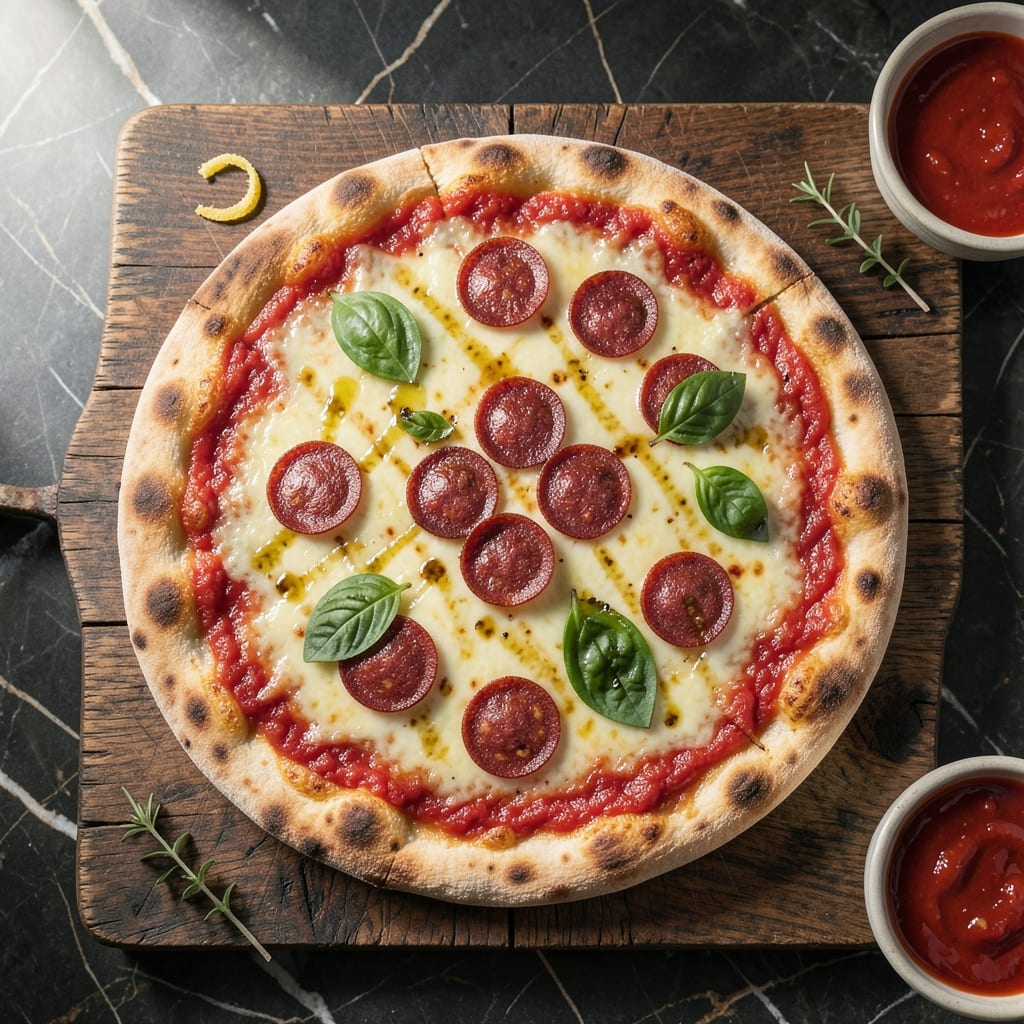
This no-yeast flatbread pizza delivers a crispy crust without the wait. I developed this method after too many failed attempts at traditional dough in my tiny Boston kitchen—turns out, you don’t need yeast for quick, restaurant-quality results.
The base comes together with simple pantry staples, and the high-heat oven ensures it bakes up golden and crispy. No rising time means you can have pizza on the table in under 20 minutes. It’s foolproof, even in the most temperamental of kitchens.
Top it with your favorite sauce, cheese, and toppings. The flatbread holds up beautifully, with a texture that’s light yet sturdy enough to support hearty ingredients. Every bite delivers that perfect crunch.
Ideal for weeknight dinners or last-minute gatherings. This recipe proves great pizza doesn’t require complicated steps.
Ingredients for Flatbread Pizza Recipe No Yeast
Pantry staples come together for this crispy, no-yeast flatbread base in minutes.
| Ingredient | Amount | Notes |
|---|---|---|
| All-Purpose Flour 🌾 | 2 cups | Plus extra for dusting surface |
| Baking Powder 🧂 | 2 tsp | Ensures light, airy texture |
| Salt 🧂 | 1 tsp | Fine sea salt preferred |
| Olive Oil 🫒 | ¼ cup | Extra-virgin for richness |
| Plain Greek Yogurt 🥛 | ¾ cup | Full-fat for best texture |
| Water 💧 | ¼ cup | Lukewarm for even mixing |
| Marinara Sauce 🍅 | 1 cup | Homemade or quality jarred |
| Shredded Mozzarella Cheese 🧀 | 2 cups | Low-moisture for melt |
| Fresh Basil Leaves 🌿 | ¼ cup | Thinly sliced for garnish |
| Garlic Cloves 🧄 | 2 cloves | Minced for sauce enhancement |
| Dried Oregano 🍃 | 1 tsp | Mediterranean variety preferred |
| Red Pepper Flakes 🌶️ | ½ tsp | Adjust to spice preference |
| Parmesan Cheese 🧀 | ¼ cup | Freshly grated from block |
[recipe_ingredient_scaler]
The yogurt is key here—Fage or Chobani full-fat gives the best texture and that signature tang. Most grocery stores carry it, but Trader Joe’s has a great store-brand version too. Flour quality matters less than you’d think (all-purpose from King Arthur is my go-to), but make sure your baking powder is fresh—old cans lose their lift. The olive oil? Use something you’d actually drizzle on bread (worth the splurge).
No Greek yogurt? Plain whole-milk yogurt works in a pinch (strain it first). Swap all-purpose flour for bread flour at a 1:1 ratio if you want extra chew. For a dairy-free version, use unsweetened coconut yogurt—just know the flavor will shift slightly. The marinara can be swapped for pesto or even olive oil and garlic for a white pizza vibe.
Flatbread dough keeps in the fridge for 2 days (tightly wrapped), but bake it fresh for maximum crispiness. Leftovers? Reheat in a dry skillet to revive the crunch. Freezes for 1 month if you par-bake the crust first (no toppings).
Why You’ll Love This Recipe
- No Yeast Needed: Honestly, I love that there’s zero waiting for dough to rise—just mix the flour, baking powder, yogurt, and olive oil and you’re ready to go.
- Crisp Yet Tender: That olive oil in the dough gives it this perfect flaky crust while the yogurt keeps it soft inside.
- Endless Toppings: I’ve done everything from classic marinara to pesto and breakfast eggs on this—it’s my blank canvas.
- Budget Stretch: Five simple pantry staples, and I get a meal that feels fancy but costs less than takeout.
Step-by-Step Instructions for Flatbread Pizza No Yeast
Here’s how to achieve a perfectly crispy crust without waiting for dough to rise.
Step 1: Make the No-Yeast Flatbread Dough
In a large bowl, whisk together the 2 cups all-purpose flour, 2 tsp baking powder, and 1 tsp salt until evenly combined. I like to sift these dry ingredients first to ensure a light, airy texture in the finished crust.
Create a well in the center and add the 0.25 cup olive oil, 0.75 cup plain Greek yogurt, and 0.25 cup water. Use a wooden spoon to stir until a shaggy dough forms. The yogurt adds tang and tenderness while the baking powder ensures a slight rise without yeast.
Step 2: Knead and Rest the Dough
Turn the dough onto a lightly floured surface (use some of the extra all-purpose flour) and knead for 3-4 minutes until smooth and elastic. This develops the gluten structure that gives your crust that satisfying chew.
Divide the dough into 4 equal portions and shape into balls. Cover with a damp towel and let rest for 10 minutes. This brief rest makes the dough easier to roll out and prevents it from springing back as you work with it.
Step 3: Roll and Pre-Bake the Crust
Preheat your oven to 425°F with a pizza stone or inverted baking sheet inside. On a floured surface, roll each dough ball into a ¼-inch thick circle. The thinner you roll it, the crispier your crust will be.
Carefully transfer the rolled dough to the preheated stone or baking sheet. Bake for 8-10 minutes until the edges just begin to turn light golden brown. This pre-baking step ensures a sturdy base that won’t get soggy when you add the toppings.
Step 4: Add Sauce and Toppings
Spread ¼ cup marinara sauce evenly over each pre-baked crust, leaving a small border for the crust. I always mince the 2 cloves garlic directly into my sauce for an extra flavor boost.
Sprinkle ½ cup shredded mozzarella cheese over each pizza, then add the dried oregano and red pepper flakes. The low-moisture cheese melts beautifully without making the crust soggy. Finish with a sprinkle of parmesan cheese for extra depth of flavor.
Step 5: Bake to Perfection and Garnish
Return the pizzas to the 425°F oven and bake for 8-10 minutes until the cheese is fully melted and the crust is deep golden brown. Keep an eye on them—they’ll go from perfect to overdone quickly at this high temperature.
Remove from the oven and immediately top with the 0.25 cup fresh basil leaves, thinly sliced. The residual heat will gently wilt the basil, releasing its aromatic oils. Let cool for 2 minutes before slicing and serving. Each pizza should have a crispy base with a slightly chewy interior and perfectly melted cheese.
Pro Tips For Making Flatbread Pizza Recipe No Yeast
- Preheat the Pan: Get your skillet or griddle screaming hot before adding the dough—I learned this the hard way after too many pale, gummy flatbreads.
- Use Full-Fat Yogurt: Sounds weird, but it works: full-fat Greek yogurt makes the dough more pliable and gives the crust a richer texture.
- Don’t Overmix: Stir the dough just until it comes together; overworking it makes the flatbread tough, and nobody wants a chewy crust.
- Roll It Thin: Aim for about 1/4-inch thickness—any thicker and the middle won’t cook through before the edges burn.
Essential Equipment for This Dish
Baking Surface
For that perfect crisp, I swear by my Lodge cast iron pizza pan—it heats evenly and retains temperature better than any baking sheet. If you don’t have one, an inverted half-sheet pan from the grocery store works just as well. Just preheat it in the oven for 15 minutes before adding your dough. 🔥
Rolling Tools
A French rolling pin gives me the most control for thin, even crusts. No fancy equipment? A clean wine bottle works in a pinch. Dust your surface with all-purpose flour to prevent sticking—this is one of those times where extra flour is your friend.
Mixing Essentials
I use a large stainless steel mixing bowl for the dough—it’s durable and won’t absorb odors like plastic. A wooden spoon is my go-to for stirring, but a silicone spatula works too. The key is getting all the dry bits incorporated without overmixing.
Measuring Accuracy
For consistent results, I recommend OXO Good Grips measuring cups and spoons. Baking powder is potent—even a little extra can leave a metallic taste. I always level off my 2 tsp with the flat edge of a butter knife.
Oven Thermometer
Oven temperatures can be wildly inaccurate. I keep a Taylor oven thermometer on the rack to verify my 425°F setting. It’s a $5 investment that prevents undercooked or burnt crusts. Trust me, it’s worth the drawer space.
Topping Tools
A pizza wheel makes quick work of slicing, but a sharp chef’s knife does the job too. For sauce spreading, the back of a spoon works perfectly. I always keep a pastry brush nearby for that final olive oil drizzle before baking. 💡
Nutrition Facts
Frequently Asked Questions
What can I use instead of Greek yogurt?
Plain whole-milk yogurt works if strained first. For dairy-free, try unsweetened coconut yogurt, though the flavor will differ slightly.
Why pre-bake the crust?
Pre-baking at 425°F for 8-10 minutes creates a sturdy base that won’t get soggy under toppings. It locks in crispiness.
Can I make this dough ahead?
Yes! Wrap tightly and refrigerate for up to 2 days. For best texture, bake fresh. Freezing par-baked crusts works for 1 month.
How thin should I roll the dough?
Aim for ¼-inch thickness for a perfectly crispy result. Too thick and it won’t cook through; too thin and it may burn.

Trained in classic French technique but raised on slow-cooked ribs and spicy rubs, she blends culinary skill with smoke and soul.
- Recipe for Fried Prawns Batter: Ultra-Crispy Golden Shell - October 3, 2026
- Indian Lamb Curry Recipe Pressure Cooker: Fragrant Spices in a Fraction of the Time - October 3, 2026
- Recipe for Oven Roasted: Golden Crisp Perfection Without the Fryer - October 3, 2026