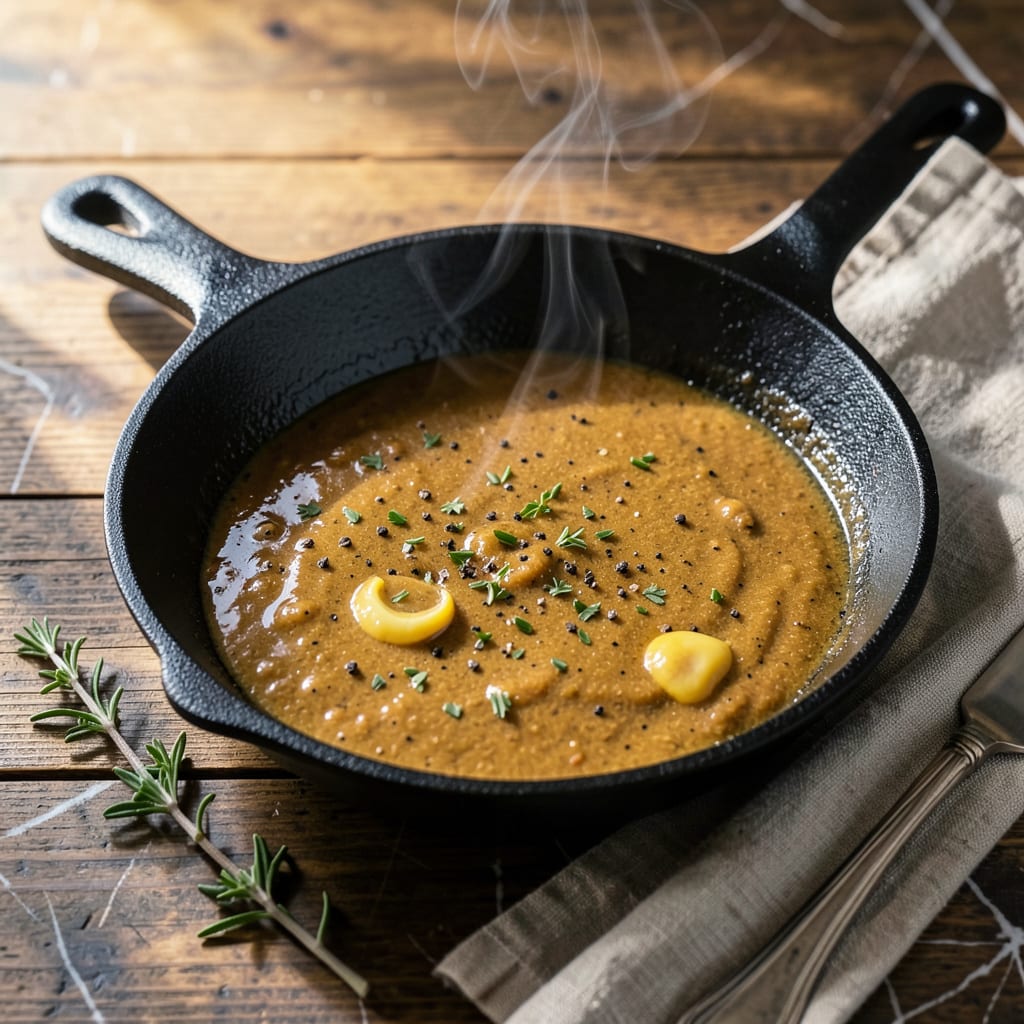
Perfect gravy starts with mastering the simple technique of using flour as a thickener. After years of watching home cooks struggle with lumps or thin, watery results, I’ve refined a foolproof method that delivers velvety, restaurant-quality gravy every time. The key lies in understanding the science behind the roux—equal parts fat and flour cooked to the perfect stage before adding liquid.
This technique works for any gravy base, from classic pan drippings to vegetarian mushroom gravies. The process begins with cooking the flour in fat (butter, oil, or meat drippings) until it reaches a light golden color—this removes the raw flour taste while building flavor. Temperature control is critical: too hot and the roux burns, too cool and it won’t thicken properly.
What separates amateur gravy from professional results is patience during the whisking stage. Liquid must be added gradually while maintaining constant motion to prevent lumps. I’ve found that warm (not boiling) liquid incorporates more smoothly, creating a silky texture without the need for straining. The final consistency should coat the back of a spoon but still flow easily.
Beyond the basic method, understanding ratios makes adjustments simple. A standard gravy uses 2 tablespoons each of fat and flour to thicken 1 cup of liquid—scale up or down as needed. For those avoiding gluten, cornstarch slurries work well but require different handling. This foundational skill transforms ordinary meals into memorable ones.
📚 In This Guide
- What You’ll Need
- Instructions
- Tips and Common Mistakes
What Youll Need
- ● Gravy base: 1–2 cups of warm pan drippings, broth, or stock (homemade or low-sodium store-bought for best flavor 🥘).
- ● All-purpose flour: 2–3 tbsp (use unbleached for smoother texture; avoid self-rising flour).
- ● Fat: 2–3 tbsp of butter, meat drippings, or oil (for roux—salted butter adds richness!).
- ● Whisk: A sturdy wire whisk (non-negotiable for lump-free results ✨).
- ● Saucepan or skillet: Medium-sized, heavy-bottomed (prevents scorching).
- ● Measuring spoons: For precise flour-fat ratios (eyeballing risks clumps!).
- ● Fine-mesh strainer: For extra-smooth gravy if lumps sneak in.
- ● Cornstarch slurry: 1 tsp cornstarch + 1 tbsp cold water (backup for stubbornly thin gravy).
- ● Seasonings: Salt, pepper, or herbs (taste as you go—underseasoned gravy is sad gravy 😢).
Step-by-Step Instructions for Thickening Gravy with Flour
Mastering this technique ensures silky, lump-free gravy with perfect consistency every time.
Prepare Your Fat and Flour Slurry
Begin by measuring equal parts all-purpose flour and fat from your pan drippings. For standard gravy proportions, I recommend starting with 2 tablespoons of flour and 2 tablespoons of rendered fat per cup of liquid you plan to thicken. The fat should be warm but not smoking—if it’s too hot, it will cook the flour too quickly and create lumps.
Whisk the flour into the fat vigorously until you achieve a smooth, bubbling paste called a roux. This initial cooking step is crucial—it removes the raw flour taste and builds the foundation for your gravy’s body. Cook the roux for 1-2 minutes until it reaches a light golden color, stirring constantly to prevent burning.
Gradually Incorporate Warm Liquid
Heat your broth or pan drippings to just below simmering—about 180°F. The liquid should be warm but not boiling, as extreme heat can cause the flour to seize up. Begin adding the warm liquid to your roux ¼ cup at a time, whisking constantly after each addition.
This gradual incorporation is the secret to lump-free gravy. Between additions, allow the mixture to return to a smooth consistency before adding more liquid. You’ll notice the gravy thickening immediately—continue until you’ve incorporated all your liquid. The mixture should coat the back of a spoon but still flow easily.
Simmer to Develop Full Thickness
Once all liquid is incorporated, return the gravy to medium-low heat and allow it to simmer gently for 5-7 minutes. This final cooking step fully hydrates the flour particles and develops the gravy’s maximum thickening potential. Stir occasionally during this phase, paying special attention to the edges of the pan where thickening can occur more quickly.
Watch for visual cues: the gravy should have a velvety sheen and leave a clear path on the spoon when you draw your finger through it. If it’s too thick, whisk in additional warm broth 1 tablespoon at a time until reaching your desired consistency. Remember that gravy continues to thicken slightly as it cools.
Finish and Adjust Seasoning
Remove the gravy from heat and let it rest for 2 minutes. This brief resting period allows any remaining flour particles to fully absorb liquid and ensures your final texture is perfectly smooth. Skim off any excess fat that rises to the surface during this time.
Taste and adjust the seasoning with salt and pepper as needed. For deeper flavor development, consider adding a splash of Worcestershire sauce or a pinch of dried herbs that complement your main dish. Strain through a fine-mesh sieve if you desire an ultra-smooth texture, though proper technique should eliminate the need for this step.
Hold and Serve Properly
Transfer the finished gravy to a warmed gravy boat or insulated container. To maintain ideal serving temperature and consistency, keep the gravy covered and in a warm place—either in a 200°F oven or over a warm water bath. Gravy can hold successfully for up to 30 minutes using these methods.
If the gravy thickens too much while holding, thin it with additional warm broth rather than water to maintain flavor intensity. Serve immediately for best texture and flavor. For make-ahead situations, cool completely before refrigerating, then reheat gently with additional liquid as needed—flour-thickened gravy will continue to thicken as it cools and reheats.
Tips and Common Mistakes for Perfect Flour-Thickened Gravy
Mastering the art of flour-thickened gravy requires attention to detail at each critical stage of the process. These professional insights will help you achieve consistently smooth, flavorful results.
Roux Development: The 1-2 minutes spent cooking your roux in Step 1 is non-negotiable for flavor development. This brief cooking time transforms raw flour’s starchy taste into a nutty foundation. Watch for the color to shift from pale white to light golden – this visual cue indicates the flour’s starches have properly gelatinized. Constant stirring prevents scorching, which would introduce bitter notes to your final gravy.
Liquid Temperature Control: Maintaining the 180°F liquid temperature specified in Step 2 is crucial for proper starch activation. Use an instant-read thermometer to verify your broth temperature before incorporation. Liquid that’s too hot will cause the flour to form stubborn lumps, while liquid that’s too cool won’t properly activate the thickening process. The gradual ¼ cup additions allow the starch molecules to evenly disperse and hydrate.
Simmering Technique: During the 5-7 minute simmer in Step 3, focus on maintaining a gentle, consistent heat at medium-low. This extended cooking time allows the flour particles to fully absorb liquid and reach their maximum thickening potential. Pay particular attention to the pan’s edges where heat concentration is highest – this is where gravy tends to thicken first and may require additional stirring to prevent scorching.
Holding and Reheating: The 30-minute holding window in Step 5 provides valuable flexibility for meal timing. When reheating refrigerated gravy, use a double boiler method rather than direct heat. This gentle approach prevents the flour’s starch molecules from breaking down, which would compromise the gravy’s body and sheen. Always thin with additional broth rather than water to maintain the original flavor intensity.
Pro Tips for Flour To Thicken Gravy
- Mastering the art of flour-thickened gravy requires attention to detail at each critical stage of the process. These …
- Roux Development: The 1-2 minutes spent cooking your roux in Step 1 is non-negotiable for flavor development. This br…
- Liquid Temperature Control: Maintaining the 180°F liquid temperature specified in Step 2 is crucial for proper starch…
Frequently Asked Questions
How much flour do I need to thicken 1 cup of gravy?
For 1 cup of gravy, start with 1–2 tablespoons of all-purpose flour. Mix it with equal parts cold water or broth to make a slurry before stirring into hot gravy. Too much flour can make gravy pasty—add gradually and simmer 2–3 minutes to check thickness. Pro tip: Cornstarch (1 tbsp) works too but requires less!
Can I add flour directly to hot gravy without lumps?
Nope! Direct flour = clumpy disaster. Always mix flour with cold liquid first (water, broth, or milk) to create a smooth slurry. Whisk vigorously while pouring into hot gravy, then simmer 1–2 minutes to activate the thickening power. A fine-mesh strainer can rescue lumps if needed.
How long does it take for flour to thicken gravy?
Flour needs 2–5 minutes of gentle simmering to reach full thickness. Stir frequently to avoid scorching. If it’s still thin, mix a bit more slurry (1:1 flour-liquid) and repeat. Patience pays off! Rushing with high heat can make gravy taste raw or gluey.
What’s a good flour substitute for thickening gravy?
Try these swaps (per 1 cup gravy):
- Cornstarch: 1 tbsp (mix with cold water; thicker but clearer).
- Arrowroot: 1–2 tsp (glossy finish, great for gluten-free).
- Instant mashed potatoes: 1–2 tbsp (adds creaminess).
Note: Cornstarch gravy can’t be boiled—it thins out!
Why does my flour-thickened gravy taste like raw flour?
Undercooking is the culprit! Flour needs at least 2–3 minutes of simmering to lose its raw taste. If it’s still floury, keep cooking on low heat, stirring often. Too thick? Thin with broth. Bonus fix: A pinch of baking soda (⅛ tsp) can neutralize raw flavors in a pinch.
Mastering the art of thickening gravy with flour is simpler than you think! With the right flour-to-liquid ratio, a little patience, and these foolproof techniques, you’ll say goodbye to lumps and hello to silky, rich gravy every time. 🎉 Whether it’s for a holiday feast or a weeknight dinner, your dishes will shine with that perfect, velvety finish.
Ready to put your new skills to the test? Grab a whisk and try it out on your next meal—your taste buds (and dinner guests) will thank you! For even more gravy magic, experiment with alternative thickeners like cornstarch or arrowroot next.

Trained in classic French technique but raised on slow-cooked ribs and spicy rubs, she blends culinary skill with smoke and soul.
- Recipe for Boneless Pork Chops in Cast Iron Skillet: Sear and Baste to Juicy Perfection - October 3, 2026
- Recipe for Boneless Cross Rib Roast: Slow-Roasted Beef with Herb Crust - October 3, 2026
- Hamburgers in Sauce Recipe Crock Pot: Slow-Cooked Savory Delight - October 3, 2026