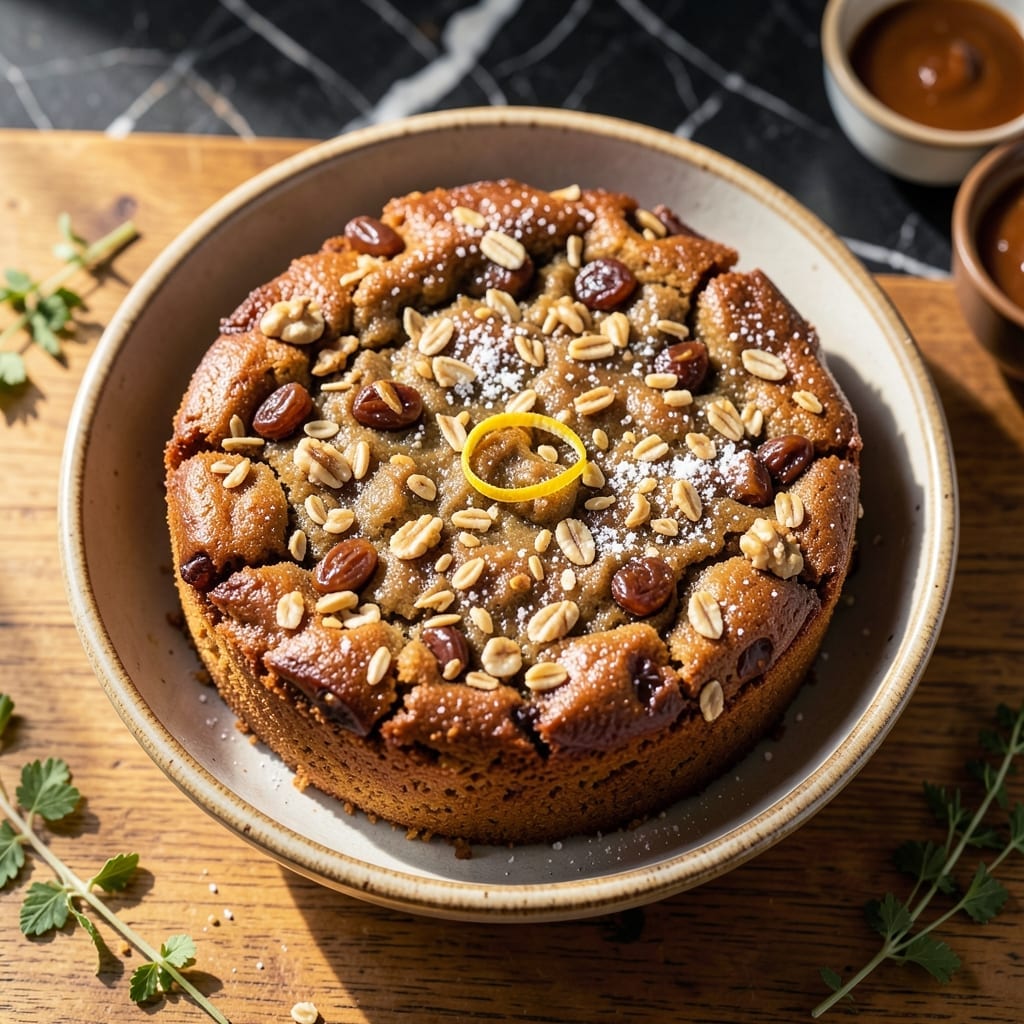
This Filipino dessert holds a special place in my kitchen, connecting me to my grandmother’s handwritten cards. It balances sweet dates with a buttery crumb topping that’s impossible to resist.
I’ve perfected the technique over years of testing, ensuring the base stays moist while the topping achieves that perfect golden crisp. The dates create pockets of caramelized sweetness that contrast beautifully with the crumbly texture above.
What emerges from the oven is a treat that’s rich without being heavy, with layers of flavor that improve as it cools. The aroma alone will transport you to a Filipino bakery, but the taste proves it’s even better homemade.
Serve warm with coffee for the full experience. Here’s how to bake this tradition.
Ingredients for Food for the Gods Recipe Filipino Style
Simple pantry items plus dates and butter create this nostalgic treat with a crispy topping.
| Ingredient | Amount | Notes |
|---|---|---|
| Pitted Dates 🌴 | 1 ½ cups | Chopped, packed firmly |
| All-Purpose Flour 🌾 | 1 ½ cups | Sifted for lightness |
| Granulated Sugar 🍚 | ¾ cup | Divided between base and topping |
| Brown Sugar 🟤 | ½ cup | Light or dark variety |
| Unsalted Butter 🧈 | 1 cup | Cold, cubed for topping |
| Large Eggs 🥚 | 2 whole | Room temperature, beaten |
| Baking Soda 🧂 | 1 tsp | For slight lift in base |
| Vanilla Extract 🌿 | 1 tsp | Pure extract preferred |
| Salt 🧂 | ¼ tsp | Balances sweetness in topping |
| Walnuts 🌰 | ¾ cup | Chopped, optional for crunch |
| Old-Fashioned Oats 🥣 | ½ cup | For topping texture |
[recipe_ingredient_scaler]
The dates are key here—Medjool from Trader Joe’s or Costco are my go-to for their natural sweetness and soft texture. Look for plump, glossy ones (not dried out or sugar-coated). The butter should be high-quality, like Plugrá or Kerrygold, since it’s the star of that crumb topping. For the flour, any all-purpose works, but I sift mine for a lighter base.
No walnuts? Pecans or almonds add a similar crunch. Short on brown sugar? Coconut sugar at a 1:1 ratio works in a pinch. The oats can be quick oats if that’s what you’ve got (texture will be slightly finer). For a richer flavor, swap half the butter for coconut oil—just keep it cold when mixing.
This stays fresh in an airtight container for 5 days at room temp. For longer storage, freeze slices for up to 3 months. Reheat briefly to restore that crisp topping (worth the extra minute).
Why You’ll Love This Recipe
- One Bowl Wonder: I mix everything in a single bowl—no fancy equipment, just dates, flour, sugars, and butter coming together effortlessly.
- Sweet Caramel Magic: The brown sugar and butter create this rich, caramelized depth that makes the dates taste even more indulgent.
- Holiday Staple: I bring this to every potluck and it’s always the first to disappear—great for gifting too.
- Budget Friendly Batch: A handful of pantry staples makes a big tray, and honestly, it tastes better the next day if there are any left.
Step-by-Step Instructions for Food for the Gods Filipino Style
This classic dessert comes together easily with a rich date base and crumbly buttery topping.
Step 1: Prepare the Date Base
Preheat your oven to 350°F and grease an 8×8-inch baking pan. In a food processor, blend the 1.5 cups Pitted Dates until finely chopped and pasty. This creates the signature sweet, sticky foundation.
Transfer the dates to a bowl and stir in 0.75 cup Granulated Sugar, 1.5 cups All-Purpose Flour, 1 tsp Baking Soda, 2 whole Large Eggs, and 1 tsp Vanilla Extract. Mix until just combined—the batter will be thick and slightly sticky. Press this evenly into your prepared pan.
Step 2: Create the Buttery Crumb Topping
In a separate bowl, combine 0.5 cup Brown Sugar, 0.75 cup Walnuts, 0.5 cup Old-Fashioned Oats, and 0.25 tsp Salt. These dry ingredients add texture and balance the sweetness perfectly.
Add the 1 cup Unsalted Butter (cold and cubed) to the bowl. Use your fingers or a pastry cutter to work the butter into the dry mixture until it resembles coarse crumbs with pea-sized pieces. This step ensures a crisp, golden topping with every bite.
Step 3: Assemble and Bake to Golden Perfection
Sprinkle the crumb topping evenly over the date base, pressing down lightly so it adheres. Bake in the preheated oven for 30-35 minutes or until the top is deep golden brown and the edges pull slightly away from the pan.
Check at the 30-minute mark—if the center still looks underdone, give it another 5 minutes. The topping should be crisp and the base set but still tender. A toothpick inserted in the center should come out with a few moist crumbs, not wet batter.
Step 4: Cool and Serve
Remove from the oven and let it cool in the pan for 15 minutes before slicing. This allows the base to set properly so it doesn’t crumble when cut. The aroma of warm dates and buttery topping will fill your kitchen.
Cut into squares while still slightly warm for clean edges. Serve at room temperature for the best texture—the crumb topping stays crisp while the date base remains moist and fudgy. This dessert keeps well in an airtight container for up to 3 days.
Pro Tips For Making Food For The Gods Recipe Filipino Style
- Toast the Flour: Lightly toasting the all-purpose flour in a dry pan for 2-3 minutes removes the raw taste and adds a subtle nuttiness that complements the dates beautifully.
- Soak the Dates: Soak pitted dates in warm water for 10 minutes before chopping—they’ll soften evenly and blend better into the batter without clumping.
- Cream Butter Thoroughly: Beat the unsalted butter with both sugars until pale and fluffy, about 4-5 minutes; this step ensures a tender, melt-in-your-mouth texture in the final bars.
- Check at 25 Minutes: Ovens vary, so start checking for doneness at 25 minutes—overbaking dries out the edges while the center stays gooey, and no one wants crumbly Food for the Gods.
Essential Equipment for food for the gods recipe filipino style
Baking Pan Essentials
An 8×8-inch baking pan is ideal for this recipe, giving you the perfect thickness for both base and topping. I prefer light-colored metal pans as they prevent over-browning on the bottom. Glass pans work too but may require 2-3 minutes extra baking time. 💡
Food Processor Necessity
For the date base, a food processor makes quick work of chopping the dates into a paste. I use my Cuisinart 7-cup model – it handles the sticky dates without straining. If you don’t have one, finely chop by hand, but expect to spend 10-15 extra minutes.
Pastry Tools
A pastry cutter or your fingertips are perfect for working the butter into the dry ingredients. I love my OXO Good Grips cutter for keeping my hands clean. The goal is pea-sized crumbs for that signature crispy topping.
Mixing Bowls
Two medium mixing bowls are all you need – one for the base and one for the topping. I prefer stainless steel as they’re lightweight and easy to clean. Avoid plastic if working with warm ingredients, as it can retain odors.
Cooling Rack
After baking, transfer the pan to a wire cooling rack for even cooling. This prevents the bottom from getting soggy. I use a simple foldable rack from my local grocery store – nothing fancy needed. Let it cool for 15 minutes before slicing.
Measuring Tools
Accurate measurements matter here. I use Pyrex glass measuring cups for liquids and OXO scoops for dry ingredients. For the butter, cut directly from the stick using the wrapper’s markings for 1 cup precision.
Nutrition Facts
Frequently Asked Questions
Can I use a different pan size?
An 9×9-inch pan works but will yield thinner bars that bake faster. Reduce time by 5-7 minutes and watch closely. For thicker portions, a 9×13-inch pan doubles the recipe nicely.
Why did my topping turn out soggy?
This usually happens if the butter was too warm when mixed or the pan wasn’t fully preheated. Ensure butter stays cold and bake at 350°F until deep golden brown.
Can I make this gluten-free?
Yes! Swap the all-purpose flour for a 1:1 gluten-free blend. Add 1/2 tsp xanthan gum if your blend doesn’t include it. The texture will be slightly denser but still delicious.
How do I store leftovers?
Keep in an airtight container at room temperature for up to 5 days. For longer storage, freeze slices for 3 months. Reheat briefly to restore crispness.

Trained in classic French technique but raised on slow-cooked ribs and spicy rubs, she blends culinary skill with smoke and soul.
- Recipe for Boneless Pork Chops in Cast Iron Skillet: Sear and Baste to Juicy Perfection - October 3, 2026
- Recipe for Boneless Cross Rib Roast: Slow-Roasted Beef with Herb Crust - October 3, 2026
- Hamburgers in Sauce Recipe Crock Pot: Slow-Cooked Savory Delight - October 3, 2026