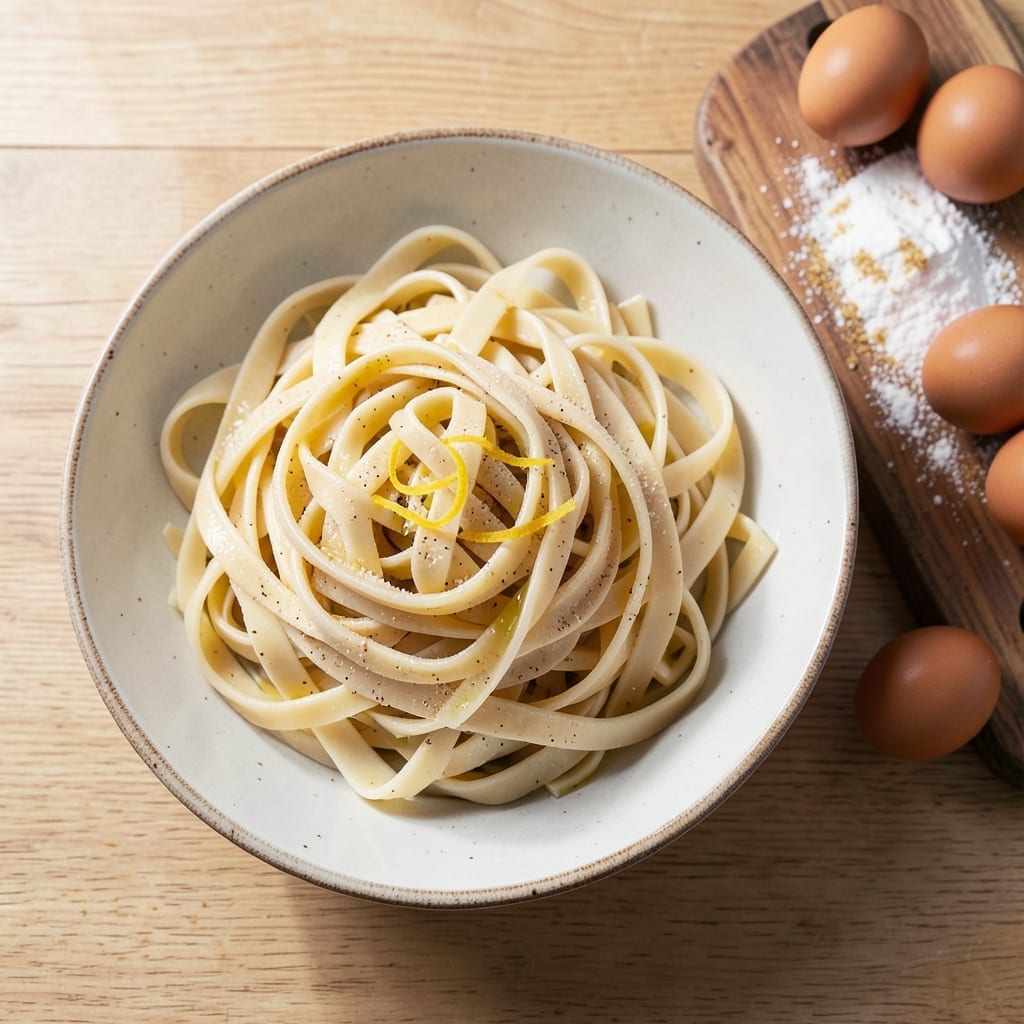
There’s nothing like the texture of fresh pasta—silky, tender, and ready in minutes with the right technique. I’ve perfected this method using a KitchenAid mixer to take the guesswork out of dough consistency.
The attachment does most of the work, rolling the dough into uniform sheets that cook evenly. A simple egg and flour mixture transforms into smooth ribbons that absorb sauce beautifully, making every bite exceptional.
What you’ll achieve is restaurant-quality pasta without the restaurant price or effort. The process is straightforward, and the results speak for themselves—perfectly al dente strands every time.
Once you try this, store-bought pasta will never taste the same. Here’s how to make it happen in your kitchen.
Ingredients for Fresh Pasta Recipe Kitchenaid
Six simple ingredients transform into silky, restaurant-quality pasta ribbons with your KitchenAid mixer.
| Ingredient | Amount | Notes |
|---|---|---|
| All-Purpose Flour 🌾 | 3 cups | Plus extra for dusting work surface |
| Large Eggs 🥚 | 4 whole | Room temperature preferred |
| Semolina Flour 🌾 | ½ cup | For texture and authenticity |
| Olive Oil 🫒 | 1 tbsp | Extra-virgin for richness |
| Sea Salt 🧂 | 1 tsp | Fine grain preferred |
| Water 💧 | 1 tbsp | As needed for dough consistency |
[recipe_ingredient_scaler]
The flour is the foundation here. King Arthur all-purpose is my go-to for its consistent protein content (11.7%), but any unbleached all-purpose works. Semolina adds that authentic bite—look for it in the baking aisle at Whole Foods or any well-stocked grocery store. Room temperature eggs incorporate better, so pull them out 30 minutes before starting.
No semolina? Replace with more all-purpose flour—the texture will be slightly softer but still delicious. For a richer dough, substitute 1 egg yolk for one whole egg. The olive oil is optional, but it adds tenderness. If your dough feels dry, add water 1 tsp at a time—don’t overdo it. The KitchenAid pasta attachment makes this foolproof.
Fresh pasta cooks in 2-3 minutes, so keep an eye on it. Store uncooked dough wrapped tightly in plastic for up to 24 hours in the fridge, or freeze for 1 month. Cooked pasta? Toss with oil to prevent sticking and use within 3 days.
Why You’ll Love This Recipe
- KitchenAid Magic: The stand mixer does all the kneading—just dump in the flour, eggs, and olive oil, then walk away.
- Rich, Toasty Depth: Semolina adds this nutty bite that store-bought pasta just can’t touch. Honestly, it’s the reason I make it every week.
- Freezer Superpower: I double the batch, freeze half, and have dinner ready in 3 minutes on busy nights.
- Penny-Pincher’s Win: A pound of fresh pasta costs me less than $2 in ingredients. Between us, it’s my secret for fancy meals on a budget.
Step-by-Step Instructions for Fresh Pasta
Here’s the method. Straightforward, tested, works every time.
Step 1: Combine the Dry and Wet Ingredients
On a clean work surface or in a large bowl, mound the 3 cups All-Purpose Flour and 0.5 cup Semolina Flour. Create a well in the center large enough to hold all the wet ingredients without spilling over. This traditional method gives you better control over the dough’s consistency.
Add the 4 whole Large Eggs, 1 tbsp Olive Oil, 1 tsp Sea Salt, and 1 tbsp Water into the well. The eggs should be at room temperature to ensure even incorporation. Using a fork, begin gently whisking the wet ingredients while gradually pulling in flour from the edges of the well.
Step 2: Knead the Dough to Smooth Perfection
Once the mixture becomes too stiff for the fork, switch to your hands. Begin kneading the dough, pressing down with the heel of your hand and pushing forward. Fold the dough over itself and rotate it a quarter turn after each push. This motion develops the gluten strands that give pasta its chewy texture.
Continue kneading for 8-10 minutes until the dough feels smooth and elastic. If it feels too dry, add a few drops more water. If it’s too sticky, incorporate a bit more all-purpose flour. You’ll know it’s ready when you can poke the dough and it slowly springs back without sticking to your finger.
Step 3: Rest the Dough for Optimal Texture
Shape the dough into a ball and wrap it tightly in plastic wrap. Let it rest at room temperature for 30 minutes. This relaxation period allows the gluten to unwind, making the dough more pliable and easier to roll out thinly without springing back.
During this rest, the flour fully hydrates and the dough becomes more homogeneous. Don’t skip this step—it’s the difference between tough, resistant pasta and silky, tender ribbons. The dough should feel slightly tacky but not sticky when properly rested.
Step 4: Roll and Cut Using the KitchenAid Attachment
Divide the rested dough into 4 equal portions and flatten each into a rough rectangle about ½-inch thick. Set your KitchenAid mixer to speed 4 and feed one dough portion through the pasta roller attachment starting at the widest setting. Fold the resulting sheet in thirds like a letter and repeat the process two more times.
Gradually decrease the roller setting, passing the dough through once or twice at each level until you reach your desired thickness (typically setting 5 or 6 for fettuccine). Feed the sheet through the cutting attachment of your choice. Dust the cut pasta lightly with extra all-purpose flour to prevent sticking.
Lay the fresh pasta on a floured surface or hang it on a drying rack for 10-15 minutes before cooking. The pasta is ready when it feels slightly dry to the touch but still pliable. Cook immediately or refrigerate for up to 24 hours in an airtight container.
Pro Tips For Making Fresh Pasta Recipe Kitchenaid
- Knead Just Enough: Stop mixing as soon as the dough comes together—overworking it in the Kitchenaid makes the pasta tough. I learned this the hard way after my first three batches turned out chewy.
- Use Room-Temp Eggs: Take your eggs out of the fridge 30 minutes before starting. Cold eggs make the dough seize up and fight the flour, and nobody wants that struggle.
- Skip the Dusting Flour: Resist the urge to keep adding flour if the dough feels sticky—the semolina in the recipe will tighten things up as it rests. Too much extra flour dulls the flavor.
- Rest Before Rolling: Wrap the dough in plastic and let it sit for at least 30 minutes at room temp. Sounds weird, but it works: the gluten relaxes, making it roll out smooth as silk through the Kitchenaid attachment.
Make-Ahead Tips for This fresh pasta recipe kitchenaid
Prep Ahead Strategy
I always make my pasta dough the night before—I find it develops even better flavor and texture. After kneading, wrap the dough tightly in plastic wrap and refrigerate for up to 24 hours. The cold rest actually enhances gluten development. 💡
Freezing Uncooked Dough
For longer storage, divide your dough into portions and freeze in ziplock bags for up to 1 month. Thaw overnight in the fridge before rolling. I learned this trick at the Portland farmers market from an Italian nonna who swears by it.
Drying Fresh Pasta
After cutting, hang your pasta on a drying rack for 1-2 hours until slightly leathery. This works great for nest-shaped portions. Store dried pasta in airtight containers at room temperature for up to 3 days before cooking.
Cooking from Cold
If using refrigerated dough, let it sit at room temperature for 30 minutes before rolling. Cold dough cracks when passed through the KitchenAid attachment. I speak from experience—my first attempt looked like a modern art project!
Pre-Cut Convenience
Cut and dust your pasta with flour, then lay flat on a baking sheet. Freeze for 1 hour, then transfer to bags. This prevents sticking and lets you cook straight from frozen—just add 1 extra minute to boiling time.
Sauce Pairing Prep
Make your sauce while the pasta cooks—fresh pasta takes just 2-3 minutes to boil. I keep a jar of my summer tomato sauce from the garden ready in the pantry. The timing works perfectly for a stress-free dinner. 🌟
Nutrition Facts
Frequently Asked Questions
Do I need a special attachment for my KitchenAid?
Yes, you’ll need the pasta roller and cutter attachments. These clip onto your mixer’s power hub. The roller flattens the dough, while cutters shape it into fettuccine, spaghetti, or other styles.
Why does my dough keep springing back when rolling?
This usually means the gluten needs more rest. Let the dough sit covered for 30 minutes before rolling. If it persists, your dough may be too dry—add water 1 tsp at a time.
Can I make this without semolina flour?
Replace it with more all-purpose flour. Your pasta will be slightly softer but still delicious. Semolina just adds a traditional bite and texture.
How long should I cook fresh pasta?
Fresh pasta cooks much faster than dried—usually 2-3 minutes in boiling water. Test for doneness by tasting; it should be tender but still have a slight bite.

Trained in classic French technique but raised on slow-cooked ribs and spicy rubs, she blends culinary skill with smoke and soul.
- Recipe for Boneless Pork Chops in Cast Iron Skillet: Sear and Baste to Juicy Perfection - October 3, 2026
- Recipe for Boneless Cross Rib Roast: Slow-Roasted Beef with Herb Crust - October 3, 2026
- Hamburgers in Sauce Recipe Crock Pot: Slow-Cooked Savory Delight - October 3, 2026