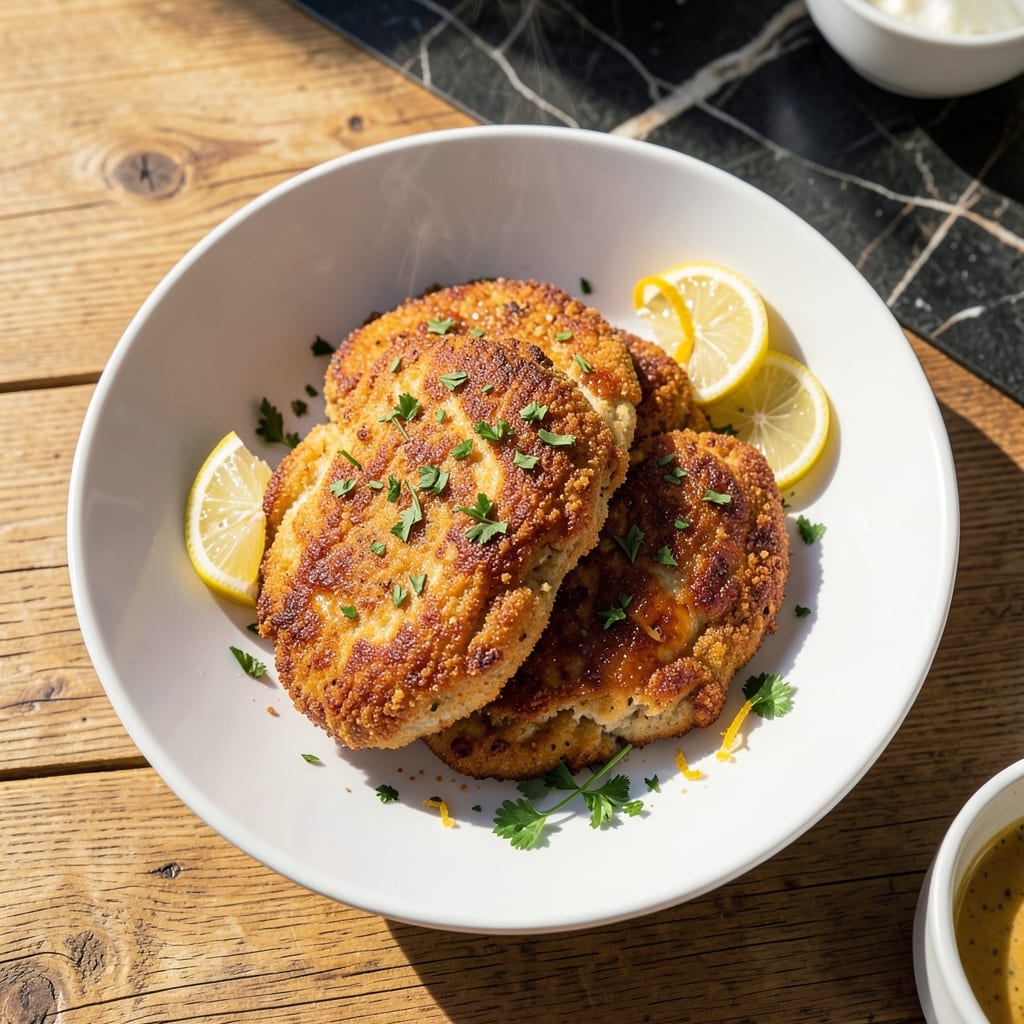
This method delivers perfectly crispy chicken without buttermilk, using simple pantry ingredients. The secret lies in a well-seasoned flour coating and precise frying technique.
I developed this approach after realizing many home cooks don’t keep buttermilk on hand. The result is golden, crunchy chicken with juicy interiors, achieved through careful temperature control.
Each piece emerges with a shatteringly crisp coating that stays intact. The process requires just basic kitchen staples and standard frying equipment.
This technique proves you can achieve restaurant-quality fried chicken without specialty ingredients. The method is straightforward yet yields impressive results every time.
Ingredients for Fried Boneless Chicken Breast Recipe Without Buttermilk
Standard pantry staples create restaurant-quality crispy chicken at home with zero specialty items.
| Ingredient | Amount | Notes |
|---|---|---|
| Boneless Chicken Breast 🍗 | 1 ½ lb | Pounded to even thickness |
| All-Purpose Flour 🌾 | 2 cups | For dredging and coating |
| Cornstarch 🌾 | ½ cup | For extra crispiness |
| Baking Powder 🧂 | 1 tbsp | For lift in coating |
| Paprika 🌶️ | 1 tbsp | Sweet or smoked variety |
| Garlic Powder 🧄 | 1 tbsp | Not garlic salt |
| Onion Powder 🧅 | 1 tbsp | For depth of flavor |
| Salt 🧂 | 1 ½ tsp | Kosher or sea salt preferred |
| Black Pepper 🌶️ | 1 tsp | Freshly ground preferred |
| Cayenne Pepper 🔥 | ¼ tsp | Adjust for heat preference |
| Large Eggs 🥚 | 2 whole | For binding coating |
| Water 💧 | ½ cup | For egg wash consistency |
| Vegetable Oil 🫒 | 4 cups | For deep frying |
[recipe_ingredient_scaler]
The chicken breast quality matters most here. Optimal results come from fresh, not previously frozen pieces. Pounding to even thickness ensures uniform cooking and prevents dry spots. Boneless, skinless is critical—bone-in will not crisp the same way. For the flour, all-purpose works perfectly, but bread flour can add extra crunch if you have it on hand.
No buttermilk? The egg and water mixture replicates its binding and tenderizing properties. For a spicier kick, increase cayenne to half a teaspoon. Swap paprika for smoked paprika for deeper flavor. The cornstarch is non-negotiable—it’s what gives that shatteringly crisp texture. If you’re out of cornstarch, arrowroot powder works at the same ratio.
Fry in small batches to avoid oil temperature drops. Store cooked chicken on a wire rack to maintain crispiness. Leftovers keep 3-4 days refrigerated, though they’re best eaten fresh. Reheat in a 375°F oven for 10-12 minutes to restore some crunch.
Why You’ll Love This Recipe
- No Buttermilk Needed: I love that this skips the buttermilk step—just flour, cornstarch, and spices for that crispy coating.
- Crispy Every Time: The cornstarch and baking powder combo gives it that golden crunch without any sogginess.
- Feeds the Fam: One batch makes enough for dinner plus leftovers for sandwiches the next day.
- Pantry Staples: All-purpose flour and paprika are already in my cupboard, so no extra shopping.
Step-by-Step Instructions for Fried Boneless Chicken Breast Without Buttermilk
This method delivers consistently crispy results with a simple, no-fuss approach.
Step 1: Prepare and Season the Chicken
Begin by pounding the 1.5 lb Boneless Chicken Breast to an even ½-inch thickness between two sheets of plastic wrap. This ensures even cooking and prevents dry spots. Season both sides generously with 1.5 tsp Salt, 1 tsp Black Pepper, and 0.25 tsp Cayenne Pepper for a subtle kick.
The uniform thickness is crucial—thicker parts take longer to cook, often leading to over-browning on the outside while the inside remains undercooked. Let the seasoned chicken rest for 10 minutes to allow the spices to adhere.
Step 2: Create the Crispy Coating
In a large bowl, whisk together the 2 cups All-Purpose Flour, 0.5 cup Cornstarch, 1 tbsp Baking Powder, 1 tbsp Paprika, 1 tbsp Garlic Powder, and 1 tbsp Onion Powder. The cornstarch is the secret to extra crunch, while the baking powder adds lift for a lighter texture.
In a separate bowl, beat the 2 whole Large Eggs with the 0.5 cup Water until fully combined. This egg wash acts as the glue for the coating. Dip each piece of chicken into the egg wash, allowing excess to drip off, then dredge in the flour mixture, pressing gently to ensure full coverage.
Step 3: Heat the Oil and Fry to Golden Perfection
Pour the 4 cups Vegetable Oil into a deep, heavy-bottomed pot or Dutch oven, ensuring it’s at least 2 inches deep. Heat over medium-high heat until the oil reaches 350°F on a deep-fry thermometer. Maintaining the correct temperature is key—too cool, and the chicken will absorb oil; too hot, and the outside will burn before the inside cooks.
Carefully lower 2-3 pieces of chicken into the oil at a time to avoid overcrowding, which can drop the oil temperature. Fry for 6-8 minutes per side until the coating is deep golden brown and the internal temperature reaches 165°F. Use tongs to turn the chicken only once for even browning.
Step 4: Drain and Rest for Maximum Crispiness
Transfer the fried chicken to a wire rack set over a baking sheet or a paper towel-lined plate. The wire rack allows air to circulate, preventing steam from making the coating soggy. Avoid stacking the pieces—this traps heat and moisture, compromising the texture.
Let the chicken rest for 5 minutes before serving. This brief rest allows the juices to redistribute, ensuring the meat stays moist while the coating remains shatteringly crisp. The contrast of the crunchy exterior and tender interior is what makes this dish unforgettable.
Pro Tips For Making Fried Boneless Chicken Breast Recipe Without Buttermilk
- Pound the Breast: Use the flat side of a meat mallet to pound the chicken to an even ½-inch thickness—this guarantees even cooking and prevents dry, overdone edges.
- Rest the Meat: Let the breaded chicken rest for 10 minutes before frying; the flour and cornstarch absorb moisture and cling better, so you get that perfect crunch.
- Skip the Overcrowding: Fry in batches with at least an inch of space between pieces, or the oil temperature drops and you’ll end up with greasy, soggy chicken.
- Use Cold Chicken: Take the chicken straight from the fridge to the hot oil—cold meat forms a tighter seal with the coating, locking in juices and keeping it tender.
Storing and Reheating This Dish
Refrigerator Storage
Let your chicken cool completely, then place in an airtight container with a paper towel to absorb moisture. Store in the fridge at 40°F or below for up to 3-4 days. I use glass containers from New Seasons Market for easy visibility. ❄️
Freezer Storage
For longer storage, wrap each piece individually in plastic wrap, then place in a freezer bag. Squeeze out excess air to prevent freezer burn. This keeps well for up to 3 months. Label with the date—I always forget when I froze things!
Oven Reheating
Preheat your oven to 375°F and place chicken on a wire rack over a baking sheet. Reheat for 10-12 minutes until crispy and internal temp hits 165°F. This method restores the most crunch of any reheating option. 🔥
Air Fryer Method
Spray chicken lightly with oil and air fry at 375°F for 5-6 minutes, flipping halfway. This works great for smaller batches and gives impressive results. I love this for quick weeknight dinners with Lily.
Microwave Option
Place chicken on a microwave-safe plate with a damp paper towel. Heat on 70% power for 1-2 minutes, checking frequently. Note this method will soften the coating, but it’s the fastest option for busy days.
Nutrition Facts
Frequently Asked Questions
Can I use chicken thighs instead of breasts?
Use bone-in, skinless thighs for juicier results. Adjust cooking time to 8-10 minutes per side since thighs cook slower. The coating works the same way.
Why does my coating fall off during frying?
This usually happens if the chicken is wet before dredging. Pat it completely dry with paper towels first. Also, let the egg wash drip off for 10 seconds before coating.
How do I keep it crispy for a picnic?
Transport on a wire rack in a single layer. Avoid covering until ready to eat. For best results, fry 1 hour before serving and keep warm in a 200°F oven.
Can I bake this instead of frying?
Yes, bake at 400°F for 20-25 minutes, flipping halfway. Spray with oil for extra crispiness. The texture won’t be identical but still delicious.

Trained in classic French technique but raised on slow-cooked ribs and spicy rubs, she blends culinary skill with smoke and soul.
- Recipe for Boneless Pork Chops in Cast Iron Skillet: Sear and Baste to Juicy Perfection - October 3, 2026
- Recipe for Boneless Cross Rib Roast: Slow-Roasted Beef with Herb Crust - October 3, 2026
- Hamburgers in Sauce Recipe Crock Pot: Slow-Cooked Savory Delight - October 3, 2026