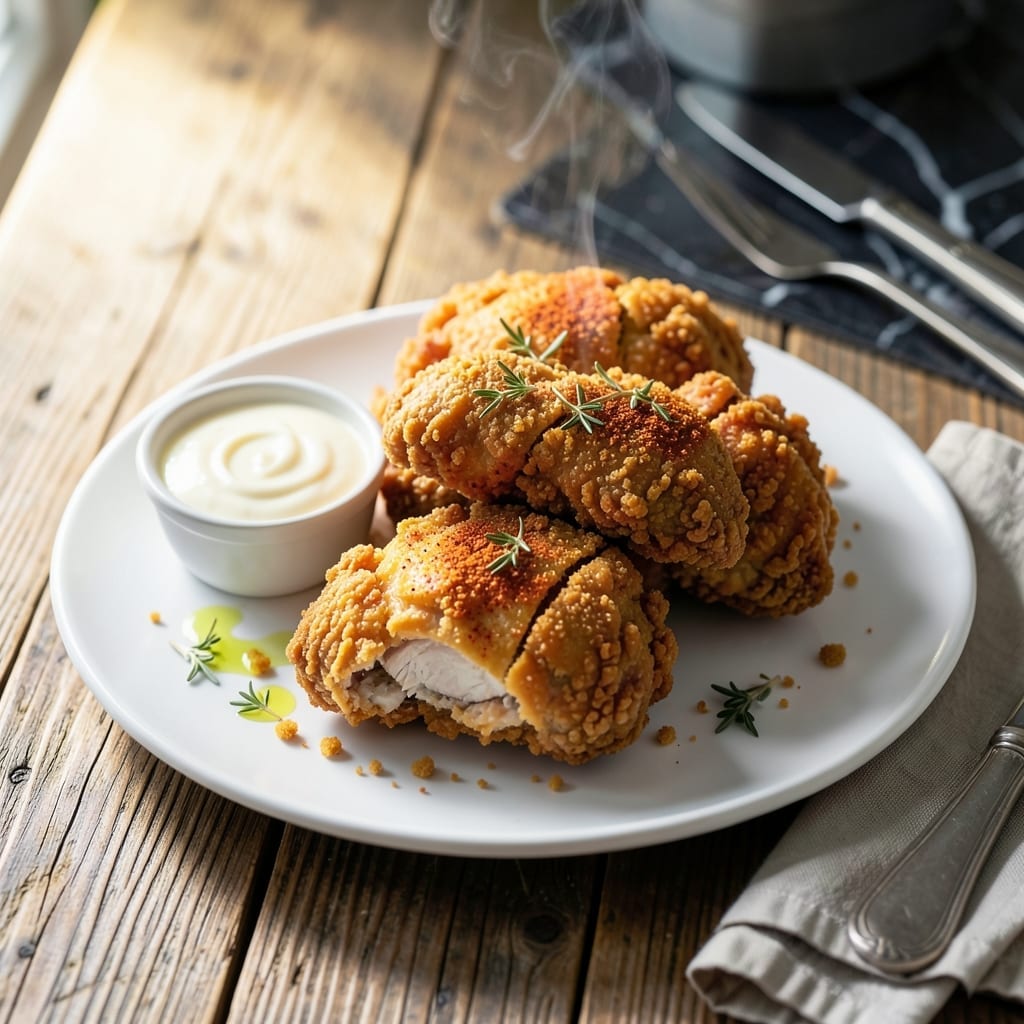
This batter recipe transforms ordinary chicken into crispy, golden perfection with a spice crust that stays shatteringly crunchy even hours after frying. I developed it through years of trial and error, perfecting the ratio of flour to liquid for maximum adherence and texture.
The secret lies in the double-dredging method and a precise blend of spices that creates layers of flavor in every bite. Unlike store-bought mixes, this homemade version lets you control the seasoning and crispness, ensuring restaurant-quality results at home without special equipment.
You’ll achieve a coating that crackles with the first bite, revealing juicy meat underneath. The batter clings beautifully to the chicken, creating those coveted ridges and peaks that make fried chicken so satisfying. Each piece emerges from the oil with a uniform, appetizing color.
This method works for any cut of chicken and scales easily for feeding a crowd. The technique is straightforward enough for beginners but delivers results that impress experienced cooks.
Ingredients for Fried Chicken Batter Recipe with Flour
These carefully balanced ingredients create a batter that delivers shatteringly crisp results every time.
| Ingredient | Amount | Notes |
|---|---|---|
| Chicken Pieces 🍗 | 2 ½ lb | Bone-in, skin-on preferred for best texture |
| All-Purpose Flour 🌾 | 2 cups | Divided for double-dredging method |
| Cornstarch 🌽 | ½ cup | For extra crispiness in coating |
| Large Eggs 🥚 | 2 whole | Beaten for binding batter |
| Buttermilk 🥛 | 1 ½ cups | Full-fat for richness and tang |
| Paprika 🌶️ | 1 tbsp | Sweet or smoked for color and depth |
| Garlic Powder 🧄 | 1 tbsp | Freshly ground if possible |
| Onion Powder 🧅 | 1 tbsp | Balances savory profile |
| Fine Sea Salt 🧂 | 1 tbsp | Diamond Crystal preferred for even distribution |
| Freshly Ground Black Pepper 🌶️ | 1 tsp | Coarse grind for texture |
| Cayenne Pepper 🔥 | ½ tsp | Adjust for desired heat level |
| Dried Thyme 🍃 | 1 tsp | Crushed between fingers to release oils |
| Dried Oregano 🌿 | 1 tsp | Mediterranean variety preferred |
| Neutral Oil 🫒 | 4 cups | For deep frying, peanut or vegetable oil |
[recipe_ingredient_scaler]
The flour to cornstarch ratio is critical for maximum crunch. King Arthur Flour is ideal for all-purpose, but any unbleached variety works. Cornstarch (look for Argo or Clabber Girl) adds that extra snap. Buttermilk should be thick and tangy—Cultured buttermilk from Whole Foods is consistently high quality. For the chicken, bone-in, skin-on thighs and drumsticks yield the juiciest results due to the fat content protecting the meat during frying.
No buttermilk? Mix 1.5 cups milk with 1.5 tbsp lemon juice or vinegar and let sit for 10 minutes. Out of cornstarch? Instant mashed potato flakes can substitute in a pinch. For a spicier kick, add 1/2 tsp smoked paprika or a pinch of chipotle powder. The eggs ensure the coating adheres properly—don’t skip them. If using boneless chicken, reduce frying time by 2-3 minutes per side to prevent drying out.
Store the battered chicken uncovered in the fridge for 30 minutes before frying to set the coating. Leftover batter can be refrigerated for 2 days (stir well before using). Once fried, chicken keeps in the fridge for 3-4 days but is best eaten fresh. Reheat in a 375°F oven for 10-12 minutes to restore crispness.
Why You’ll Love This Recipe
- Mix and Fry: I just dump flour, cornstarch, eggs, and buttermilk in a bowl—no fancy steps, just mix and coat.
- Crispy Outside, Juicy Inside: That buttermilk soak keeps the chicken tender while the flour-cornstarch crust fries up shatteringly crisp.
- Feeds the Crew: I’ve served this for Sunday dinner, game day, and even packed leftovers for lunch—it’s always a hit.
- Leftovers Reheat Well: Honestly, the chicken stays crispy even the next day if I reheat it in the oven.
Step-by-Step Instructions for Fried Chicken Batter
Master the double-dredging technique for an ultra-crispy, well-seasoned crust that stays put.
Step 1: Season and Prepare the Chicken
Pat the 2.5 lb chicken pieces completely dry with paper towels. This removes excess moisture that can prevent the coating from adhering properly. Season all over with 1 tbsp fine sea salt, 1 tsp freshly ground black pepper, 0.5 tsp cayenne pepper, and 1 tsp dried thyme.
I crush the dried thyme between my fingers as I sprinkle it—this releases the aromatic oils and ensures even distribution. Let the seasoned chicken rest at room temperature for 15 minutes while you prepare the coating, allowing the salt to begin penetrating the meat.
Step 2: Create the Wet and Dry Dredges
In a shallow dish, whisk together 2 cups all-purpose flour, 0.5 cup cornstarch, 1 tbsp paprika, 1 tbsp garlic powder, 1 tbsp onion powder, and 1 tsp dried oregano. The cornstarch is the secret to extra crunch—it creates a lighter, crispier texture than flour alone.
In a separate bowl, whisk 2 whole large eggs with 1.5 cups buttermilk until fully combined. The buttermilk’s acidity tenderizes the chicken while the fat adds richness. For the best texture, use full-fat buttermilk.
Step 3: Double-Dredge for Maximum Crispiness
Dip each piece of chicken into the buttermilk mixture, allowing excess to drip off for 5 seconds. Then dredge in the flour mixture, pressing firmly to adhere. Shake off excess and dip back into the buttermilk, then dredge in the flour mixture a second time.
This double-dredging creates a thick, craggy coating that fries up exceptionally crispy. Place the coated pieces on a wire rack set over a baking sheet. Let them rest for 10 minutes—this helps the coating set so it doesn’t slide off during frying.
Step 4: Fry to Golden Perfection
Heat 4 cups neutral oil in a deep, heavy pot to 350°F. Use a thermometer for accuracy—oil temperature is critical. The oil should come about halfway up the sides of the pot to allow for even cooking without crowding.
Fry the chicken in batches, being careful not to overcrowd the pot, for 12-15 minutes or until the coating is deep golden brown and the internal temperature reaches 165°F. Turn occasionally for even browning. The coating should be crisp and audibly crunch when pressed with tongs.
Transfer to a wire rack or paper towels to drain. The chicken should be golden and crispy all over, with no raw batter visible. Serve immediately while hot and at its peak crispiness.
Pro Tips For Making Fried Chicken Batter Recipe With Flour
- Chill the Chicken: Soak the chicken pieces in buttermilk for at least 4 hours—overnight if you can. I learned this the hard way when my first few batches had batter that just slid right off.
- Use Cold Batter: Mix your flour, cornstarch, eggs, and buttermilk just before frying and keep it cold. After burning three batches, I finally figured out that warm batter makes the coating gummy instead of crispy.
- Skip the Overcrowding: Fry in small batches so the oil temperature stays between 350-375°F. My grandmother swore by this, and she was right: too many pieces at once drops the temp and gives you soggy chicken.
- Double Dredge: Dip the chicken in flour first, then buttermilk, then back in flour before the final batter dip. Sounds weird, but it works—this extra step guarantees a thicker, crunchier crust every time.
Essential Equipment for This Dish
Deep Fryer Essentials
For home frying, I recommend a heavy-bottomed Dutch oven—my Lodge 5-quart handles the job perfectly. The thick walls maintain steady 350°F oil temperature, which is critical for even cooking. Avoid thin pots that create hot spots. 🔥
Temperature Control Tools
A candy or deep-fry thermometer is non-negotiable. I use the ThermoWorks Super-Fast for instant readings. Clip it to the pot side and monitor constantly—oil temp drops when you add chicken. 20-30 seconds of recovery time between batches is normal.
Dredging Station Setup
Use shallow, wide dishes for your flour and buttermilk mixtures. I prefer stainless steel mixing bowls from my local restaurant supply store. They’re durable, easy to clean, and the sloped sides help coat chicken evenly.
Draining Solutions
A wire rack set over a baking sheet is ideal for draining fried chicken. This allows air circulation on all sides, preventing soggy bottoms. Line the sheet with paper towels to catch drips. Never drain directly on paper towels alone.
Safety Equipment
Keep a fire extinguisher rated for grease fires nearby—never use water on oil fires. I also wear long oven mitts and an apron. Hot oil can splatter, so protect your skin. Safety first, always.
Optional Upgrades
For serious fryers, a countertop deep fryer with temperature control takes guesswork out. I’ve had good results with Cuisinart’s model. Still, a Dutch oven works just as well with proper attention. 💡
Nutrition Facts
Frequently Asked Questions
Can I use self-rising flour instead of all-purpose?
No, self-rising flour contains baking powder which can create an uneven texture. Stick with all-purpose flour for the best results. The neutral flavor and consistent protein content ensure proper crispiness.
Why does my batter fall off during frying?
This usually happens if the chicken wasn’t dry before dredging or didn’t rest after coating. Pat pieces completely dry and let them sit for 10 minutes after double-dredging to set the batter properly.
How do I keep the coating crispy longer?
Drain on a wire rack, not paper towels, to prevent steam from making it soggy. For leftovers, reheat in a 375°F oven for 10-12 minutes to revive the crunch.

Trained in classic French technique but raised on slow-cooked ribs and spicy rubs, she blends culinary skill with smoke and soul.
- Recipe for Boneless Pork Chops in Cast Iron Skillet: Sear and Baste to Juicy Perfection - October 3, 2026
- Recipe for Boneless Cross Rib Roast: Slow-Roasted Beef with Herb Crust - October 3, 2026
- Hamburgers in Sauce Recipe Crock Pot: Slow-Cooked Savory Delight - October 3, 2026