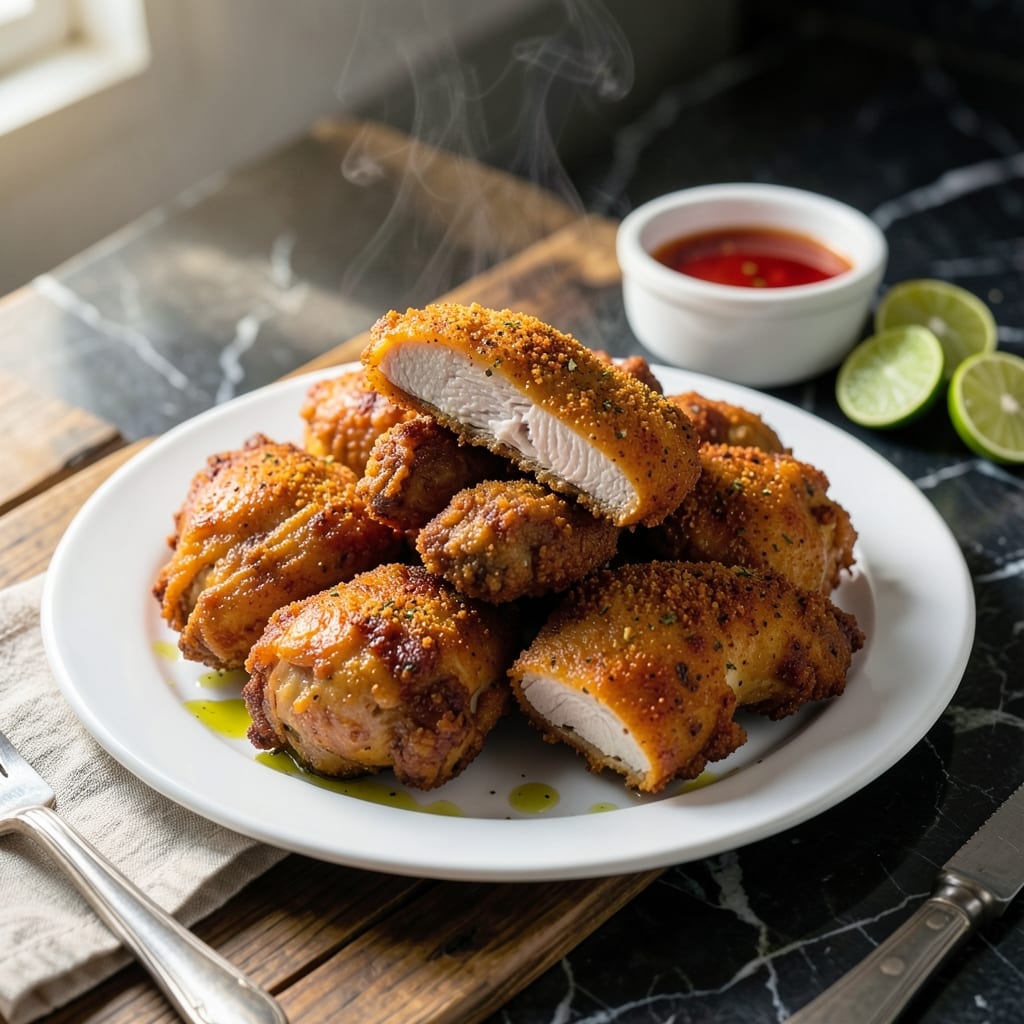
This Filipino-style breading delivers an irresistibly crispy coating that stays crunchy long after frying. The secret lies in a double-dredging method combined with local seasoning touches.
I’ve refined this technique through years of home cooking, ensuring every piece emerges golden and perfectly seasoned. The breading adheres beautifully, creating a thick, shatteringly crisp exterior that encases juicy meat.
The result is fried chicken with a texture that rivals any carinderia favorite—crunchy outside, tender inside. This method works for any cut, from wings to drumsticks.
Master this breading, and you’ll have a dish that brings authentic Pinoy flavor to your table every time.
Ingredients for Fried Chicken Breading Recipe Pinoy
Pantry staples plus a few Pinoy twists. Everything you need for that carinderia crunch.
| Ingredient | Amount | Notes |
|---|---|---|
| Chicken Pieces 🍗 | 2 lb | Wings, drumsticks, or thighs |
| All-Purpose Flour 🌾 | 2 cups | For initial dredging |
| Cornstarch 🌾 | ½ cup | For extra crispiness |
| Baking Powder 🧂 | 1 tbsp | Makes breading shatteringly crisp |
| Garlic Powder 🧄 | 2 tsp | For deep savory flavor |
| Onion Powder 🧅 | 2 tsp | Balances the seasoning |
| Ground Black Pepper 🌶️ | 1 ½ tsp | Freshly ground preferred |
| Paprika 🌶️ | 1 tbsp | Sweet or smoked for color |
| Salt 🧂 | 1 ½ tsp | Adjust to taste preference |
| Large Eggs 🥚 | 2 whole | For egg wash adhesion |
| Evaporated Milk 🥛 | ½ cup | For creamier breading |
| Panko Breadcrumbs 🍞 | 1 ½ cups | For final crispy layer |
| Calamansi Zest 🍋 | 1 tbsp | Filipino citrus touch (or lime zest) |
| Vegetable Oil 🫒 | 4 cups | For deep frying |
[recipe_ingredient_scaler]
The breading secret is in the double-dredge. Panko breadcrumbs give that signature shatter—Kikkoman brand is my go-to, but any Japanese-style works. Cornstarch is non-negotiable here (the good stuff, not the cake flour substitute). For the evaporated milk, Carnation is standard in Filipino kitchens, but any brand will do. Look for calamansi at Asian markets or sub lime zest in a pinch.
No calamansi? Lime or lemon zest at the same amount works fine. Swap panko for regular breadcrumbs if needed, but the texture won’t be as crisp. Out of evaporated milk? Whole milk plus a splash of cream gets close. The baking powder is key—don’t skip it. For gluten-free, swap the flour for rice flour, but the breading won’t cling as well.
Fry in batches so the oil temp stays hot. Leftover breading keeps in a sealed container for 1 week. Cooked chicken stays crispy for 2 days in the fridge—reheat in the oven, not microwave. Oil can be reused once if strained and stored cool.
Why You’ll Love This Recipe
- Minimal Fuss: I just mix flour, cornstarch, baking powder, and garlic powder—no fancy steps, no stress.
- That Garlic Crunch: Honestly, the garlic powder in the breading gives every bite that savory punch I crave.
- Feeds the Gang: Between us, this recipe stretches chicken pieces into a meal that satisfies the whole family.
- Budget Winner: One batch costs pennies compared to takeout, and leftovers? Still crispy the next day.
Step-by-Step Instructions for Crunchy Filipino-Style Chicken Breading
Here’s the foolproof method I use to get that signature pinoy crisp every single time.
Step 1: Season and Prepare the Chicken
Pat the 2 lb Chicken Pieces completely dry with paper towels—this ensures the breading adheres properly and creates maximum crunch. Season both sides generously with 1.5 tsp Salt, 1.5 tsp Ground Black Pepper, 1 tbsp Paprika, 2 tsp Garlic Powder, and 2 tsp Onion Powder. I like to rub the spices in so every bite is packed with flavor.
Let the chicken sit while you prep the breading stations. This brief rest allows the seasoning to penetrate the meat and enhances the overall taste. Meanwhile, set up three shallow bowls for the dredging, wet wash, and final coating stages.
Step 2: Create the Dredging and Wet Wash Stations
In the first bowl, combine 2 cups All-Purpose Flour, 0.5 cup Cornstarch, and 1 tbsp Baking Powder. The cornstarch and baking powder are my secret weapons for that ultra-crispy, shattering texture. Whisk until evenly distributed—no lumps here.
In the second bowl, whisk together 2 whole Large Eggs and 0.5 cup Evaporated Milk until smooth. The evaporated milk adds a subtle richness that sets this Filipino-style breading apart from standard versions. Stir in 1 tbsp Calamansi Zest for that distinct citrusy brightness.
Place 1.5 cups Panko Breadcrumbs in the third bowl. Panko’s larger, airier crumbs create the perfect crunchy exterior. Leave it as-is—no need to season since the flour mix and chicken are already well-seasoned.
Step 3: Coat the Chicken for Maximum Crisp
Working one piece at a time, dredge the chicken in the flour mixture, pressing firmly so it adheres completely. Shake off any excess—you want an even, thin layer. Too much flour leads to a gummy coating rather than a crisp one.
Dip the floured chicken into the egg wash, letting any excess drip off. Then, press it into the panko breadcrumbs, turning to coat all sides completely. I like to press the crumbs into the meat gently to ensure they stick. Place the breaded pieces on a wire rack set over a baking sheet.
Let the breaded chicken rest for 10 minutes before frying. This step is crucial—it allows the coating to set, preventing it from falling off during frying.
Step 4: Fry to Golden Perfection
Heat 4 cups Vegetable Oil in a deep, heavy-bottomed pot to 350°F. Use a thermometer for accuracy—oil temperature is key to even cooking and that perfect golden crust. Carefully lower the chicken pieces into the oil, a few at a time, to avoid overcrowding. Overcrowding lowers the oil temperature and results in greasy, soggy breading.
Fry for 12-15 minutes, turning occasionally, until the chicken is deep golden brown and the internal temperature reaches 165°F. The breading should be crisp and shatter when you tap it with tongs. Drain on a wire rack or paper towels to keep it crispy, not soggy.
Serve immediately while hot and crispy. The contrast between the juicy, flavorful chicken and the crunchy, well-seasoned breading is what makes this recipe unforgettable.
Pro Tips For Making Fried Chicken Breading Recipe Pinoy
- Double Dredge: Dip chicken in flour mixture, then egg wash, then back into the flour—this extra layer makes the crust thicker and crispier, especially with the cornstarch in the mix.
- Heat the Oil Right: Use medium-high heat, around 350°F, and test with a wooden chopstick—if bubbles form around it, the oil’s ready. Too hot and the outside burns before the inside cooks.
- Dry the Chicken: Pat the chicken pieces very dry with paper towels before dredging. I learned this the hard way—wet chicken makes the breading slide right off.
- Add Baking Powder: Mix 1 tsp baking powder into your flour-cornstarch blend. Sounds weird, but it works: it creates tiny bubbles for an extra-crispy, airy crust.
Essential Equipment for fried chicken breading recipe pinoy
Deep Fryer Essentials
For home cooks, a 5-6 quart Dutch oven like Lodge Enamel is ideal—deep enough for submerging chicken without oil spills. The heavy base prevents hot spots that burn breading. I’ve used mine for years with perfect results. 🔥
Temperature Control Tools
A candy/deep-fry thermometer is non-negotiable for maintaining 350°F. I recommend Taylor Precision for accuracy. Clip it to the pot side for constant monitoring—oil temp drops fast when adding cold chicken.
Dredging Station Setup
Use wide, shallow bowls (at least 9-inch diameter) for even coating. I prefer stainless steel mixing bowls—they’re durable and easy to clean. A wire cooling rack over a baking sheet catches drips while breaded chicken rests.
Oil Handling Gear
A slotted metal spoon or tongs lets you lower and turn chicken safely. I use OXO 12-inch tongs for precise control. Keep a splash guard nearby—hot oil pops when chicken hits it.
Draining Solutions
Skip paper towels—they steam the breading. Instead, use a wire rack set over a sheet pan for air circulation. For large batches, a baking cooling grid works perfectly. This keeps every piece shatteringly crisp. ✨
Safety Must-Haves
Always keep a fire extinguisher rated for grease fires nearby. Never leave hot oil unattended. I also keep a lid handy to smother flames quickly. Safety first—crispy chicken isn’t worth a kitchen disaster.
Nutrition Facts
Frequently Asked Questions
Why use evaporated milk in the egg wash?
It adds richness and helps the breading adhere better. The milk solids create a stickier base for the panko to cling to, resulting in a thicker, crispier crust. It’s a classic Pinoy technique for extra crunch.
Can I skip the baking powder in the flour mix?
Don’t skip it! The baking powder reacts with the moisture in the chicken, creating tiny air pockets that make the breading shatteringly crisp. Without it, your coating may turn out denser and less crunchy.
What if my breading keeps falling off during frying?
Ensure the chicken is completely dry before dredging and let it rest for 10 minutes after breading. Also, maintain oil temperature at 350°F—if it’s too low, the coating absorbs oil and detaches.
How do I keep the breading crispy after frying?
Drain on a wire rack, not paper towels, to prevent steam from softening the crust. Serve immediately or keep warm in a 200°F oven on a rack for up to 30 minutes.

Trained in classic French technique but raised on slow-cooked ribs and spicy rubs, she blends culinary skill with smoke and soul.
- Recipe for Boneless Pork Chops in Cast Iron Skillet: Sear and Baste to Juicy Perfection - October 3, 2026
- Recipe for Boneless Cross Rib Roast: Slow-Roasted Beef with Herb Crust - October 3, 2026
- Hamburgers in Sauce Recipe Crock Pot: Slow-Cooked Savory Delight - October 3, 2026