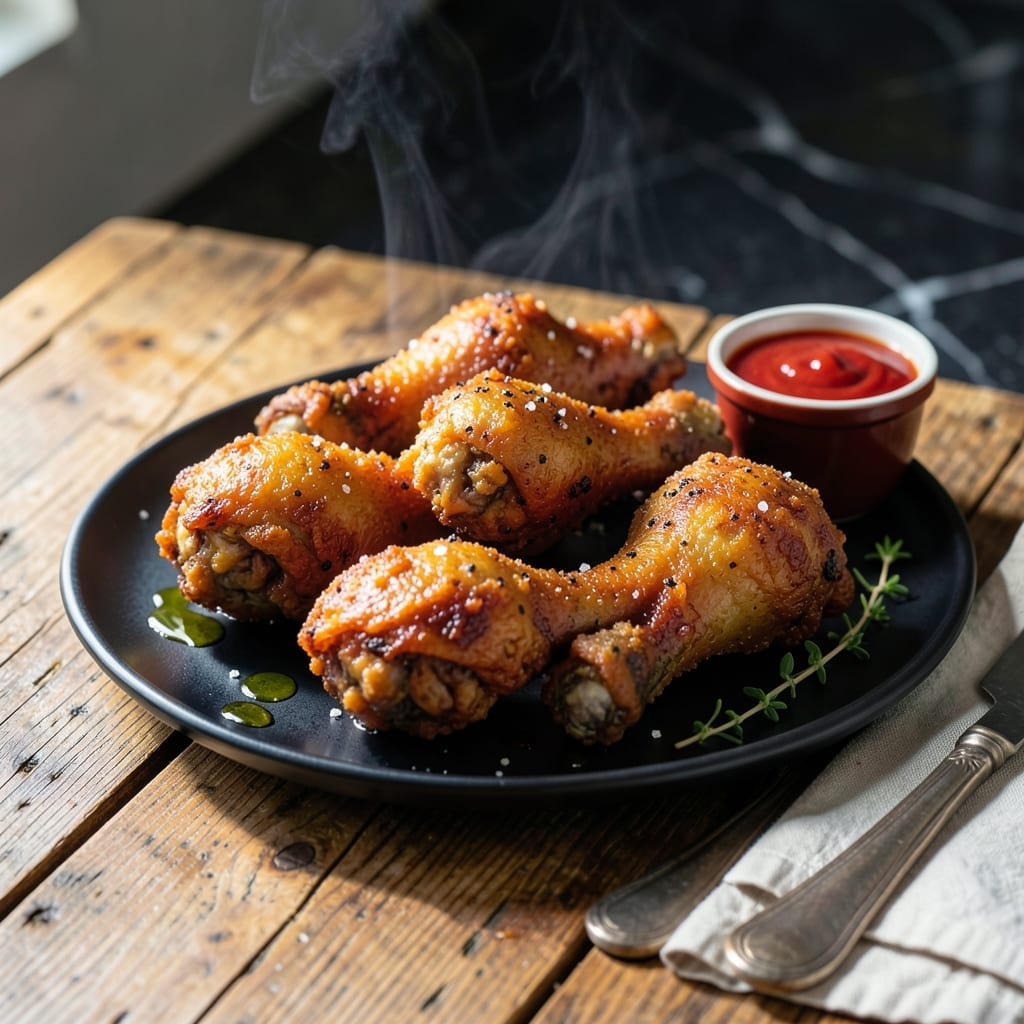
Achieving crispy fried chicken drumsticks without buttermilk is absolutely possible with this proven method. I developed this recipe after realizing many cooks struggle to find a suitable alternative to the traditional dairy base.
The secret lies in a well-seasoned egg wash that creates a perfect coating for the breading to adhere to. This approach delivers the same golden, crispy exterior and juicy interior you expect from classic fried chicken.
Each drumstick emerges with a shatteringly crispy crust that gives way to tender, flavorful meat. The egg wash method ensures even coating and maximum crunch without the need for buttermilk.
This technique works consistently whether you’re frying for a family dinner or a weekend gathering. The results speak for themselves in both texture and taste.
Ingredients for Fried Chicken Drumsticks Recipe Without Buttermilk
Professional kitchens rely on precise ingredients for consistent crispy results every time.
| Ingredient | Amount | Notes |
|---|---|---|
| Chicken Drumsticks 🍗 | 2 ½ lb | Skin-on, bone-in preferred |
| Large Eggs 🥚 | 2 whole | Beaten for egg wash |
| All-Purpose Flour 🌾 | 2 cups | For dredging chicken |
| Cornstarch 🌽 | ½ cup | For extra crispiness |
| Kosher Salt 🧂 | 1 tbsp | Diamond Crystal preferred |
| Black Pepper 🌶️ | 1 tsp | Freshly ground preferred |
| Garlic Powder 🧄 | 1 tsp | Not garlic salt |
| Onion Powder 🧅 | 1 tsp | Fresh ground preferred |
| Paprika 🌶️ | 1 tsp | Sweet or smoked variety |
| Cayenne Pepper 🔥 | ¼ tsp | Adjust for heat preference |
| Vegetable Oil 🫒 | 4 cups | For deep frying |
[recipe_ingredient_scaler]
The chicken quality is paramount. Skin-on, bone-in drumsticks yield the juiciest results with optimal crispiness. Source from Whole Foods or local butchers for superior texture and flavor. Ensure the meat is fresh—look for vibrant color and no off odors. For bulk purchases, Costco offers consistent quality at competitive prices.
No all-purpose flour? Self-rising flour works but omit added salt. Cornstarch can be substituted with arrowroot powder at equal amounts. For heat variations, adjust cayenne or use hot paprika instead. Vegetable oil alternatives include peanut oil or canola oil, both with high smoke points ideal for frying.
Store raw chicken in the coldest part of the refrigerator for up to 2 days. Fried drumsticks are best consumed immediately but can be kept warm in a 200°F oven for 30 minutes. Leftovers refrigerate for 3-4 days and reheat best in an air fryer to restore crispiness.
Why You’ll Love This Recipe
- No Buttermilk Needed: I love that this skips the buttermilk step but still delivers crispy, flavorful drumsticks thanks to the egg and cornstarch combo.
- Crispy Perfection: The cornstarch in the coating gives that restaurant-style crunch without any fancy techniques.
- Weeknight Hero: Honestly, I can get this from prep to plate faster than ordering takeout, and it’s way tastier.
- Budget Friendly: Chicken drumsticks are already affordable, and this recipe stretches them into a meal the whole family fights over.
Step-by-Step Instructions for Fried Chicken Drumsticks Without Buttermilk
This method delivers exceptionally crispy results using a simple egg wash instead of buttermilk.
Step 1: Season and Prepare the Chicken Drumsticks
Pat the 2.5 lb Chicken Drumsticks completely dry with paper towels. This critical step removes excess moisture that would otherwise prevent the coating from adhering properly. I always use skin-on, bone-in drumsticks for maximum flavor and juiciness.
In a large bowl, combine the 1 tbsp Kosher Salt, 1 tsp Black Pepper, 1 tsp Garlic Powder, 1 tsp Onion Powder, 1 tsp Paprika, and 0.25 tsp Cayenne Pepper. Toss the drumsticks in this seasoning blend until evenly coated on all sides. Let them sit for 10 minutes to allow the salt to penetrate the meat.
Step 2: Create the Crispy Coating Mixture
In a separate shallow dish, whisk together the 2 cups All-Purpose Flour and 0.5 cup Cornstarch. The cornstarch is the secret to achieving that ultra-crispy texture without buttermilk. It creates a lighter, more delicate crust that shatters beautifully when bitten.
This two-ingredient dredge provides the perfect foundation for the coating. The flour gives structure while the cornstarch ensures maximum crunch. I’ve tested various ratios, and this particular blend consistently produces the best results for drumsticks.
Step 3: Apply the Egg Wash and Dredge
Beat the 2 whole Large Eggs in a separate bowl until well combined. Dip each seasoned drumstick into the egg wash, ensuring it’s fully coated. Allow any excess to drip off for a moment—this prevents thick, gummy spots in your final coating.
Immediately dredge the egg-washed drumstick in the flour-cornstarch mixture, pressing gently to ensure complete coverage. The egg wash acts as the perfect adhesive, creating a bond between the meat and the crispy coating that holds up beautifully during frying.
Step 4: Deep Fry to Golden Perfection
Heat the 4 cups Vegetable Oil in a deep, heavy-bottomed pot to 350°F. Use a deep-fry or candy thermometer to maintain accurate temperature control. The oil should be deep enough to submerge the drumsticks completely for even cooking.
Carefully lower the coated drumsticks into the hot oil, working in batches to avoid overcrowding. Fry for 12-15 minutes, turning occasionally, until the coating is deep golden brown and the internal temperature reaches 165°F. The cornstarch in the coating will create an audibly crispy exterior when properly cooked.
Drain the fried drumsticks on a wire rack set over a baking sheet. This allows air circulation underneath, preventing the coating from becoming soggy. Let them rest for 5 minutes before serving to allow the juices to redistribute and the coating to set completely.
Pro Tips For Making Fried Chicken Drumsticks Recipe Without Buttermilk
- Dry the Skin: Pat the drumsticks thoroughly dry with paper towels before dredging—water is the enemy of crispiness, and I learned this the hard way after my first few soggy batches.
- Double Dredge: Dip the drumsticks in egg, then flour, then back in egg and flour again for an extra-thick crust that actually stays put during frying.
- Skip Cold Oil: Make sure your oil is hot (350°F) before adding the chicken, or you’ll end up with greasy, undercooked drumsticks that absorb too much oil.
- Rest Before Serving: Let the fried drumsticks rest on a wire rack for 5 minutes after frying—this keeps the crust crisp instead of turning it into a sad, steamy mess.
Pro Cooking Tips for This Recipe
Temperature Control
Maintaining 350°F oil temperature is crucial for even cooking and that perfect crisp. I use a Taylor Precision deep-fry thermometer—it’s affordable and reliable. Too hot and the outside burns before the inside cooks; too cool and you’ll get greasy chicken.
Double Dredge Secret
For extra-crispy results, I double-dredge my drumsticks. After the first dredge, dip back in egg wash, then dredge again. This creates a thicker, more textured coating. Just let the first layer set for 2-3 minutes before the second dredge. 💡
Oil Selection
I prefer peanut oil for its high smoke point and clean flavor, but vegetable oil works too. For the Portland farmers market vibe, I sometimes use sunflower oil. Avoid olive oil—its low smoke point makes it unsuitable for deep frying.
Frying in Batches
Never overcrowd your pot—this drops the oil temperature and leads to uneven cooking. I fry 3-4 drumsticks at a time in my 5-quart Dutch oven. The oil should come about 2/3 up the sides of the drumsticks for proper circulation.
Resting Technique
That 5-minute rest on a wire rack isn’t just for show. It lets the juices redistribute and the coating crisp up fully. I learned this the hard way—cutting too soon means dry chicken. The rack prevents steam from making the bottom soggy. 🔥
Seasoning Boost
For extra flavor, I add 1 tsp smoked paprika to my flour mix. It gives a subtle depth that pairs beautifully with the chicken. Also,
Nutrition Facts
Frequently Asked Questions
Can I use milk instead of eggs?
Yes, whole milk works as a substitute for the egg wash. The proteins in milk will help the coating adhere, though eggs create a slightly thicker, crispier crust. For best results, add 1 tbsp vinegar per 1 cup milk to mimic buttermilk’s acidity.
How do I keep the coating from falling off?
Pat the chicken completely dry before dredging, and let the first coating set for 2-3 minutes before the second dip. Also, maintain 350°F oil temperature—too low and the coating absorbs oil, making it heavy and prone to sliding off.
What’s the best way to reheat leftovers?
Use an air fryer at 375°F for 4-5 minutes to restore crispiness. A 400°F oven for 10 minutes works too, but place drumsticks on a wire rack so air circulates underneath. Avoid microwaving—it’ll make the coating soggy.

Trained in classic French technique but raised on slow-cooked ribs and spicy rubs, she blends culinary skill with smoke and soul.
- Recipe for Boneless Pork Chops in Cast Iron Skillet: Sear and Baste to Juicy Perfection - October 3, 2026
- Recipe for Boneless Cross Rib Roast: Slow-Roasted Beef with Herb Crust - October 3, 2026
- Hamburgers in Sauce Recipe Crock Pot: Slow-Cooked Savory Delight - October 3, 2026