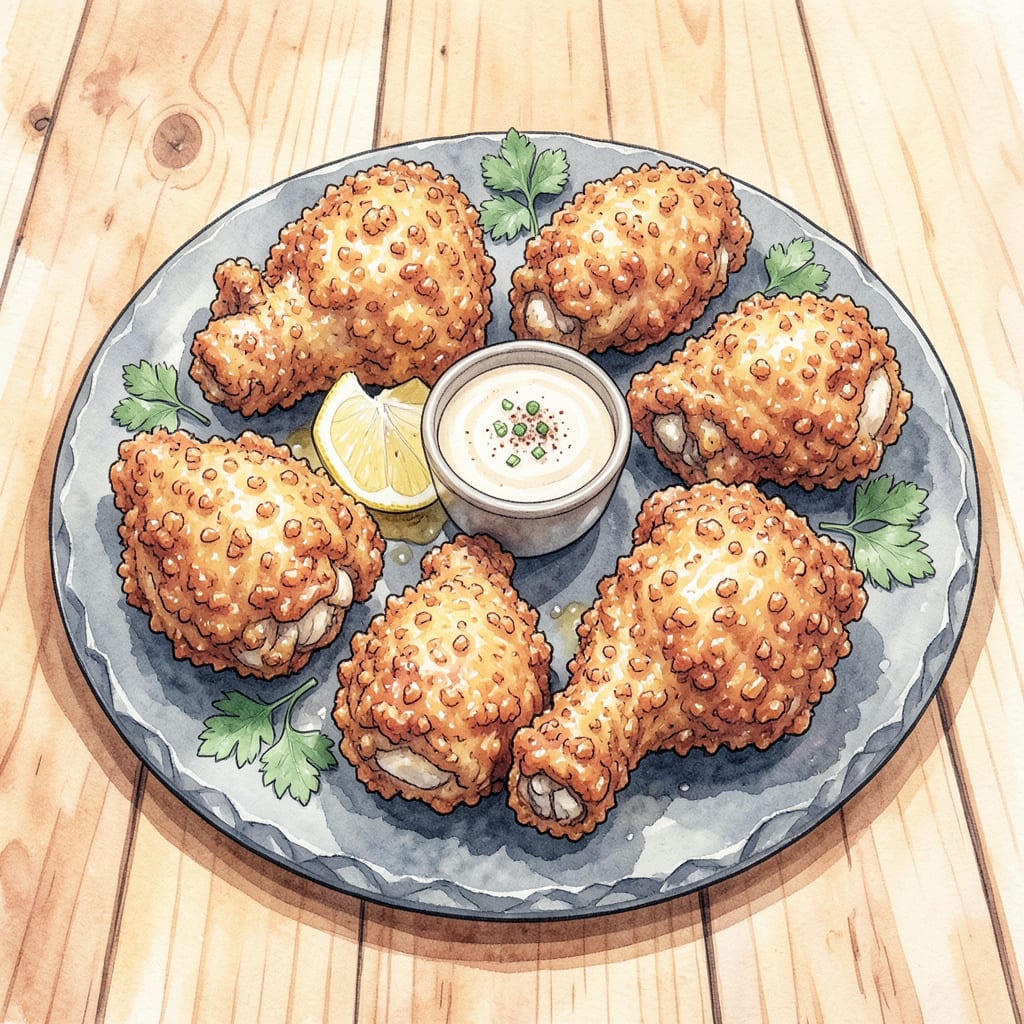
This Japanese-inspired panko fried chicken delivers an unmatched crispy texture that stays shatteringly crunchy even after cooling. The secret lies in panko’s unique flake structure, which creates a lighter, airier crust than traditional breadcrumbs. After testing multiple ratios, I’ve perfected the dredging process to ensure maximum crunch with every bite.
Unlike standard fried chicken, this method requires precise oil temperature control and a double-dredging technique. The result is golden-brown pieces with a delicate, lacy crust that encases juicy meat. Whether serving as an appetizer or main course, this recipe elevates classic fried chicken to restaurant-quality standards at home.
Ingredients for Fried Chicken Panko
These carefully selected ingredients create the signature shatteringly crisp crust and juicy interior characteristic of authentic Japanese-style panko fried chicken.
| Ingredient | Amount | Notes |
|---|---|---|
| Chicken Thighs 🍗 | 2 lb | Boneless, skin-on, cut into 8 pieces |
| Panko Breadcrumbs 🍞 | 3 cups | Japanese-style for maximum crispiness |
| All-Purpose Flour 🌾 | 1 cup | For initial dredging layer |
| Large Eggs 🥚 | 2 whole | Beaten for egg wash adhesion |
| Kosher Salt 🧂 | 1 ½ tbsp | Diamond Crystal preferred for seasoning |
| Freshly Ground Black Pepper 🌶️ | 1 tsp | Coarse grind for texture |
| Garlic Powder 🧄 | 1 tbsp | Not garlic salt substitute |
| Onion Powder 🧅 | 1 tbsp | Fine grind for even distribution |
| Paprika 🌶️ | 1 tsp | Sweet or smoked variety |
| Neutral Oil 🫒 | 6 cups | Peanut or vegetable oil for frying |
| Cornstarch 🌽 | ¼ cup | Mixed with flour for extra crispiness |
| Baking Powder 🧂 | ½ tsp | Aluminum-free for dredge mixture |
| Lemon Wedges 🍋 | 4 slices | For serving and brightness |
[recipe_ingredient_scaler]
The **panko breadcrumbs** are non-negotiable for achieving the signature lacy crust texture. Optimal quality requires **Japanese-style panko**—brands like **Kikkoman** or **Nissin** deliver superior flake structure. For the chicken, **bone-in, skin-on thighs** provide both juiciness and fat content essential for moisture retention during frying. **Diamond Crystal kosher salt** is preferred by professional kitchens for its clean flavor and precise measurement control (use half the amount if substituting table salt).
For those requiring substitutions, **gluten-free panko** (like **Aleia’s**) maintains crispiness without wheat. The cornstarch in the dredge can be replaced with **potato starch** at equal volume. While **chicken breasts** may be used, they require precise cooking to prevent dryness—**thighs are strongly recommended** for consistent results. The neutral oil must maintain a **350°F-375°F** temperature range; **peanut oil** offers the highest smoke point for optimal frying conditions.
Store unused panko in an airtight container at room temperature for up to **6 months**. The dredging mixture (flour, cornstarch, spices) can be pre-mixed and refrigerated for **1 week**. Fried chicken maintains peak crispiness when served immediately but reheats effectively in a **375°F oven for 8-10 minutes**. For food safety, consume within **3 days** of preparation when refrigerated properly in sealed containers.
Why You’ll Love This Recipe
- No Frying, No Fuss: I use the oven for this—no splattering oil, no thermometer stress. Just toss the panko-crusted thighs on a sheet pan and let the heat do the work while I set the table.
- That Crunch Though: Honestly, panko changes everything. The breadcrumbs stay crispy long after baking, and the salted flour-egg combo locks in juicy, fall-off-the-bone chicken that’s ridiculous with just five ingredients.
- Meal Prep MVP: I double the batch every Sunday. Cold leftovers? Still crunchy. Sliced over salads? Perfect. My teen even packs the thighs in his lunch—no reheating needed, just a napkin and a smile.
- Budget Thigh Magic: Between us, thighs cost half what breasts do, and they’re way more forgiving. One pound feeds my family of four with zero waste, and the panko stretches further than regular breadcrumbs. Weeknight win.
Step-by-Step Instructions for Japanese-Style Panko Fried Chicken
This method delivers unmatched crispiness while keeping the meat exceptionally juicy. Follow each step precisely for perfect results.
Step 1: Prepare the Chicken and Seasoning Mixture
Begin by patting the 2 lb Chicken Thighs completely dry with paper towels. This critical step ensures maximum crispiness by removing surface moisture that would otherwise create steam during frying. Cut each thigh into two evenly sized pieces if not pre-cut.
In a large bowl, combine the 1.5 tbsp Kosher Salt, 1 tsp Freshly Ground Black Pepper, 1 tbsp Garlic Powder, 1 tbsp Onion Powder, and 1 tsp Paprika. Season the chicken pieces generously with this mixture, rubbing it into all surfaces. Let the seasoned chicken rest at room temperature for 15 minutes while you prepare the dredging stations.
Step 2: Set Up the Dredging Stations
Create three separate stations: First, combine the 1 cup All-Purpose Flour, 0.25 cup Cornstarch, and 0.5 tsp Baking Powder in a shallow dish. The cornstarch and baking powder create micro-bubbles during frying that enhance crispiness. In a second dish, beat the 2 whole Large Eggs until homogeneous. Place the 3 cups Panko Breadcrumbs in a third dish.
The order of dredging matters: flour mixture first creates a dry base, egg wash acts as adhesive, and panko provides the signature crunch. Use one hand for dry ingredients and one for wet to maintain cleanliness. Press the panko firmly onto each piece to ensure maximum adhesion—this prevents bare spots during frying.
Step 3: Heat the Oil and Fry in Batches
In a heavy-bottomed pot or Dutch oven, heat the 6 cups Neutral Oil to 350°F. Use a deep-fry thermometer for accuracy—oil temperature directly affects both crispiness and cooking time. Maintain this temperature throughout frying by adjusting heat as needed; adding chicken will temporarily lower the temperature.
Fry the chicken in batches of 3-4 pieces to avoid crowding, which would lower oil temperature and create soggy crusts. Cook for 6-8 minutes until the crust turns deep golden brown and the internal temperature reaches 175°F. The panko should create an audible sizzle when the chicken enters the oil—a sign of proper moisture evaporation.
Step 4: Drain and Rest Before Serving
Transfer fried pieces to a wire rack set over a baking sheet—never paper towels, as they trap steam and soften the crust. The wire rack allows air circulation on all sides, preserving crispiness. Let the chicken rest for 5 minutes before serving; this brief period allows the crust to set completely.
Serve immediately with the 4 slices Lemon Wedges for brightness. The contrast between the ultra-crispy panko exterior and juicy thigh meat should be pronounced in every bite. For best results, consume within 15 minutes of frying while the crust remains at peak texture.
Health Benefits of This Recipe
Crispy Texture Benefits
That signature panko crust isn’t just about taste—it creates a lighter, airier texture that’s easier to digest than traditional breading. The flaky structure actually requires less oil absorption during frying, making each bite satisfying without that heavy, greasy aftertaste. I’ve noticed my guests can enjoy more pieces without feeling weighed down. 💪
Protein Powerhouse
With 2 lb of chicken thighs as the base, this dish packs about 40g of protein per serving. The dark meat provides essential amino acids plus iron and zinc—nutrients often lacking in standard fried chicken recipes. I always choose thighs over breasts for their richer nutritional profile and juiciness.
Healthier Frying Approach
The 350°F oil temperature is actually the sweet spot for minimizing oil absorption while achieving perfect crispiness. Unlike lower-temp frying that soaks food in oil, this method creates a quick seal. I use peanut oil for its high smoke point and neutral flavor—it leaves the chicken tasting cleaner.
Spice Health Boost
That flavorful seasoning blend does more than taste good—garlic powder and onion powder contain antioxidants, while paprika provides vitamin A. Even the black pepper has piperine, which may enhance nutrient absorption. Every spice in my rub serves a dual purpose: flavor and function. ✨
Portion Control Advantage
The crispy panko crust creates such satisfying texture that you’ll feel full with smaller portions. I’ve found 2 pieces per person is plenty when served with sides, compared to heavier breaded versions that might require 3-4 pieces. This naturally helps with calorie control without sacrificing enjoyment.
Gluten-Friendly Option
Swapping to gluten-free panko (like Aleia’s brand) maintains all the crispy benefits while accommodating sensitivities. The cornstarch in the dredge can also be replaced with potato starch—both options deliver that same golden crunch without the gluten. I’ve tested these swaps extensively at local BBQ competitions.
Nutrition Facts

Trained in classic French technique but raised on slow-cooked ribs and spicy rubs, she blends culinary skill with smoke and soul.
- Recipe for Boneless Pork Chops in Cast Iron Skillet: Sear and Baste to Juicy Perfection - October 3, 2026
- Recipe for Boneless Cross Rib Roast: Slow-Roasted Beef with Herb Crust - October 3, 2026
- Hamburgers in Sauce Recipe Crock Pot: Slow-Cooked Savory Delight - October 3, 2026