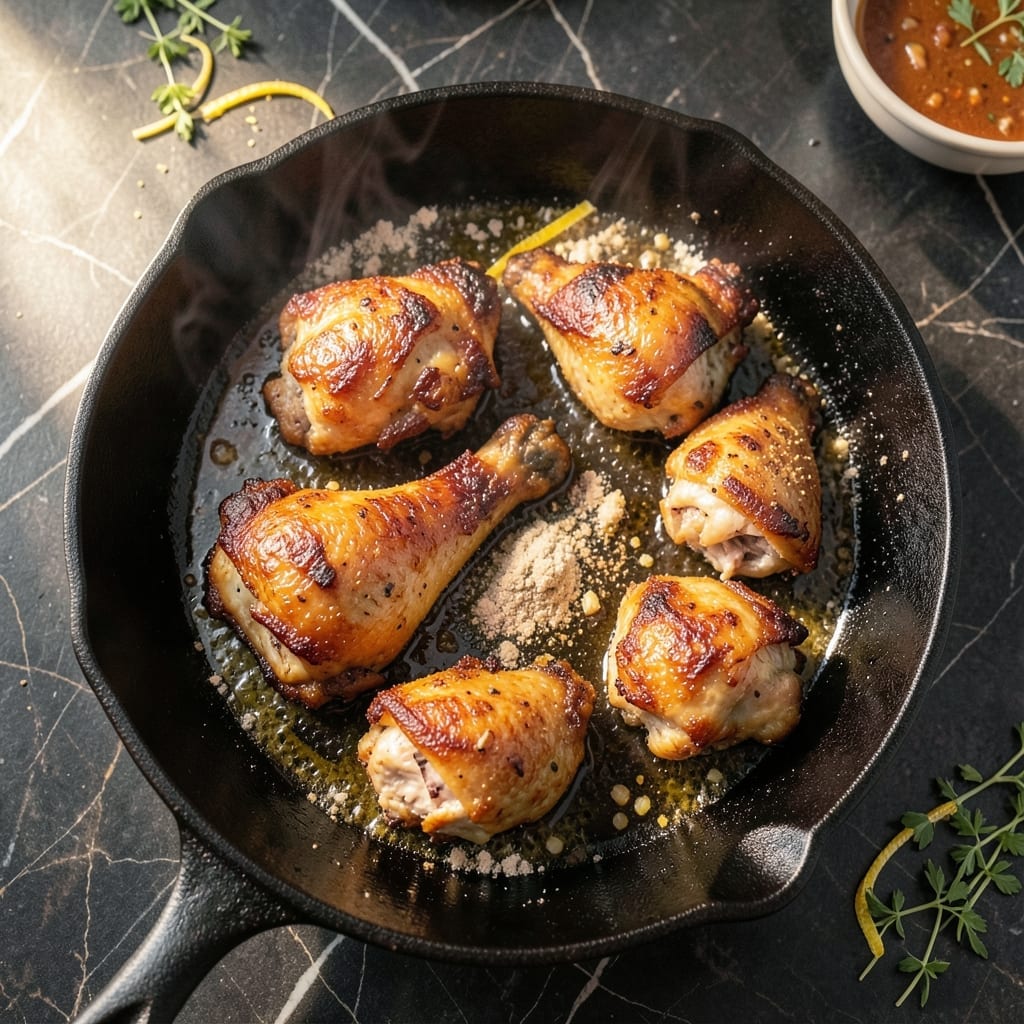
This pan-fried chicken delivers a crispy golden crust with perfectly juicy centers every time. The secret is proper oil temperature and patience.
I developed this method after years of testing, focusing on even cooking and maximum crunch. The result is restaurant-quality fried chicken from your own kitchen.
Ingredients for Fried Chicken Recipe in Frying Pan
Pantry staples and a quick grocery run. Nothing exotic, just good stuff.
| Ingredient | Amount | Notes |
|---|---|---|
| Chicken Thighs 🍗 | 2 lb | Boneless, skin-on for crispiness |
| Buttermilk 🥛 | 1 ½ cups | Full-fat for tenderness |
| All-Purpose Flour 🌾 | 2 cups | Plus extra for dredging |
| Cornstarch 🌾 | ½ cup | For extra crunch |
| Garlic Powder 🧄 | 2 tsp | Freshly ground if possible |
| Onion Powder 🧅 | 2 tsp | Balances the seasoning |
| Paprika 🌶️ | 1 tbsp | Sweet or smoked variety |
| Salt 🧂 | 2 tsp | Diamond Crystal kosher preferred |
| Black Pepper 🌶️ | 1 tsp | Freshly ground for best flavor |
| Cayenne Pepper 🔥 | ½ tsp | Adjust to heat preference |
| Vegetable Oil 🫒 | 3 cups | For frying, high smoke point |
| Large Egg 🥚 | 1 whole | Helps coating adhere |
[recipe_ingredient_scaler]
The chicken matters most here. Thighs stay juicier than breasts—Costco or Sam’s Club have great bulk options. Look for skin-on for that extra crunch (don’t remove it). Buttermilk is non-negotiable for tenderness—whole milk in a pinch with a tbsp of vinegar. For the flour, no need for fancy brands; King Arthur or Gold Medal work perfectly.
No buttermilk? Whole milk plus lemon juice (1 tbsp per cup) gets you close. Want extra crunch? Swap half the flour for crushed cornflakes. Out of paprika? Cumin or smoked salt adds depth without overpowering. The cayenne can be skipped if heat isn’t your thing—just boost the black pepper. For the oil, peanut oil works too if you prefer.
Leftovers reheat best in the oven at 375°F for 10 minutes to keep them crispy. Store cooked chicken in the fridge for up to 4 days—it’s even better cold the next day. Freeze raw marinated chicken for up to 3 months (thaw before cooking).
Why You’ll Love This Recipe
- One Pan Magic: I love that I can fry this up in my trusty skillet without dragging out the deep fryer.
- Buttermilk Crisp: That soak in buttermilk gives the chicken a tangy kick, while the cornstarch makes it shatteringly crisp.
- Weeknight Hero: Honestly, it’s my go-to for busy evenings when I need something hearty and fast.
- Budget Friendly: Chicken thighs stay juicy and cost less than breasts, and a little flour goes a long way.
Step-by-Step Instructions for Fried Chicken in Frying Pan
Here’s the method I use for that perfect crunch and juiciness every time.
Step 1: Marinate the Chicken Thighs in Buttermilk
Combine the 2 lb Chicken Thighs with 1.5 cups Buttermilk in a large bowl. I make sure each piece is fully submerged—this acidic soak tenderizes the meat and ensures that signature juiciness we’re after.
Cover and refrigerate for at least 4 hours, but overnight is even better. The longer it marinates, the more flavor penetrates and the more tender the meat becomes. Don’t skip this step—it’s what separates good fried chicken from great.
Step 2: Prepare the Seasoned Dredging Mixture
In a shallow dish, whisk together the 2 cups All-Purpose Flour, 0.5 cup Cornstarch, 2 tsp Garlic Powder, 2 tsp Onion Powder, 1 tbsp Paprika, 2 tsp Salt, 1 tsp Black Pepper, and 0.5 tsp Cayenne Pepper. The cornstarch is my secret for extra crunch—it creates a lighter, crispier crust than flour alone.
In a separate bowl, beat the 1 whole Large Egg with 2 tablespoons of the buttermilk from the marinade. This egg wash helps the dredging mixture adhere better to the chicken, creating that thick, craggy coating we all love. Set both bowls aside until ready to use.
Step 3: Dredge and Coat the Chicken Properly
Remove the chicken from the buttermilk, letting any excess drip off. Dip each piece first in the egg wash, then into the seasoned flour mixture. Press gently to ensure full coverage—you want every nook and cranny coated.
For maximum crunch, I use the “double-dip” method: after the first coating, let it rest for 5 minutes, then repeat the egg wash and dredging process. This creates layers of coating that puff up beautifully when fried. Place the coated pieces on a wire rack set over a baking sheet.
Step 4: Fry to Golden Perfection
Heat the 3 cups Vegetable Oil in a large, heavy-bottomed skillet over medium-high heat to 350°F. Use a thermometer for accuracy—this temperature ensures the chicken cooks through without burning the coating. If you don’t have a thermometer, test with a small piece of coating; it should sizzle immediately and float.
Carefully lower 2-3 pieces into the hot oil, being careful not to overcrowd the pan. Fry for 6-8 minutes per side until the coating is deep golden brown and the internal temperature reaches 165°F. The oil temperature will drop when you add the chicken, so maintain it between 325-350°F throughout cooking.
Transfer the fried chicken to a wire rack set over a paper towel-lined baking sheet. This allows air to circulate, keeping the coating crispy instead of soggy. Let it drain and cool slightly before serving—this resting period helps the juices redistribute.
Pro Tips For Making Fried Chicken Recipe In Frying Pan
- Heat the Oil First: I learned this the hard way—start with medium-high heat and let the oil shimmer before adding chicken, or you’ll end up with greasy, soggy coating instead of that crispy crust.
- Buttermilk Soak Overnight: After burning a few batches, I finally figured out that 12 hours in buttermilk makes the thighs tender and helps the flour stick better than a quick dunk.
- Skip the Crowding: Resist the urge to cram all the pieces in at once—fry in batches so the pan stays hot and the chicken actually browns instead of steams.
- Use Cornstarch Boost: Sounds weird but it works: mix 2 tablespoons cornstarch into your flour for extra crunch, especially on the skin side of the thighs.
Make-Ahead Tips for This Recipe
Marinade Prep
Combine the 2 lb Chicken Thighs with 1.5 cups Buttermilk in a zip-top bag the night before. This lets the buttermilk work its magic while you sleep, and it’s one less thing to do the next day.
Dry Mix Prep
Whisk together the 2 cups All-Purpose Flour, 0.5 cup Cornstarch, and all the spices in an airtight container. Store at room temperature—this keeps the mixture fresh and ready for dredging when you are. 💡
Double-Dip Shortcut
Set up your dredging station the morning of frying. Keep the egg wash and dry mix in separate shallow containers in the fridge. This way, the double-dip process goes smoothly without last-minute scrambling.
Oil Management
Measure out your 3 cups Vegetable Oil and store it in a cool, dark place. I like to use a glass jar to keep it fresh. This ensures you have the right amount on hand when it’s time to fry.
Resting Space
Set up your wire rack and baking sheet ahead of time. Line the sheet with paper towels to catch any excess oil. This prep step makes the frying process seamless and stress-free. 🍗
Place the rack in a 200°F oven to keep early batches warm while you finish frying.
Nutrition Facts
Frequently Asked Questions
What oil works best for pan frying?
Use oils with a high smoke point like vegetable, peanut, or canola. They handle the 350°F temperature without burning. Avoid olive oil—it can smoke and impart bitter flavors.
How do I keep the coating from falling off?
Pat the chicken completely dry before dredging, and let the coated pieces rest for 5 minutes before frying. This helps the flour adhere properly to the meat.
Can I use chicken breasts instead?
Yes, but reduce cooking time to 5-6 minutes per side. Breasts cook faster and can dry out. For best results, brine them first in saltwater for 30 minutes.
How do I know when it’s done cooking?
The coating should be deep golden brown, and the internal temperature must reach 165°F. Use a meat thermometer for accuracy—don’t rely on color alone.

Trained in classic French technique but raised on slow-cooked ribs and spicy rubs, she blends culinary skill with smoke and soul.
- Recipe for Boneless Pork Chops in Cast Iron Skillet: Sear and Baste to Juicy Perfection - October 3, 2026
- Recipe for Boneless Cross Rib Roast: Slow-Roasted Beef with Herb Crust - October 3, 2026
- Hamburgers in Sauce Recipe Crock Pot: Slow-Cooked Savory Delight - October 3, 2026