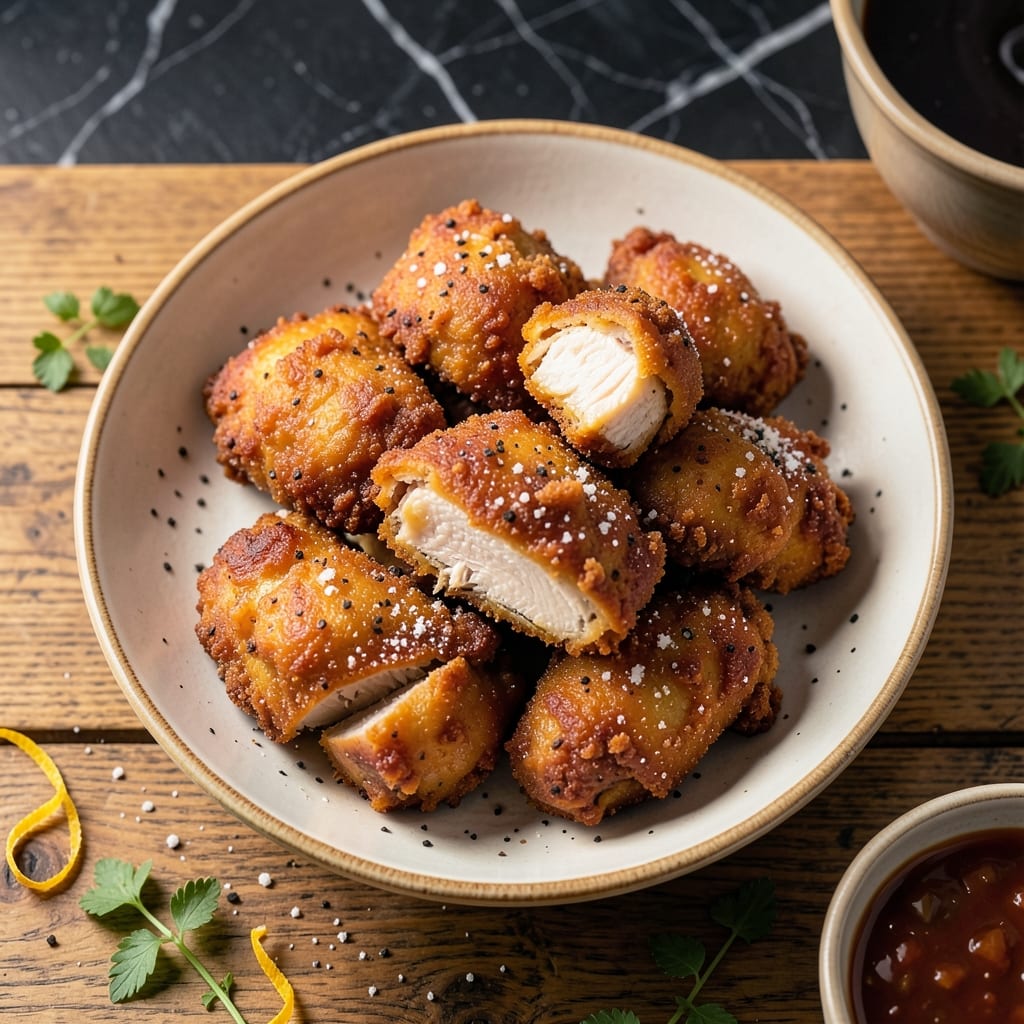
This cornstarch coating transforms ordinary chicken into something exceptional. The secret lies in its ability to create an ultra crispy exterior that shatters with every bite, while keeping the meat juicy inside.
I developed this method after years of experimenting with different coatings. Cornstarch creates a lighter, more delicate crunch than traditional flour, and it browns beautifully in hot oil.
The process requires precise oil temperature and careful timing to achieve that perfect golden crust. Each piece emerges from the fryer with a texture that’s both shatteringly crispy and satisfyingly light.
Serve immediately for the best experience, while the coating is still at its peak. The contrast between the crunch and tender meat makes every bite memorable.
Ingredients for Fried Chicken Recipe Using Cornstarch
Transform ordinary chicken with this precise combination of crispy coating essentials and tenderizing marinade.
| Ingredient | Amount | Notes |
|---|---|---|
| Chicken Thighs 🍗 | 2 lb | Boneless, skinless, cut into 1-inch pieces |
| Cornstarch 🌾 | 1 cup | For ultra-crispy coating |
| All-Purpose Flour 🌾 | ½ cup | Balances cornstarch texture |
| Baking Powder 🧂 | 1 tsp | Helps coating puff slightly |
| Salt 🧂 | 1 ½ tsp | Diamond Crystal kosher preferred |
| Black Pepper 🌶️ | 1 tsp | Freshly ground for best flavor |
| Garlic Powder 🧄 | 1 tsp | Enhances savory depth |
| Onion Powder 🧅 | 1 tsp | Adds aromatic base note |
| Paprika 🌶️ | 1 tsp | Sweet or smoked, for color |
| Cayenne Pepper 🔥 | ¼ tsp | Adjust for heat preference |
| Vegetable Oil 🫒 | 4 cups | High smoke point for frying |
| Buttermilk 🥛 | 1 cup | For marinating chicken |
| Large Egg 🥚 | 1 whole | Helps coating adhere |
[recipe_ingredient_scaler]
The cornstarch is non-negotiable for that shatteringly crisp exterior. Bob’s Red Mill offers consistent quality, but any pure cornstarch works. For the chicken, bone-in, skin-on thighs yield the juiciest results, though boneless simplifies eating. Seek out air-chilled chicken at Whole Foods or local butchers for superior texture—it absorbs the buttermilk marinade more effectively than standard water-chilled options.
No buttermilk? Whole milk with 1 tbsp vinegar or lemon juice (let sit 5 minutes) works perfectly. For a gluten-free version, replace flour with rice flour at a 1:1 ratio. The paprika can be omitted if unavailable, but it contributes both color and subtle sweetness. Hot sauce in the marinade (1-2 tbsp) adds a welcome tang without overwhelming the flavor profile.
The coating mixture keeps in an airtight container for 1 month. Marinate the chicken for at least 4 hours (overnight ideal) for maximum tenderness. Fry in batches to maintain oil temperature—350°F to 375°F is the sweet spot for that perfect golden crust.
Why You’ll Love This Recipe
- One-Pan Wonder: That cornstarch and baking powder combo means I fry once, clean once, and still get it right every time.
- Dangerously Crispy: The cornstarch gives it this insane crunch that shatters with every bite—honestly, it’s the only way I’ll fry chicken now.
- Feeds a Crowd: I stretch one batch to cover weeknight dinners, lunchbox leftovers, and still have enough for unexpected guests.
- Budget Keeper: Chicken thighs stay cheap, cornstarch is a pantry staple, and this recipe uses both without waste.
Step-by-Step Instructions for Fried Chicken Using Cornstarch
Master the technique for achieving that signature crispy coating with a light, airy crunch.
Step 1: Marinate Chicken in Buttermilk Mixture
In a large bowl, whisk together the 1 cup Buttermilk and 1 whole Large Egg until fully combined. Add the 2 lb Chicken Thighs (cut into 1-inch pieces) and ensure each piece is well coated. Cover and refrigerate for at least 1 hour or up to 4 hours.
This step ensures the chicken stays moist during frying while the acidic buttermilk tenderizes the meat. For best results, don’t skip this marinating time—it’s essential for both flavor and texture.
Real talk: longer marinating (closer to the 4-hour mark) yields the most tender and flavorful chicken.
Step 2: Prepare the Crispy Coating
In a separate large bowl, combine the 1 cup Cornstarch, 0.5 cup All-Purpose Flour, 1 tsp Baking Powder, 1.5 tsp Salt, 1 tsp Black Pepper, 1 tsp Garlic Powder, 1 tsp Onion Powder, 1 tsp Paprika, and 0.25 tsp Cayenne Pepper. Whisk until all ingredients are evenly distributed.
The cornstarch is the star here—it creates that ultra-crispy texture, while the baking powder helps the coating puff slightly for extra crunch. Don’t be tempted to substitute the cornstarch; it’s what makes this coating unique.
Here’s the thing—this coating must be thoroughly mixed to avoid clumping. A fine-mesh strainer can help if you notice any lumps.
Step 3: Coat the Chicken Thoroughly
Remove the chicken from the buttermilk mixture, letting any excess drip off. Dredge each piece in the cornstarch mixture, pressing firmly to ensure the coating adheres completely. Place the coated chicken on a wire rack set over a baking sheet.
I’ve found that pressing the chicken into the coating with your fingers ensures every nook and cranny is covered. This prevents bare spots that could lead to uneven browning or less crispy areas.
Let the coated chicken rest for 10 minutes before frying. This allows the coating to set slightly, which helps it stay intact during frying.
Step 4: Fry to Golden Perfection
Heat the 4 cups Vegetable Oil in a large, deep pot or Dutch oven over medium-high heat until it reaches 350°F. Use a deep-fry or candy thermometer for accuracy—oil temperature is critical for crispy, non-greasy chicken.
Carefully lower a few pieces of chicken into the hot oil, ensuring not to overcrowd the pot (this lowers the oil temperature and leads to soggy chicken). Fry for 8-10 minutes, turning occasionally, until the coating is deep golden brown and the internal temperature reaches 165°F.
If the oil temperature drops below 325°F, adjust the heat to maintain a steady temperature. Drain the fried chicken on the wire rack to keep it crispy—paper towels can make the coating soggy.
Step 5: Rest and Serve Immediately
Transfer the fried chicken to a clean wire rack and let it rest for 5 minutes. This allows the coating to set fully and the juices to redistribute within the meat.
Serve immediately while hot and crispy. The coating should have a light, airy crunch with a deep golden hue, while the chicken inside remains tender and juicy. If you must hold it, place it in a 200°F oven for up to 15 minutes to maintain warmth without sacrificing texture.
Pro Tips For Making Fried Chicken Recipe Using Cornstarch
- Double Dredge: Dip the chicken thighs in the cornstarch-flour mix twice, with a 2-minute rest between coats—this builds a thicker, crispier crust that actually stays on.
- Heat the Oil: Use a thermometer to keep the oil at 350°F; I learned this the hard way after burning two batches at too-high heat.
- Dry the Chicken: Pat the thighs completely dry with paper towels before dredging—any moisture makes the cornstarch coating slide right off.
- Add Baking Powder: Mix 1 teaspoon of baking powder into your cornstarch and flour; it sounds weird, but it makes the crust puff slightly for extra crunch.
Storing and Reheating Leftovers
Fridge Storage
Let the chicken cool completely, then store in an airtight container with a paper towel lining the bottom to absorb moisture. It keeps in the fridge for 3-4 days at 40°F or below. I use Glasslock containers from New Seasons Market for best results. ❄️
Freezer Storage
Freeze cooled chicken in a single layer on a baking sheet first, then transfer to a freezer bag. It stays crispy for up to 1 month at 0°F. Squeeze out all air to prevent freezer burn. Label with the date—I learned this trick from my grandma in Cincinnati.
Oven Reheating
Preheat oven to 375°F and place chicken on a wire rack over a baking sheet. Heat for 10-12 minutes until internal temp reaches 165°F. This method restores the most crispiness without drying out the meat.
Air Fryer Method
Reheat at 350°F for 4-5 minutes, shaking halfway through. The circulating air helps maintain that shatteringly crisp texture better than a microwave. I use my Ninja Foodi for this—works like a charm. 🔥
Microwave Last Resort
Place chicken on a paper towel-lined plate and cover with another damp paper towel. Microwave on 50% power for 1-2 minutes. While not ideal, this prevents the coating from turning chewy.
Pro Tip
For meal prep, undercook the chicken slightly before storing. Finish frying when reheating to maintain that perfect golden crust. This works especially well with the air fryer method.
Nutrition Facts
Frequently Asked Questions
Why use cornstarch instead of flour?
Cornstarch creates a lighter, crispier coating than flour. It absorbs less oil during frying, resulting in a shatteringly thin crust that stays crunchy longer.
Can I bake this instead of frying?
Yes, but the texture differs. Bake at 400°F for 20-25 minutes, flipping halfway. The coating won’t be as crispy as deep-frying, but still delicious.
How do I keep the coating from falling off?
Pat chicken dry before marinating, and let coated pieces rest 10 minutes before frying. This helps the coating adhere better.
What oil works best?
Use oils with high smoke points like vegetable, peanut, or canola. Avoid olive oil—it can burn at frying temps.

Trained in classic French technique but raised on slow-cooked ribs and spicy rubs, she blends culinary skill with smoke and soul.
- Recipe for Boneless Pork Chops in Cast Iron Skillet: Sear and Baste to Juicy Perfection - October 3, 2026
- Recipe for Boneless Cross Rib Roast: Slow-Roasted Beef with Herb Crust - October 3, 2026
- Hamburgers in Sauce Recipe Crock Pot: Slow-Cooked Savory Delight - October 3, 2026