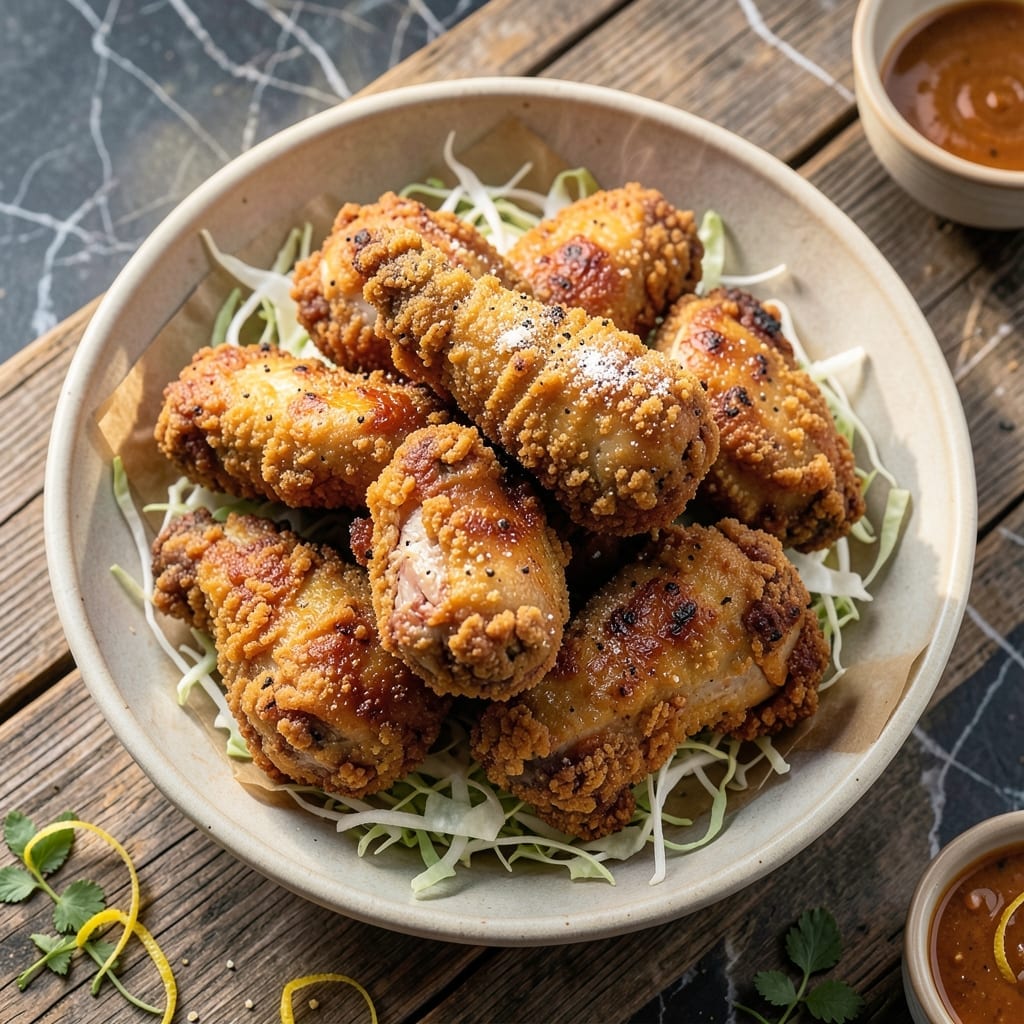
This method delivers the crispy coating you’ve been chasing. The cornstarch creates a shatteringly thin, golden crust that stays crunchy long after frying.
I’ve tested countless techniques, and cornstarch consistently outperforms flour for a lighter, more delicate texture. The key is hot oil and proper draining to maintain that perfect crunch.
Each piece emerges with a golden hue and an audible snap with every bite. The interior stays juicy while the exterior remains perfectly rigid.
Serve immediately for the best experience, though leftovers reheat surprisingly well in the oven. Here’s how to achieve it.
Ingredients for Fried Chicken Recipe with Cornstarch
Crispy, golden perfection starts with cornstarch and a handful of pantry staples.
| Ingredient | Amount | Notes |
|---|---|---|
| Chicken Thighs 🍗 | 2 lb | Boneless, skin-on preferred |
| Cornstarch 🌾 | 1 cup | For ultra-crispy coating |
| All-Purpose Flour 🌾 | ½ cup | Balances the cornstarch |
| Baking Powder 🧂 | 1 tsp | For extra crispiness |
| Salt 🧂 | 1 ½ tsp | Kosher or sea salt |
| Black Pepper 🌶️ | 1 tsp | Freshly ground preferred |
| Garlic Powder 🧄 | 1 tsp | For savory depth |
| Onion Powder 🧅 | 1 tsp | Complements the garlic |
| Paprika 🌶️ | 1 tsp | Sweet or smoked variety |
| Cayenne Pepper 🔥 | ¼ tsp | Adjust for heat preference |
| Buttermilk 🥛 | 1 cup | For marinating chicken |
| Vegetable Oil 🫒 | 4 cups | For deep frying |
| Large Eggs 🥚 | 2 whole | Helps coating adhere |
[recipe_ingredient_scaler]
The chicken is the star here. Thighs with skin-on give you that juicy interior and extra-crispy exterior. I grab mine from Whole Foods or Costco—look for pieces that are similar in size so they cook evenly. The cornstarch is non-negotiable (it’s what creates that shatteringly thin crust), but any brand works. Just make sure it’s pure cornstarch, not a baking mix.
No buttermilk? Milk plus a tablespoon of vinegar or lemon juice gets you close. Want more heat? Double the cayenne or add a pinch of crushed red pepper. The baking powder might seem odd, but it’s the trick for extra crispiness. If you’re out of paprika, a dash of smoked salt can add that depth. The oil should be neutral—vegetable, canola, or peanut oil all work great.
Fry in batches to avoid crowding the pan (that’s how you get soggy coating). Drain on a rack, not paper towels—keeps it crispier. Leftovers? Reheat in a 400°F oven for 10-12 minutes to revive the crunch.
Why You’ll Love This Recipe
- No-Fuss Coating: I just dump cornstarch, flour, baking powder, and salt in a bag—shake the thighs and fry. So easy.
- Ultra-Crispy Bite: The cornstarch makes that shatter-crust that stays crunchy even after sitting.
- Feeds a Crowd: I make a double batch for Sunday dinner and still have leftovers for Monday’s lunch.
- Budget Friendly: Chicken thighs are cheap, and a bag of cornstarch lasts me through six batches.
Step-by-Step Instructions for Ultra Crispy Fried Chicken
Here’s the method I’ve perfected for achieving that coveted crunch with every single bite.
Step 1: Marinate the Chicken Thighs in Buttermilk
In a large bowl, whisk together the 1 cup buttermilk with the 2 whole large eggs until fully combined. Add the 2 lb chicken thighs and turn to coat evenly. The buttermilk’s acidity tenderizes the meat while the fat and proteins help the coating adhere.
Cover and refrigerate for at least 4 hours, or ideally overnight. This extended marination ensures maximum flavor penetration and guarantees the coating will cling properly during frying. I’ve found this step is non-negotiable for that perfect crispy texture.
Step 2: Prepare the Seasoned Coating Mixture
In a large, shallow dish, combine the 1 cup cornstarch, 0.5 cup all-purpose flour, 1 tsp baking powder, 1.5 tsp salt, 1 tsp black pepper, 1 tsp garlic powder, 1 tsp onion powder, 1 tsp paprika, and 0.25 tsp cayenne pepper. Whisk thoroughly to distribute the seasonings evenly.
The cornstarch is the secret to ultra-crispiness, while the baking powder creates tiny air pockets that make the coating lighter and crunchier. The mix of spices gives that classic fried chicken flavor profile we all crave.
Step 3: Coat the Chicken and Let It Rest
Remove the chicken thighs from the buttermilk mixture and let any excess drip off. Dredge each piece in the cornstarch mixture, pressing firmly to ensure complete coverage. Place the coated thighs on a wire rack set over a baking sheet.
Let the coated chicken rest for 15-20 minutes at room temperature. This allows the coating to hydrate slightly and adhere better to the meat. You’ll notice the surface becomes slightly tacky – that’s exactly what you want for maximum crispiness.
Step 4: Deep Fry to Golden Perfection
In a large, heavy-bottomed pot or Dutch oven, heat the 4 cups vegetable oil to 350°F. Use a deep-fry thermometer for accuracy – the temperature must stay consistent. Carefully lower 2-3 pieces of chicken into the hot oil, being careful not to overcrowd the pot.
Fry for 12-15 minutes, turning occasionally, until the coating is deep golden brown and the internal temperature reaches 165°F. The oil should bubble steadily but not violently around the chicken. Maintain the oil temperature between 325-350°F throughout cooking.
Step 5: Drain and Keep Warm
Transfer the fried chicken to a wire rack or paper towel-lined plate to drain excess oil. The wire rack method keeps the coating crispier than paper towels which can steam the surface. Sprinkle with a pinch of salt while still hot to enhance the seasoning.
Keep the finished pieces warm in a 200°F oven while frying the remaining batches. Serve immediately while hot and crispy. The contrast between the crunchy exterior and juicy interior is what makes this dish truly special.
Pro Tips For Making Fried Chicken Recipe With Cornstarch
- Double Dredge Thighs: Dust the chicken in flour first, then dip in water or egg wash before coating with the cornstarch mix—I learned this the hard way after my first batch had bald spots.
- Rest Before Frying: Let the dredged thighs sit for 10 minutes before hitting the oil; the coating sets better and actually changes the outcome from flaky to crisp.
- Skip Cold Chicken: Pull the thighs from the fridge 20 minutes before cooking—cold meat lowers the oil temp and you’ll end up with greasy, sad chicken.
- Heat the Oil High: Get that oil to 350°F and keep it there; after burning three batches, I finally figured out that low heat means soggy crust instead of golden, crackling skin.
Common Mistakes When Making fried chicken recipe with cornstarch
Skipping the Marinade
Don’t rush the buttermilk soak—4 hours minimum is crucial. The acid tenderizes the meat while the proteins help the coating stick. I learned this the hard way with dry, flaky crust. 🌡️
Overcrowding the Pot
Fry in batches with 2-3 pieces at a time. Too many pieces drop the oil temp, creating a greasy, soggy mess. Use a deep-fry thermometer to monitor 350°F consistently.
Inconsistent Coating
Press the cornstarch mix firmly onto each thigh. A light dusting won’t cut it—you need a thick, even layer for that signature crunch. Rest the coated chicken 15-20 minutes before frying.
Wrong Oil Temperature
Oil that’s too cool (below 325°F) makes the chicken absorb oil. Too hot (above 375°F) burns the outside before the inside cooks. Aim for that 325-350°F sweet spot. 🔥
Improper Draining
Drain on a wire rack, not paper towels. The steam from towels turns your crispy crust soft. A rack lets air circulate, keeping it shatteringly crisp while it cools.
Neglecting the Rest
Let the chicken rest 5 minutes after frying. This allows the juices to redistribute, so every bite stays moist inside and crunchy outside. Serve immediately for the best texture.
Nutrition Facts
Frequently Asked Questions
Why use cornstarch instead of flour?
Cornstarch creates a lighter, crispier crust that stays crunchy longer. It absorbs less oil than flour, resulting in a thinner, more delicate coating with better shatter.
Can I substitute another oil?
Yes! Peanut or canola oil work just as well as vegetable oil. Maintain 350°F for best results. Avoid olive oil—its low smoke point makes it unsuitable for frying.
How do I keep it crispy after frying?
Drain on a wire rack, not paper towels, to prevent steam from softening the crust. Keep finished pieces warm in a 200°F oven while frying batches.
What if my coating falls off?
Press the cornstarch mixture firmly onto each piece and let it rest 15-20 minutes before frying. This helps the coating adhere better to the meat.

Trained in classic French technique but raised on slow-cooked ribs and spicy rubs, she blends culinary skill with smoke and soul.
- Recipe for Boneless Pork Chops in Cast Iron Skillet: Sear and Baste to Juicy Perfection - October 3, 2026
- Recipe for Boneless Cross Rib Roast: Slow-Roasted Beef with Herb Crust - October 3, 2026
- Hamburgers in Sauce Recipe Crock Pot: Slow-Cooked Savory Delight - October 3, 2026