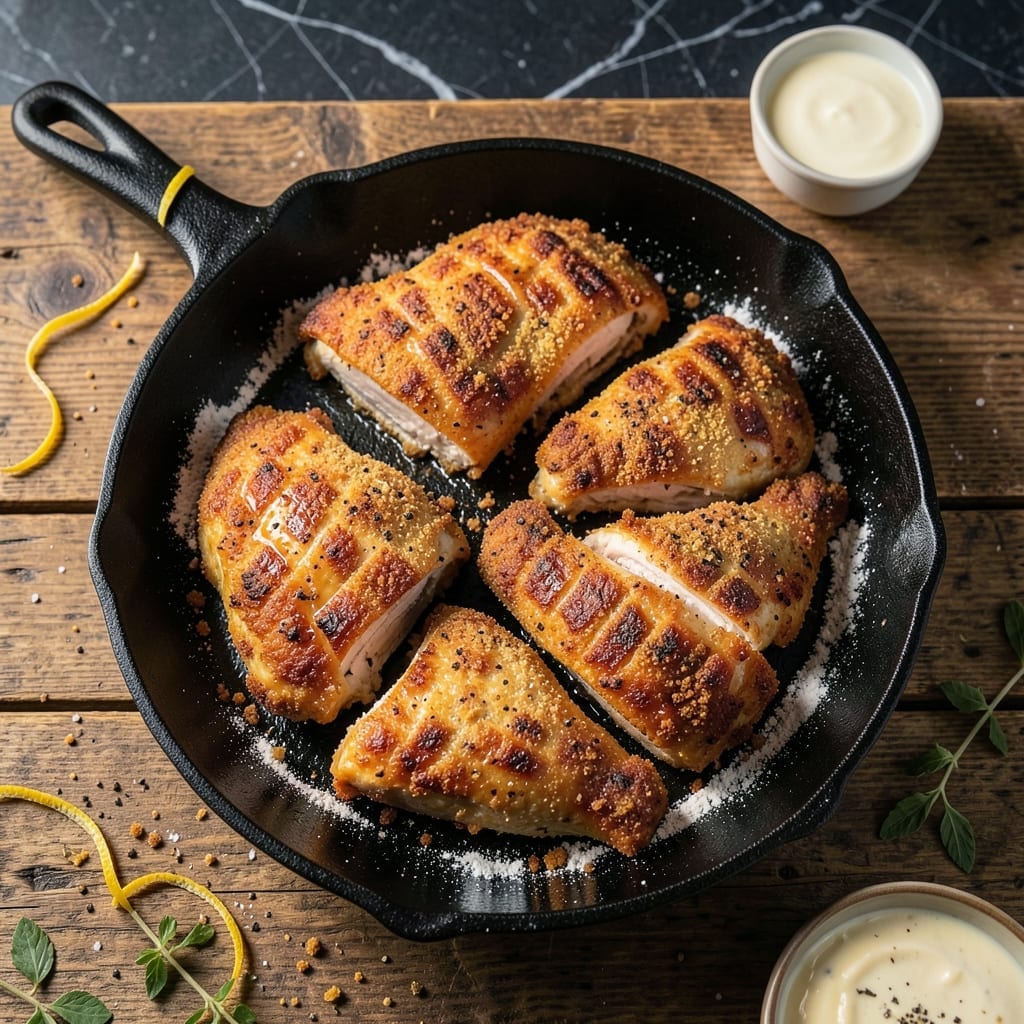
There’s a reason cast iron remains my go-to for crispy, golden fried chicken. This method delivers juicy centers every time, with a shatteringly thin crust that stays intact until the last bite.
I’ve tested this in my tiny Boston kitchen more times than I’d like to admit. The key is maintaining steady heat and resisting the urge to crowd the pan—patience ensures even cooking and that signature crunch.
What you’ll get is chicken with a deep golden-brown exterior that gives way to tender, succulent meat inside. The cast iron distributes heat evenly, creating a crust that’s both sturdy and delicate.
Serve it hot for the best texture. This recipe transforms a simple dinner into a memorable meal.
Ingredients for Fried Chicken Recipe Cast Iron Pan
Simple ingredients, one cast iron pan, and a whole lot of flavor waiting to happen.
| Ingredient | Amount | Notes |
|---|---|---|
| Chicken Thighs 🍗 | 2 ½ lb | Boneless, skin-on preferred |
| Buttermilk 🥛 | 2 cups | Full-fat for best texture |
| All-Purpose Flour 🌾 | 2 cups | Plus 2 tbsp for dredging |
| Cornstarch 🌽 | ¼ cup | For extra crispiness |
| Salt 🧂 | 1 tbsp | Kosher or sea salt |
| Black Pepper 🌶️ | 1 tbsp | Freshly ground preferred |
| Paprika 🌶️ | 2 tsp | Sweet or smoked variety |
| Garlic Powder 🧄 | 1 tsp | Not garlic salt |
| Onion Powder 🧅 | 1 tsp | Fresh ground preferred |
| Cayenne Pepper 🔥 | ½ tsp | Adjust for heat preference |
| Vegetable Oil 🫒 | 3 cups | For frying, high smoke point |
| Large Eggs 🥚 | 2 whole | Beaten, for egg wash |
[recipe_ingredient_scaler]
The chicken is the star here. Thighs stay juicier than breasts—skin-on gives you that extra crunch. I grab mine from Whole Foods or the local butcher (they usually have better quality). For buttermilk, full-fat is key—it tenderizes and adds richness. If you can’t find it, mix whole milk with a splash of vinegar (about 1 tbsp per cup).
No buttermilk? Plain yogurt thinned with milk works in a pinch. Swap cornstarch for flour if you want extra crunch (or skip it entirely). The spices can be adjusted—add more cayenne for heat or swap smoked paprika for sweet. I’ve even used hot sauce in the buttermilk for a little kick. The oil? Any high-smoke-point neutral oil works—peanut or canola if you’re out of vegetable.
Fry in batches and keep cooked pieces warm in a 200°F oven. Leftovers? They’ll keep in the fridge for 3-4 days but reheat in the oven to keep that crust crispy. Honestly, it’s best fresh—so make extra for seconds.
Why You’ll Love This Recipe
- One Pan Wonder: I toss the chicken in buttermilk, coat it in flour and cornstarch, and fry it all in one cast iron pan—no extra dishes.
- Crispy Perfection: That buttermilk soak keeps the thighs juicy while the cornstarch gives them a shatteringly crisp crust.
- Feeds the Crew: I’ve served this for Sunday supper and weeknight dinners alike—always disappears fast.
- Budget Winner: Chicken thighs stay cheap, and the flour-cornstarch mix stretches to feed more without extra cost.
Step-by-Step Instructions for Fried Chicken in Cast Iron Pan
Here’s how to achieve that perfect crispy crust with tender, juicy meat every time.
Step 1: Marinate Chicken in Buttermilk
Start by placing the 2.5 lb Chicken Thighs in a large bowl. Pour in the 2 cups Buttermilk until all pieces are fully submerged. This buttermilk bath tenderizes the meat and adds incredible flavor.
Cover and refrigerate for at least 4 hours, but overnight is ideal. The longer it marinated, the more tender and flavorful your chicken will be. I always prepare this the night before for maximum impact.
Step 2: Prepare the Seasoned Flour Coating
In a large shallow dish, whisk together the 2 cups All-Purpose Flour, 0.25 cup Cornstarch, 1 tbsp Salt, 1 tbsp Black Pepper, 2 tsp Paprika, 1 tsp Garlic Powder, 1 tsp Onion Powder, and 0.5 tsp Cayenne Pepper.
The cornstarch is the secret to that extra crispy coating, while the spices create that classic fried chicken flavor. I like to use a fork to really break up any lumps in the flour mixture for even coverage.
Step 3: Coat and Rest the Chicken
Remove the Chicken Thighs from the buttermilk, letting any excess drip off. Dredge each piece in the seasoned flour mixture, pressing firmly to adhere. For extra crispiness, I dip them back in the buttermilk and coat in flour again.
Place the coated pieces on a wire rack set over a baking sheet. This allows air to circulate all around, preventing soggy spots. Let them rest for 15-20 minutes—this helps the coating adhere better during frying.
Step 4: Fry in Cast Iron to Golden Perfection
Heat the 3 cups Vegetable Oil in your cast iron skillet over medium-high heat to 350°F. The oil is ready when a pinch of flour sizzles immediately when sprinkled in.
Carefully place the chicken in the hot oil, being careful not to overcrowd the pan. Fry for 6-8 minutes per side until deep golden brown and the internal temperature reaches 165°F. The crust should be crispy and the juices should run clear when pierced.
Transfer to a paper towel-lined plate to drain. The cast iron maintains even heat, ensuring consistent cooking throughout.
Step 5: Rest and Serve While Hot
Let the fried chicken rest for 5-10 minutes before serving. This allows the juices to redistribute, keeping the meat moist and tender. The crust will stay crispy if you keep it on a wire rack rather than stacking pieces.
Serve immediately while hot and crispy. Each bite should deliver that perfect contrast of crunchy exterior and juicy interior that makes this dish so irresistible. I promise this method delivers on both the crispy and juicy promises every time.
Pro Tips For Making Fried Chicken Recipe Cast Iron Pan
- Preheat the Pan: Get that cast iron ripping hot—medium-high for 5 minutes before adding oil, or the coating will stick instead of crisp.
- Soak Overnight: I learned this the hard way—chicken thighs need at least 4 hours in buttermilk, but 12 hours makes the meat noticeably juicier.
- Double Dredge: Dip in flour-cornstarch mix, back in buttermilk, then back in the dry mix again—this is the only way to get that thick, shatteringly crisp crust.
- Use a Splatter Screen: Sounds obvious, but I burned my forearm twice before realizing a mesh screen lets you fry without turning your kitchen into a war zone.
Storing and Reheating This Dish
Refrigerator Storage
Let your chicken cool completely before storing. I place pieces in airtight containers with paper towels to absorb moisture. It’ll keep in the fridge for 3-4 days—though it’s best eaten fresh. 🍗
Freezer Storage
For longer storage, freeze in a single layer first on a baking sheet, then transfer to freezer bags. Squeeze out all air to prevent freezer burn. This method keeps the crust as crisp as possible for up to 3 months.
Oven Reheating
Preheat to 375°F and place chicken on a wire rack over a baking sheet. Heat for 15-20 minutes until the internal temperature reaches 165°F. This restores crispiness better than any other method.
Air Fryer Revival
For smaller batches, my Ninja air fryer works wonders. Set to 375°F for 8-10 minutes, shaking halfway. The hot air circulation mimics the original frying process beautifully.
Avoid the Microwave
While quick, microwaving turns that perfect crust soggy. If you must, use 50% power in 30-second bursts with a paper towel to absorb moisture. Still, I’d recommend the oven method every time.
Pro Storage Tip
Never stack pieces when storing—this traps steam and ruins the crust. In my tiny Boston kitchen, I use the oven’s cooling rack as a temporary holding spot while batches finish frying. ❄️
Nutrition Facts
Frequently Asked Questions
What oil works best in cast iron for frying?
Use oils with a high smoke point like vegetable, peanut, or canola. They handle 350°F without burning. Avoid olive oil—it smokes at lower temps and imparts unwanted flavor.
How do I know when the oil is ready?
Sprinkle a pinch of flour into the oil. If it sizzles immediately, it’s at 350°F. A wooden chopstick should bubble when inserted too. Never overheat—375°F risks burning the coating.
Why does my coating fall off during frying?
This usually happens if the chicken isn’t dry before dredging or if you skip the resting step. Let coated pieces rest 15-20 minutes so the flour adheres. Also, avoid moving them too soon in the pan.
Can I use chicken breasts instead of thighs?
Yes, but they dry out faster. Reduce cooking time to 5-6 minutes per side and check the internal temp at 165°F. Thighs stay juicier and are more forgiving for beginners.

Trained in classic French technique but raised on slow-cooked ribs and spicy rubs, she blends culinary skill with smoke and soul.
- Recipe for Curried Lamb Chops: Spice-Rubbed and Pan-Seared to Succulence - October 3, 2026
- Recipe for Boneless Leg of Lamb Roast in the Oven: Herb-Crusted and Rosy Pink Inside - October 3, 2026
- Meat Loaf Recipe With Beef And Pork: Homestyle Blend With Rich Gravy - October 3, 2026